LABORIE Goby Owner’s Manual GOBY-UM02 58
To calculate the Area under Curve for a saved test or after a test is stopped:
1. When a test is stopped or a saved test is open, right click on the graph at the starting point of area calculation and
select
Insert Event.
2. Select the area start event named AS: in the list.
3. Click Annotate Event.
4. Move the cursor pointer to the end point of the calculation area and right-click on the graph.
5. Select Insert Event.
6. Select the area end event named AE:
pressure channel
:
threshold value
in the list.
7. Click Annotate Event. The area calculated will be appended to the Area End Event Annotation in the format AE:
Pves: xxxx where xxxx is the calculated area.
8. Click Info and select Event Summary to review the Area Start and Area End values.
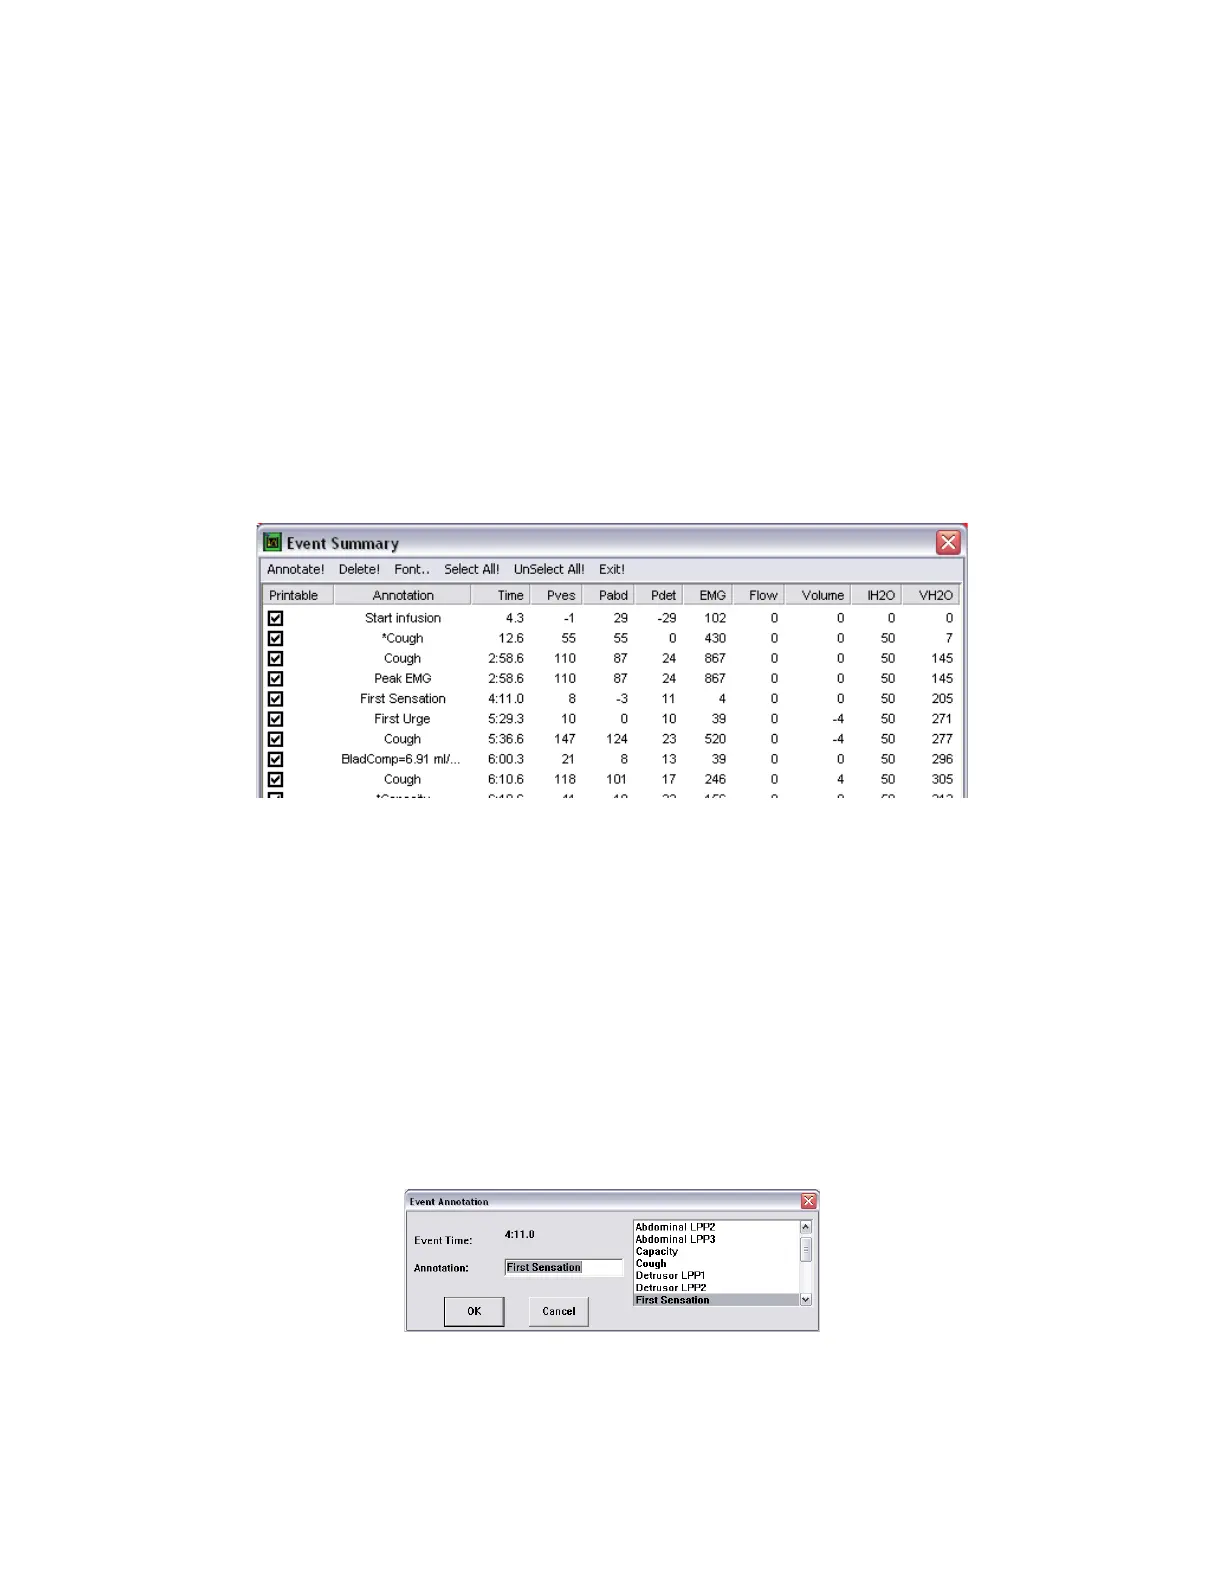
5.6.6 Event Summary
To view the Event Summary window:
Click Info > Event Summary. The events recorded during the test are listed in chronological order in the Event Summary
window as shown in
Figure 68.
Figure 68: Event Summary Window
The Event Summary window can be used to Annotate, Delete, and change the Font of events appearing within the on-
screen display. The Event Summary window provides an overview of calculations gathered at the time the event was marked.
5.6.6.1 Changing the Font
To change the appearance of the Event Summary window contents, select the font type and size by clicking the Font menu.
This opens a Font selection window where you can set the font to your preference. This only applies to the on-screen display
and not what is printed on the hardcopy report.
5.6.6.2 Add or Change Event Annotation
1. Highlight an event and click Annotate!
2. The Event Annotation window will load. Type the text in the text box or pick from the list.
3. Click OK.
Figure 69: Event Annotation Window