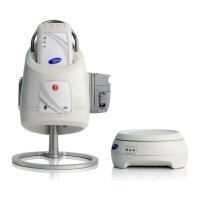
LABORIE Goby Owner’s Manual GOBY-UM02 81
6.2 CMG/PF TEST
The purpose of running a CMG/PF test is to determine whether the bladder and its surrounding tissues are functioning
correctly. The CMG test involves filling the bladder and determining the Detrusor pressure Pdet = Pves – Pabd (the
difference between the pressure inside the bladder (Pves) and the pressure inside the abdomen (Pabd)).
NOTE: Make sure the batteries on the devices are fully charged before the start of the test.
6.2.1 Run a CMG/PF Test
6.2.1.1 Run a CMG/PF Test Using Air-charged Catheters
1. Gather supplies needed for testing (catheters, beaker, commode chair, funnel, cable transducers, etc.).
2. Turn on and connect all equipment required for the study.
a. Turn on the computer and the printer. Start the UDS120 GOBY software.
b. Turn on the Goby™ Hub with the power switch located at its base and ensure it is connected in the
software. Ensure the
UDS Roam™ and Urocap™ IV are connected to the software and at full battery.
c. Connect the transducer cables to the UDS Roam™ and the catheters to the transducer cables. Connect
the primed infusion line to the filling lumen on the vesical catheter. Ensure the compressible portion of
the Infusion Pump Tubing is inserted through the pump.
3. Click the CMG/PF button on the control panel and enter the patient’s information if necessary.
4. Check that the chargers of the transducer cables are in the OPEN position.
5. Click the Zero All button on the control panel.
6. Position the patient in the supine or lithotomy position with legs in stirrups for catheter insertion.
7. Insert the Air-Charged Catheters into the patient.
NOTE: Bladder catheter placement for women is 8-10 cm for single sensor and 12-14 cm. For men insert Bladder
catheters 8cm plus penile length. Place the abdominal catheter rectally 10 -15cm, past any stool, along the anterior wall of
the rectum.
IMPORTANT: These are approximate guidelines. Ensure that the catheter sensor is fully inserted into the bladder
without over insertion.
8. Tape catheters as close to the insertion site as possible. The UDS Roam™ may be attached to the patient with
the optional belt and holster; refer to page
95.
9. Prepare the patients skin and apply EMG patches; the patient’s skin should be clean, dry, and free of hair. Ensure
electrodes are snapped onto the 3 EMG leads. Place two electrodes peri-anally at the 10 o’clock and 2 or 3
o’clock positions. Place the third electrode on a bony prominence such as the patient’s hip bone or knee.
10. Switch the transducers to the CHARGE position to record true internal pressures. When recording two pressures
during a CMG or Pressure/Flow test, Pves and Pabd should be fairly equal and Pdet should be at or near zero.
11. Ask the patient to cough to confirm catheter positioning. When recording two pressures at the same time, the
cough will show equal deflection on both channels.
NOTE: If Pabd is higher than Pves, try repositioning the Pabd catheter. If repositioning does not work, ask the patient
to cough to confirm that both pressures are reacting appropriately.
12. Select the Calibration Set and then click the Run button on the control panel. Refer to the Calibration Sets Menu
section on page 79 for instructions on selecting Calibration Sets.
13. Click the Start Pump button to start the pump and begin filling the bladder.
14. Mark relevant events using buttons available in the control panel (for example: First Sensation, First Desire and so
on). Encourage the patient to give feedback on sensation or urge.
15. Click Stop Pump to stop infusing when the patient is full and click Capacity on the control panel to mark the
event.
16. Click the Permit to Void button and ask the patient to void through the commode chair into the Urocap™ IV
beaker (with catheters in place).
17. Click the Stop button when finished and then click the Save button on the control panel to save the test file.
18. Print the results of the test if desired. See the Print a Test section on page 88 for more information.
19. Remove the catheters, EMG patches, and pump tubing and dispose in accordance to hospital/clinic procedures.
20. Empty and thoroughly wash the beaker for reuse.