LABORIE Goby Owner’s Manual GOBY-UM02 37
Use this window to select the printer for printing data and reports. The selected printer will be the default until changed.
The About UDS Client dialog box displays the information for contacting LABORIE Technical Support as well as formulas
used in Urodynamics. It also includes the software version number, the Firmware version number, and the device name.
Click the
button to open the Fax Cover sheet window that can be sent to the Support department for inquiries
into any problems you may be experiencing with the equipment or software. Once you have filled in the information, click
the
button to print the cover sheet and fax to the support department.
Exit
The Exit feature closes the UDS software.
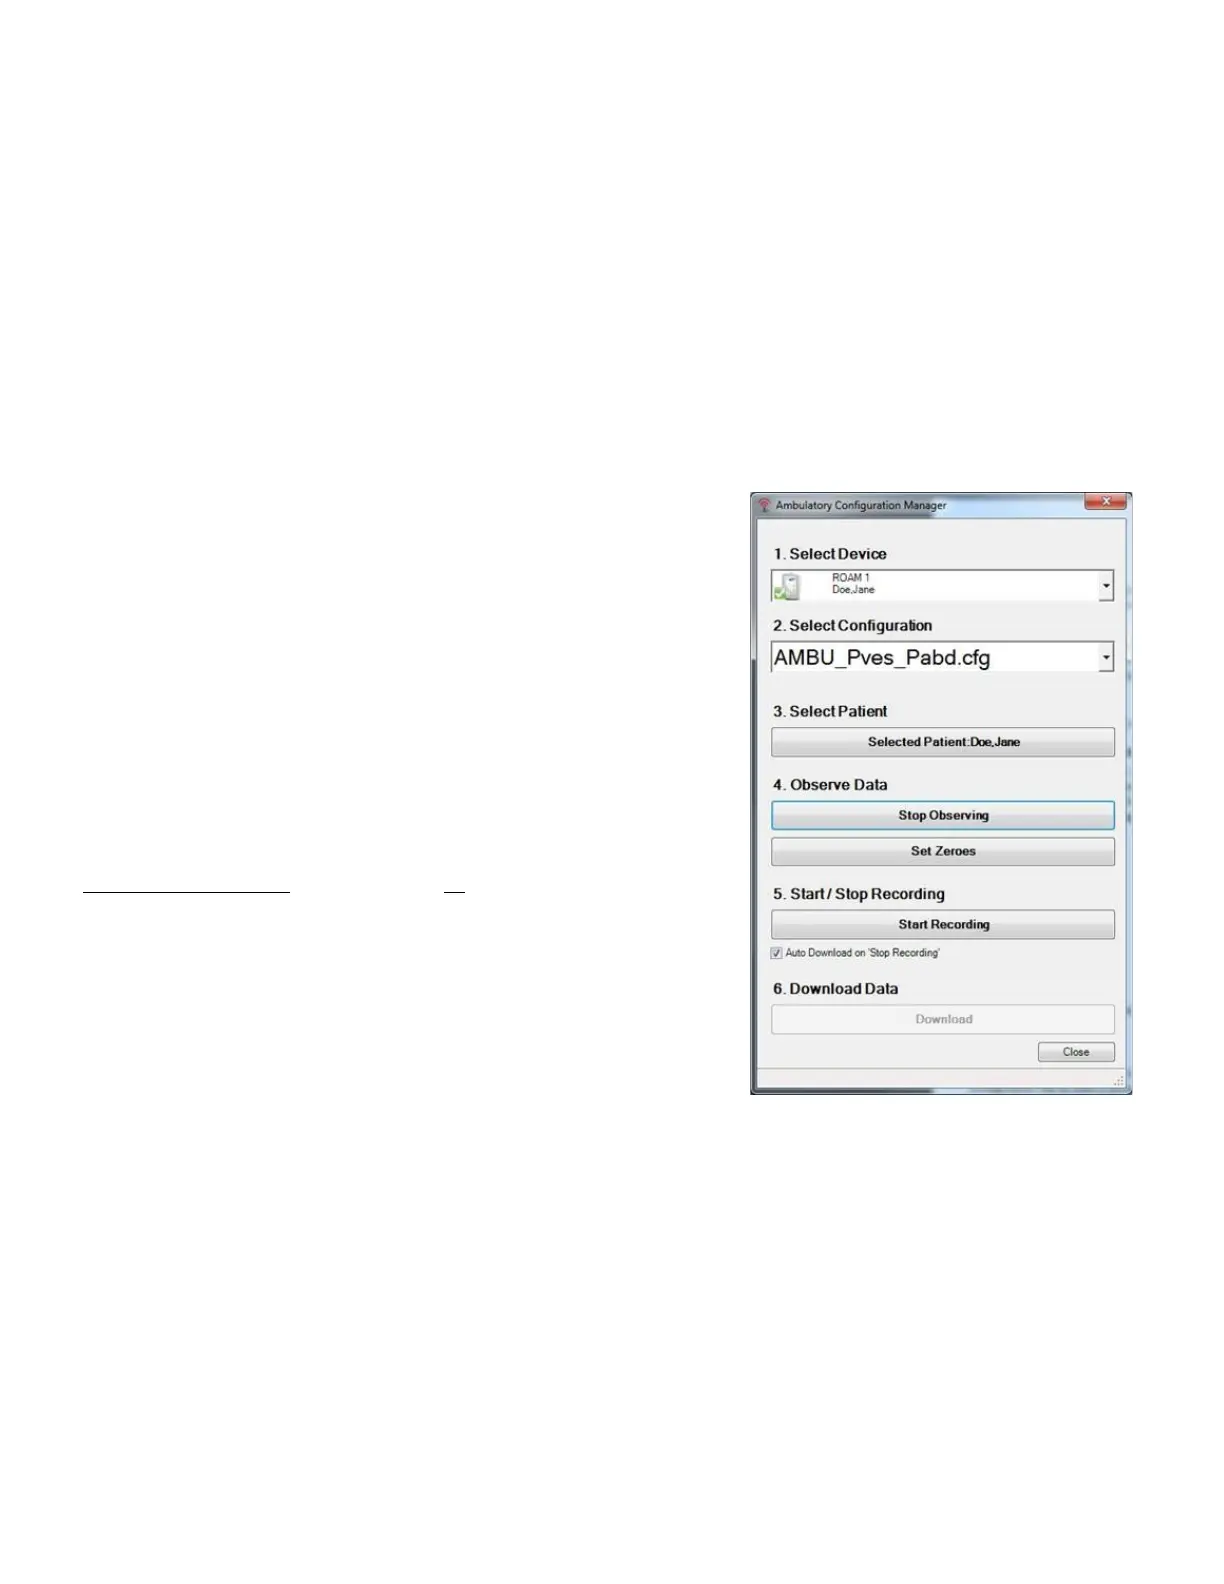
Ambulatory Configuration Manager
When the
button is clicked on the control panel, the test
procedure automatically converts to ambulatory mode. In the resulting
screen:
• select the UDS Roam used for recording pressures
• click
to choose the test’s configuration
file
• click
to enter patient information
• click
to verify pressures and Set Zeroes as necessary
• click
to begin the ambulatory monitoring.
• Click download to download data from the test.
Figure 37
For instructions on running an Ambulatory monitoring test, refer to the
Ambulatory Monitoring
section on page
84
Figure 37: Ambulatory Configuration
Manager
5.4 EDIT MENU
5.4.1 Zoom – Selected Area and Back
Use the zoom function for a more detailed look at a section of the graph. The test must be at least 3 minutes long for the
zoom feature to work.
1. Press and hold the left mouse button and drag the cursor to select an area on the UDS graph to zoom.
2. Click Edit > Zoom Selected Area. The selected area is zoomed in and expands to fill the entire graph window.
3. Highlight an area of the zoomed graph again and select Zoom Selected Area to continue zooming in if necessary,
or click
Edit > Zoom Back to return to the original graph
 Loading...