LABORIE Goby Owner’s Manual GOBY-UM02 83
6.3 RUN A UPP TEST
A Urethral Pressure Profile (UPP) test is used to measure the length of the urethra and the pressure within the urethra. An
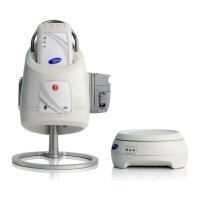
optional UPP puller device may be used in conjunction with the UDS Software to run a UPP test. To setup the UPP stand
refer to the Assemble the Puller Stand (Optional) section on page 19
. Refer to the UPP Silent Drive Puller Owner’s Manual
for more information about the setup and use of the UPP puller.
NOTE: Make sure the battery is fully charged before the start of the test.
6.3.1 Setup for UPP Test
1. If utilizing the UPP Silent Drive Puller, ensure that the device is set up correctly. Refer to the UPP Silent Drive
Puller Owner’s Manual for more information.
2. Turn on and connect all equipment required for the study.
a. Turn on the computer and the printer. Start the UDS120 GOBY software.
b. Turn on the Goby™ Hub with the power switch located at its base and ensure it is connected in the
software. Ensure the
UDS Roam™ and Urocap™ IV are connected to the software and at full battery.
c. Prime the pressure transducer cartridges, pressure measurement tubing and pump tubing.
3. Ask the patient to void or perform a Uroflow test if required.
4. Insert catheters according to device specific Instructions for Use.
5. Tape the catheters as close to the insertion site as possible and ensure the catheter is connected to the
applicable transducer pressure cartridge. The
UDS Roam™ may be attached to the patient with the optional belt
and holster; refer to page
95.
6. Click the UPP button on the control panel and add the patient’s information if necessary. Click Run then infuse.
7. Click Start Pump to infuse a minimum of 50cc into the bladder. Once the bladder is filled to the desired volume,
click
Stop Pump.
8. Confirm placement of the Pura sensor just proximal to the bladder neck. Withdraw the catheter at a moderate
rate. When Pura begins to rise, stop withdrawing and return the catheter slightly back into the bladder. This will
place the sensor proximal to the bladder neck, which is a good place to start the slow withdrawal.
6.3.2 Run a UPP Test
6.3.2.1 UPP Test with the UPP Silent Drive Puller
1. Once the UPP Test setup is complete, place the catheter into the guide and clamp of the UPP puller arm.
2. Click Start UPP. The catheter will be withdrawn from the bladder at a rate of 1mm/second. Notice when Pura
and Pclo start to rise; Pves should remain stable indicating that the sensor is traveling through the urethra.
3. When the Pura sensor on the catheter has reached the end of the urethra (as indicated by the Pclo reaching zero),
click
Stop UPP.
4. Click Return to set up the puller for the next catheter pull. The UPP Puller will return to the start position.
IMPORTANT: If the catheter is removed from the patient do not use the UPP Puller to re-insert the catheter.
5. Click Stop when finished, then click the Save button on the control panel. Print the results of the test if desired.
See the
Print a Test section on page 88 for more information.
6. Remove the catheters and dispose in accordance to hospital/clinic procedures.
7. The UPP puller must be thoroughly cleaned and disinfected. See the UPP Silent Drive Puller Owner’s Manual for
information about cleaning and disinfecting.
6.3.2.2 UPP Test with a Manual Pull
1. Once the UPP Test setup is complete, click Start UPP.
2. Begin withdrawing the catheter VERY slowly. Watch the cm markers on the catheter; it should take a count of 10
to go from one marker to the next [pulling at 1mm/sec]. When the Pura and Pclo curves rise, Pves should remain
stable indicating that the sensor is traveling through the urethra.
3. When Pclo returns to 0, stop pulling.
4. Click Stop UPP. Reinsert the catheter to either repeat the UPP or click Stop to finish the test.
5. Click Save button on the control panel; print the results of the test if desired.
6. Remove the catheters and dispose in accordance to hospital/clinic procedures.
7. The UPP puller must be thoroughly cleaned and disinfected. See the UPP Silent Drive Puller Owner’s Manual for
information about cleaning and disinfecting.