LABORIE Goby Owner’s Manual GOBY-UM02 82
6.2.1.2 CMG/PF Test Using Fluid-filled Catheters
1. Gather supplies needed for testing (catheters, beaker, commode chair, funnel, transducers, etc.).
2. Turn on and connect all equipment required for the study.
a. Turn on the computer and the printer. Start the UDS120 GOBY software.
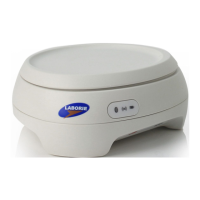
b. Turn on the Goby™ Hub with the power switch located at its base and ensure it is connected in the
software. Ensure the
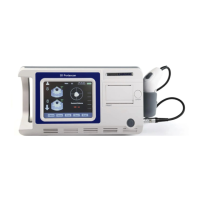
UDS Roam™ and Urocap™ IV are connected to the software and at full battery.
c. Prime the transducers pressure cartridges, measurement tubing, and pump tubing.
d. Click the CMG/PF button on the control panel. Ensure all the pressure transducers are responding. Press
the 100 mm Hg button on the pressure transducer cartridge and tap the beaker on the Uroflow
transducer.
NOTE: 100 mm Hg = 136 cm H20.
3. Position patient in the supine or lithotomy position with legs in stirrups for catheter insertion.
4. To zero the transducers, first adjust the pressure cartridges to the height of the patient’s bladder. Turn the stop
cocks “OFF” to the cartridges, remove the stopper caps, and select
Set Zeroes on the Control Panel. Replace
the stopper caps and turn the three-way stop cocks “OFF” to the syringe.
5. Set up and prime the catheters in accordance with device specific instructions for use.
6. Insert the Bladder and Abdominal Catheters. Tape catheters as close to the insertion site as possible.
7. Connect the pressure measurement lines and pump tubing to the appropriate catheter ports and cables.
8. Prepare the patients skin and apply EMG patches; the patient’s skin should be clean, dry, and free of hair. Ensure
electrodes are snapped onto the 3 EMG leads. Place two electrodes peri-anally at the 10 o’clock and 2 or 3
o’clock positions. Place the third electrode on a bony prominence such as the patient’s hip bone or knee.
9. Ask the patient to cough in order to verify that the channels are responding.
10. Select the Calibration Set and then click the Run button on the control panel. Refer to the Calibration Sets Menu
section on page 79 for instructions on selecting Calibration Sets.
11. Click the Start Pump button to start the pump and begin filling the bladder.
12. Mark relevant events using the buttons available on the control panel (for example:
First Sensation
,
First Desire
and so on). Encourage the patient to give feedback on sensation or urge.
13. Click Stop Pump to stop infusing when the patient is full and click Capacity on the control panel to mark the
event.
14. Click the Permit to Void button and ask the patient to void through the commode chair (with catheters in place)
into the
Urocap™ IV beaker.
15. Click the Stop button when finished and then click the Save button on the control panel to save the test file.
16. Print the results of the test if desired.
17. Remove the catheters, EMG patches, and pump tubing and dispose in accordance to hospital/clinic procedures.
18. Empty then thoroughly wash the beaker for reuse.


 To Next Page