123
Feature Pages
How To Use It:
Press any GENIUS button or tab, then press either SCROLL button to select the desired sound. Press the word
EDIT, which appears in the lower right of the screen, two times, to display the SOUND SHAPER Screen.
Change Attack, Decay, and Release by directly touching the screen to highlight the labeled rectangle. Press
either
SCROLL button to change the value in the box, thus modifying that portion of the sound. Values range
from 0 (minimum) to 100 (maximum). While changing the sounds play the appropriate key or pedal to lis-
ten to the changes.
Press the lighted
FEATURE(CLEAR) button to return to the POWER-UP screen.
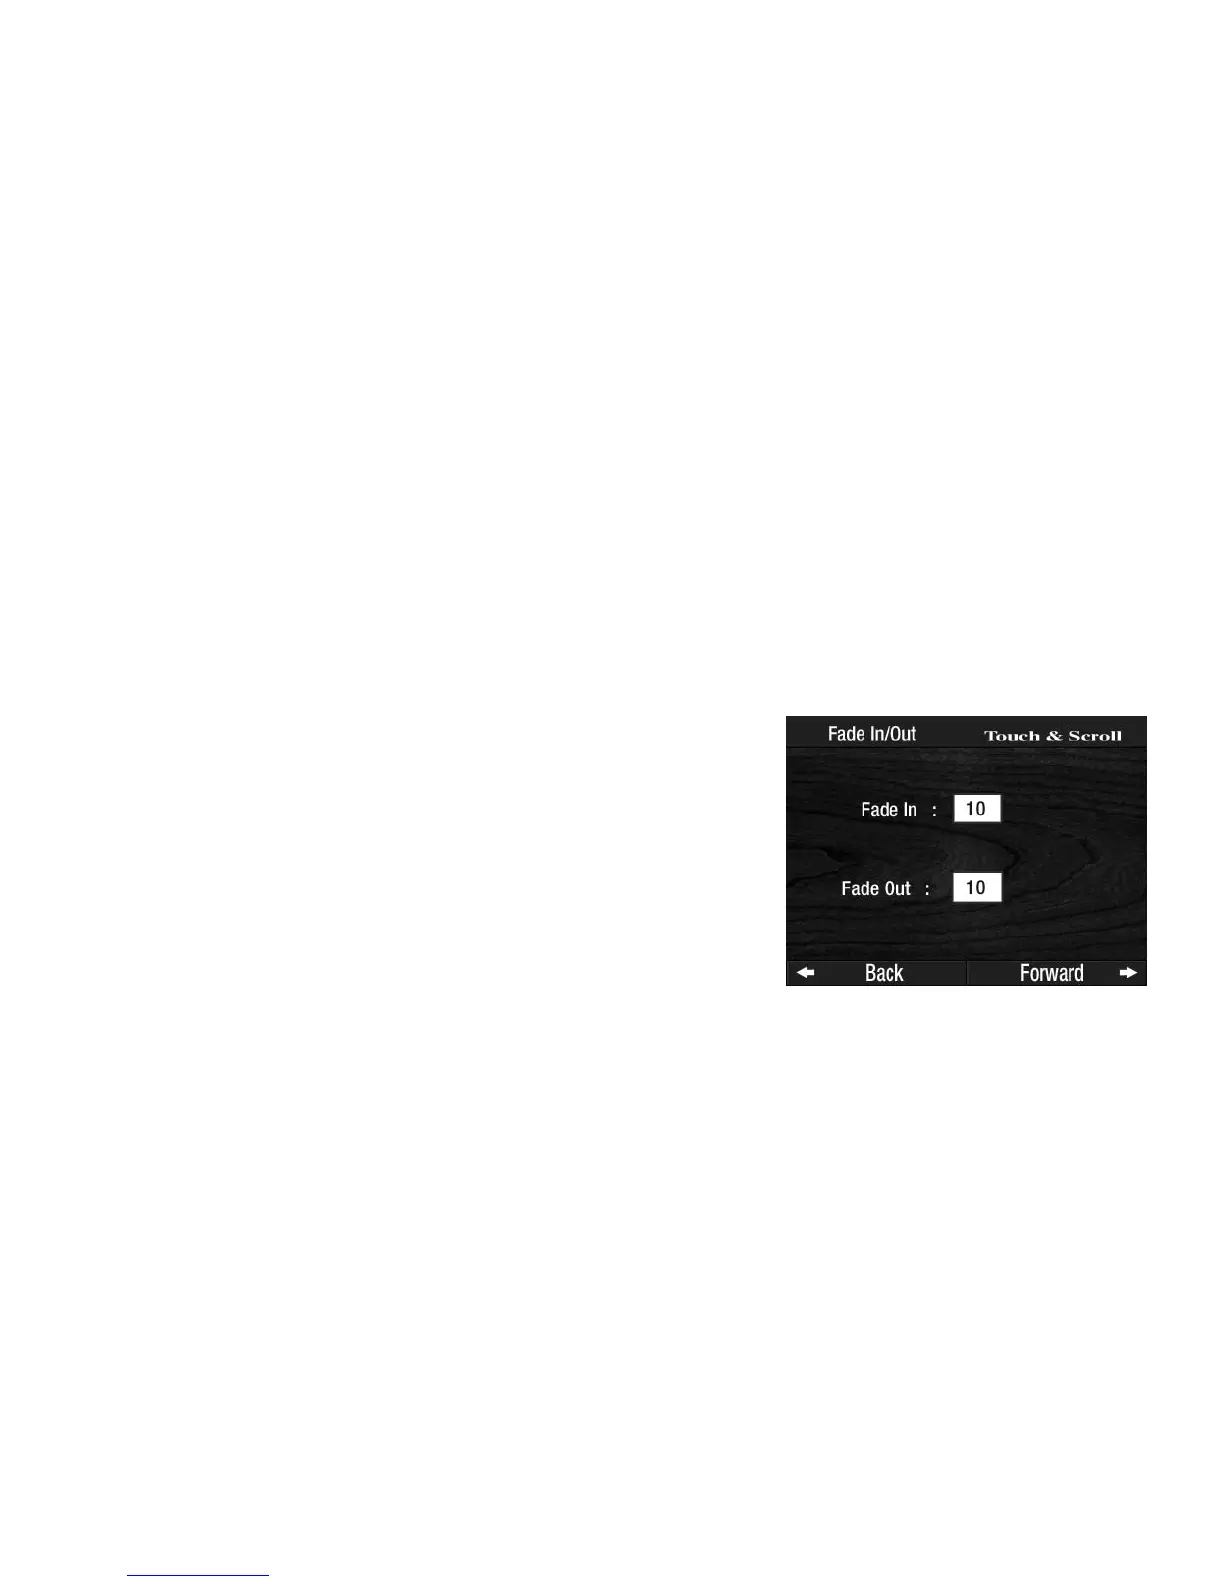
4. Fade In/Out
What It Does:
The length of time needed for the FADE IN and FADE OUT to play is preset from the factory does not require
adjustment. You may however, lengthen and shorten the amount of time for the Fade In and Fade Out intro-
ductions and endings.
How It Works:
1. Press the FEATURE (CLEAR) button.
2. Press either SCROLL button until FEATURE PAGE 4 is displayed.
3. Press the words
FADE IN/OUT on the screen.
The numbers in the boxes represent time in seconds. You may select a number between 0 and 100 for either
Fade In or Fade Out.
How To Use It:
Use the Fade In and Fade Out time adjustments to stretch out or shorten an introduction or ending for dra-
matic musical effect.
4. To change the Fade In time, press the box on the touch screen
next to the words FADE IN. The box will become highlighted.
5. To increase the amount of time for the Fade In introduction, press
the
TOP SCROLL button.
To decrease the amount of time for the Fade In, press the
BOTTOM SCROLL button. It may be necessary to press the
button several times to obtain the desired amount of time. To
move rapidly through the numbers, press and hold either one of
the scroll buttons.
6. Follow the same procedures in steps 4 and 5 to change the Fade
Out ending.
 Loading...