37
Memory Stick
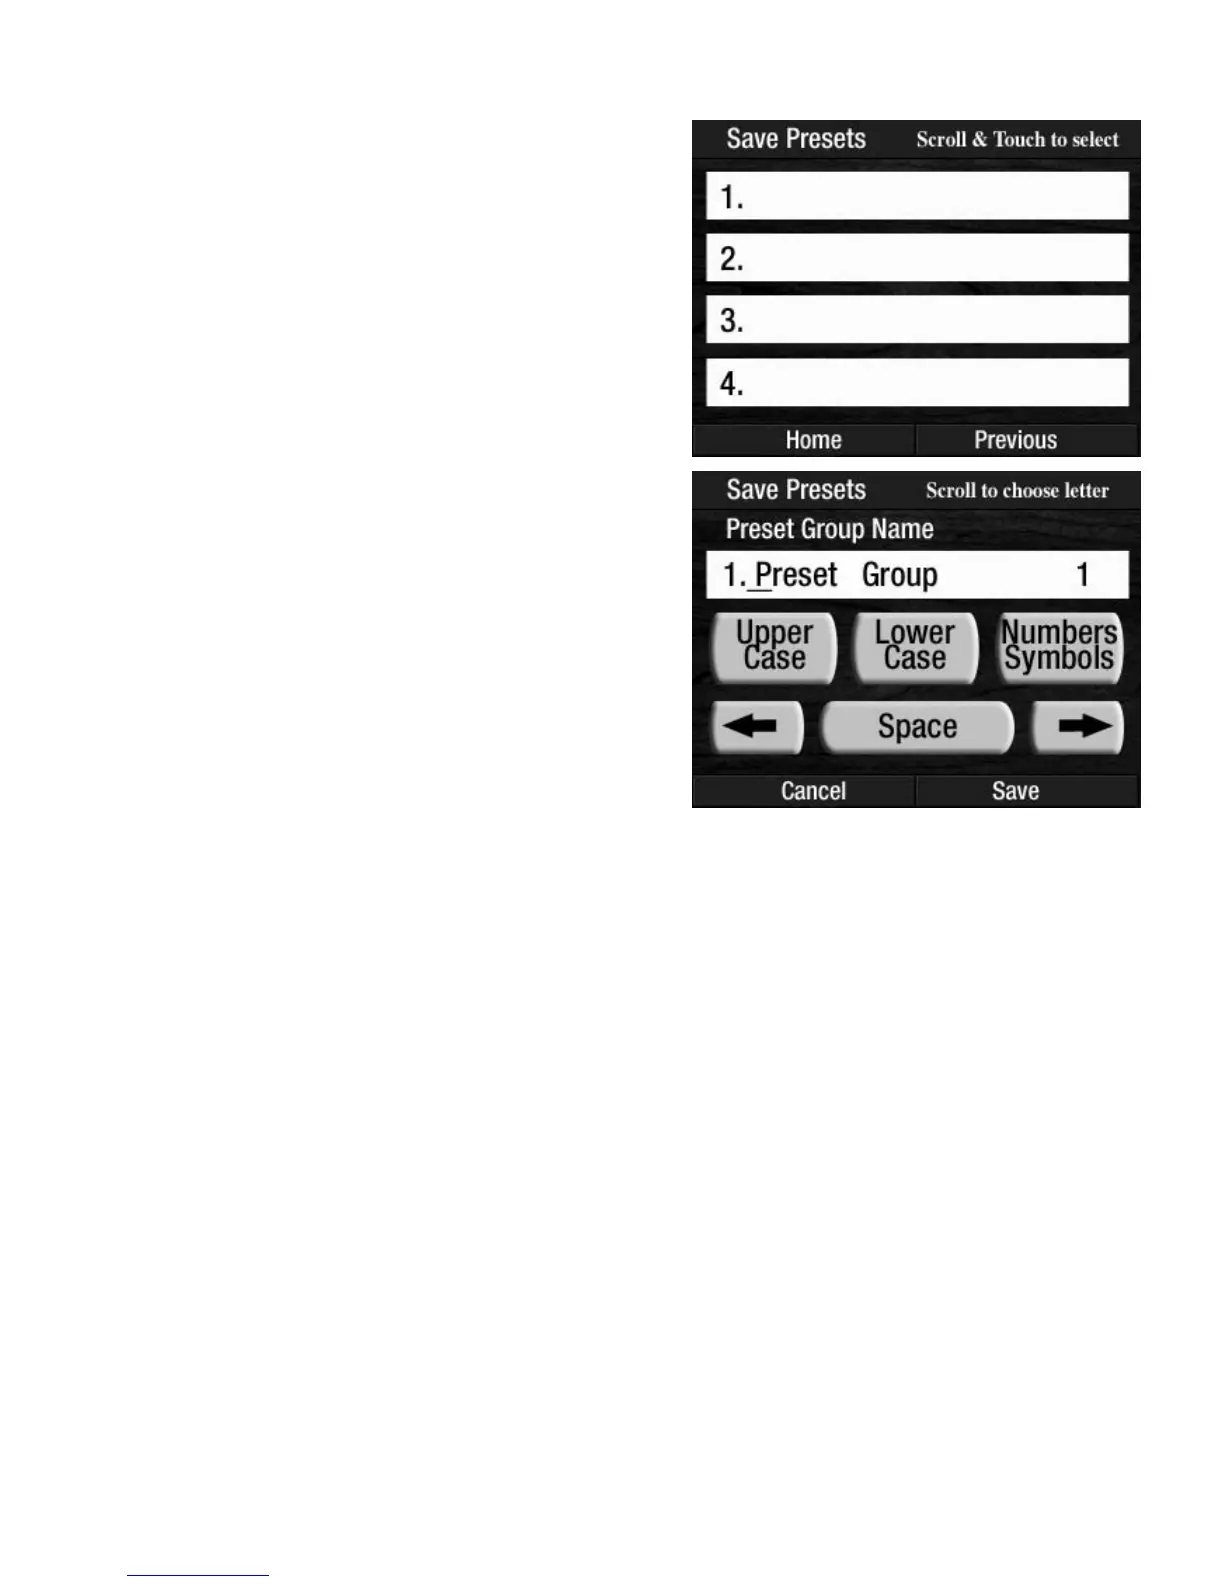
SAVE PRESETS
Press the word UPPER CASE, LOWER CASE, or NUMBERS-SYMBOLS on the screen. It will become high-
lighted. There is a little line under the first letter of the title given by the organ, which is called a cursor. The
cursor is the location that a letter, number or symbol will be placed in the title.
Press either
SCROLL button until the desired letter, number, or symbol appears on the cursor. Press the RIGHT
ARROW, on the screen, to move the cursor to the right. Press the LEFT ARROW, on the screen, to move the
cursor to the left. Press the word
SPACE on the screen to erase the letter, symbol, or character on the cursor.
The title can be up to 15 characters in length.
When finished typing, press the word SAVE on the screen. The screen will display SAVING PRESETS and
then
PRESETS SAVED. The screen will then return to the POWER UP display.
Every time you use SAVE PRESETS, the screen will display all previously saved groups of Presets (howev-
er titled) and will select the next empty space. Press that space, on the screen, and repeat the above steps.
If you wish, you can press one of the previously saved groups of Presets on the screen. The screen will dis-
play the option to
OVERWRITE the selected Preset Group, replacing it with the new one you are now saving.
The organ will automatically select the first available
empty space on the memory stick. You may name the
Preset Group, using the screen that will be presented, or
press the word
SAVE on the screen to use the title given
by the organ.
However, it is best to create your own title for your saved
presets. It will be easier to keep track of them later as
you create other groups of presets.
How It Works:
After you have customized the BANK PRESETS to your
liking follow these steps to save them on a memory stick.
1. Insert the memory stick on which you wish to SAVE the
Presets into the
USB DATA PORT.
2. Press the USB screen button on the touch screen.
3. Press the words SAVE PRESETS on the screen to
initiate the procedure.
4. Press the name, on the screen, of the Preset Group you
wish to save to. For example, press the box
labeled 1.