Mini-Crawler Crane M A E D A Section 4 – FLY-JIB INSTALLATION AND STOWAGE
1/2019 MC405C-3 4-159
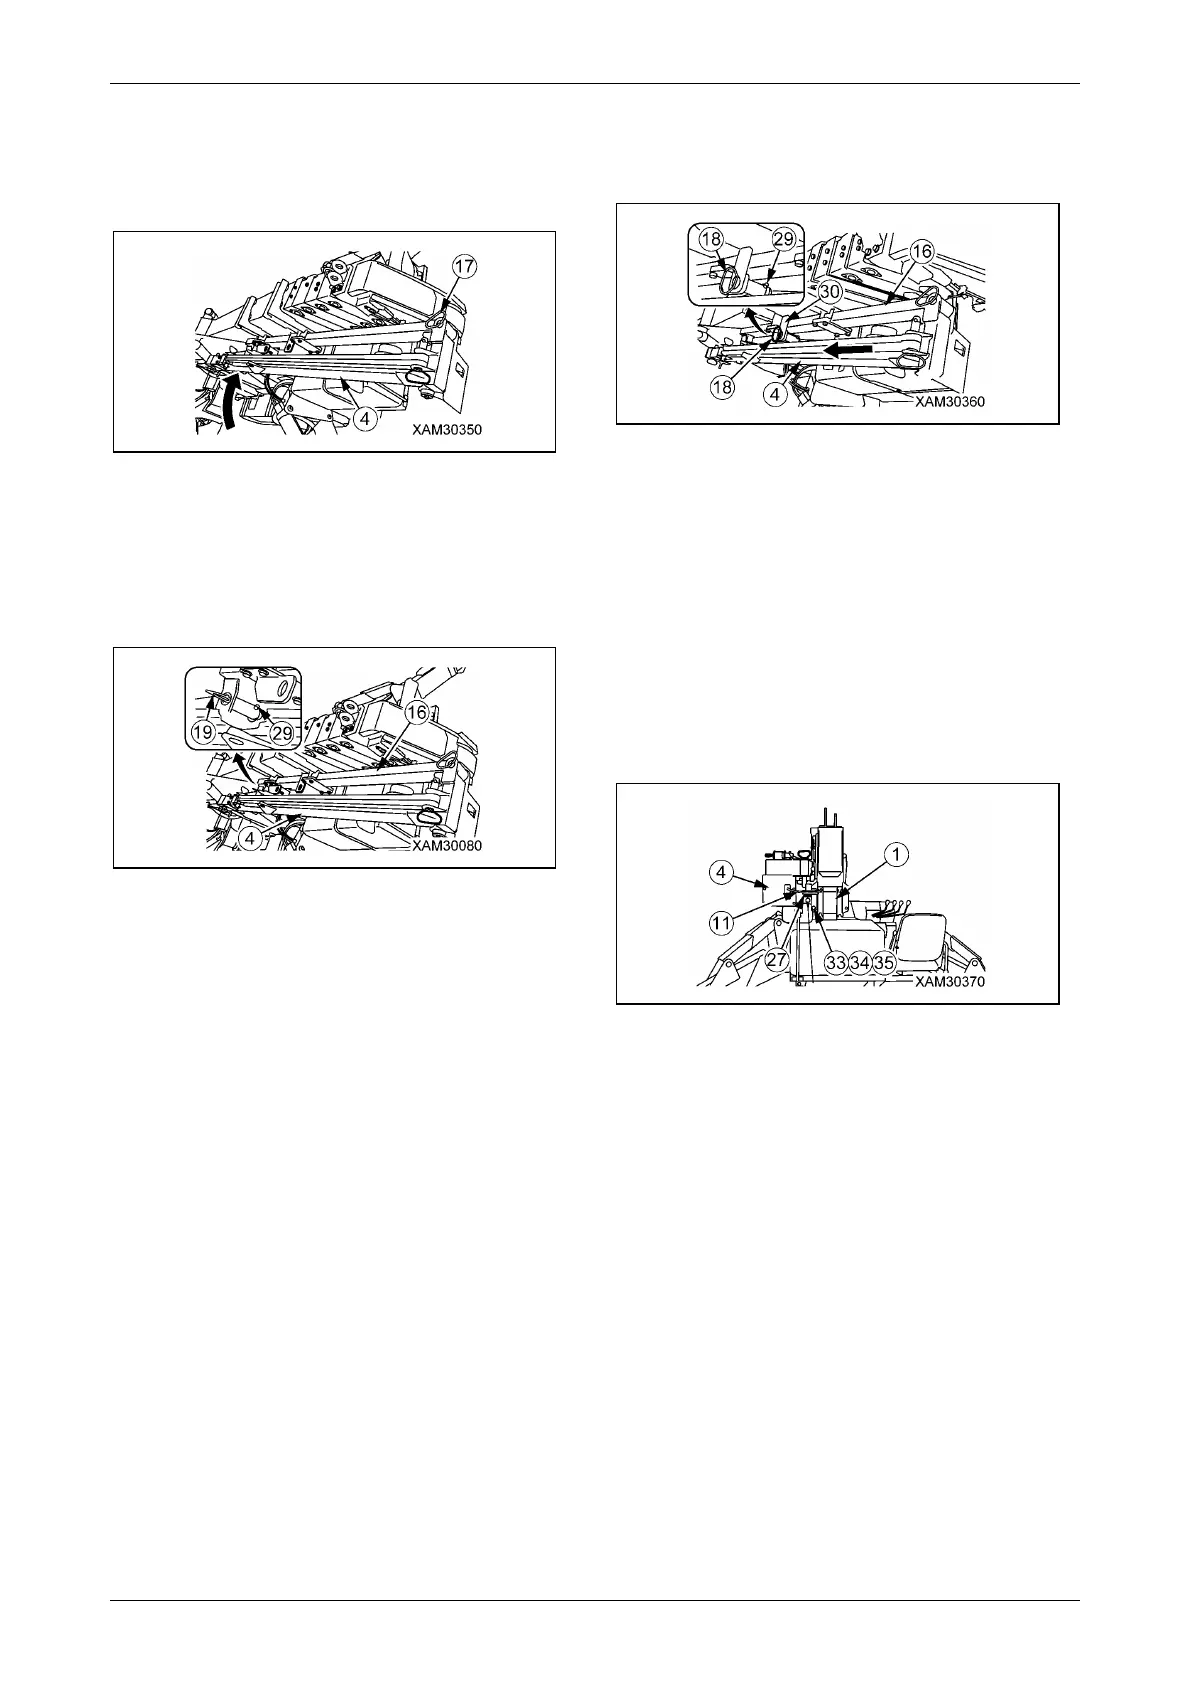
20. Lift up No.1 Fly-jib (4) tip to take it out from
stow stay, then slew it around the position
pin (17) (length: 150mm) on the right side of
the head of main boom.
Fig. 4-471
21. Put the hole of storage bar (16) and bracket
on the head of No.1Fly-jib (4) together.
22. Insert position pin (19) into the hole of No.1
Fly-jib (4) bracket, then fix position pin (19)
firmly with lynch-pin (29).
Fig. 4-472
WARNING! Always insert position pin (19)
from upside. If you insert it from downside,
position pin will come out and result in a
serious hazard.
23. Slide storage bar (16) and No.1 Fly-jib (4) to
the direction of the head of No.1 Fly-jib (4),
put the hole of the stopper (30) on the
storage bar (16) and No.1 Fly-jib (4)
together.
24. Insert position pin (18) into the hole of
stopper (30) on the storage bar (16), then fix
position pin (18) firmly by lynch-pin (29).
Fig. 4-473
WARNING! Always insert position pin (18)
from upside. If you insert it from downside,
position pin will come out and result in a
serious hazard.
25. Set the sheave (27) for Fly-jib stowing to the
hole on the head of main boom, and fix by
attachment bolt (33) (M12x30L), washer
(34), and nut (35).
26. Hang wire rope (11) on the sheave (27) of
Fly-jib stowing.
Fig. 4-474
CAUTION: If you are to stow No.1 Fly-jib with
single fall hook, always attach sheave (27) for
Fly-jib stowing, and hang wire rope (11) from
main boom to this sheave (27). If you do not
use this sheave (27), the wire rope (11) will
bend and result in early damage of wire rope.