7-2 (E)
7. Operation Method
LH71A / LH72
7-2. How to Use the Various Function
Note
If an alarm sounds, it means that there has been a key operations error.
7-2-1. Zero Reset
Basically, this operation can be done in any mode.
• Set the INC value to 0.
In the case of the ABS mode, the indication automatically switches over to the INC
mode. However, in the datum point/reference point mode, the indication does not
switch over to the INC mode.
7-2-2. Inch/mm Selector
Basically, this operation can be done in any mode.
• The selector is only effective if the destination country is set to US or STD.
You can confirm the current unit by looking at the lit display below the key.
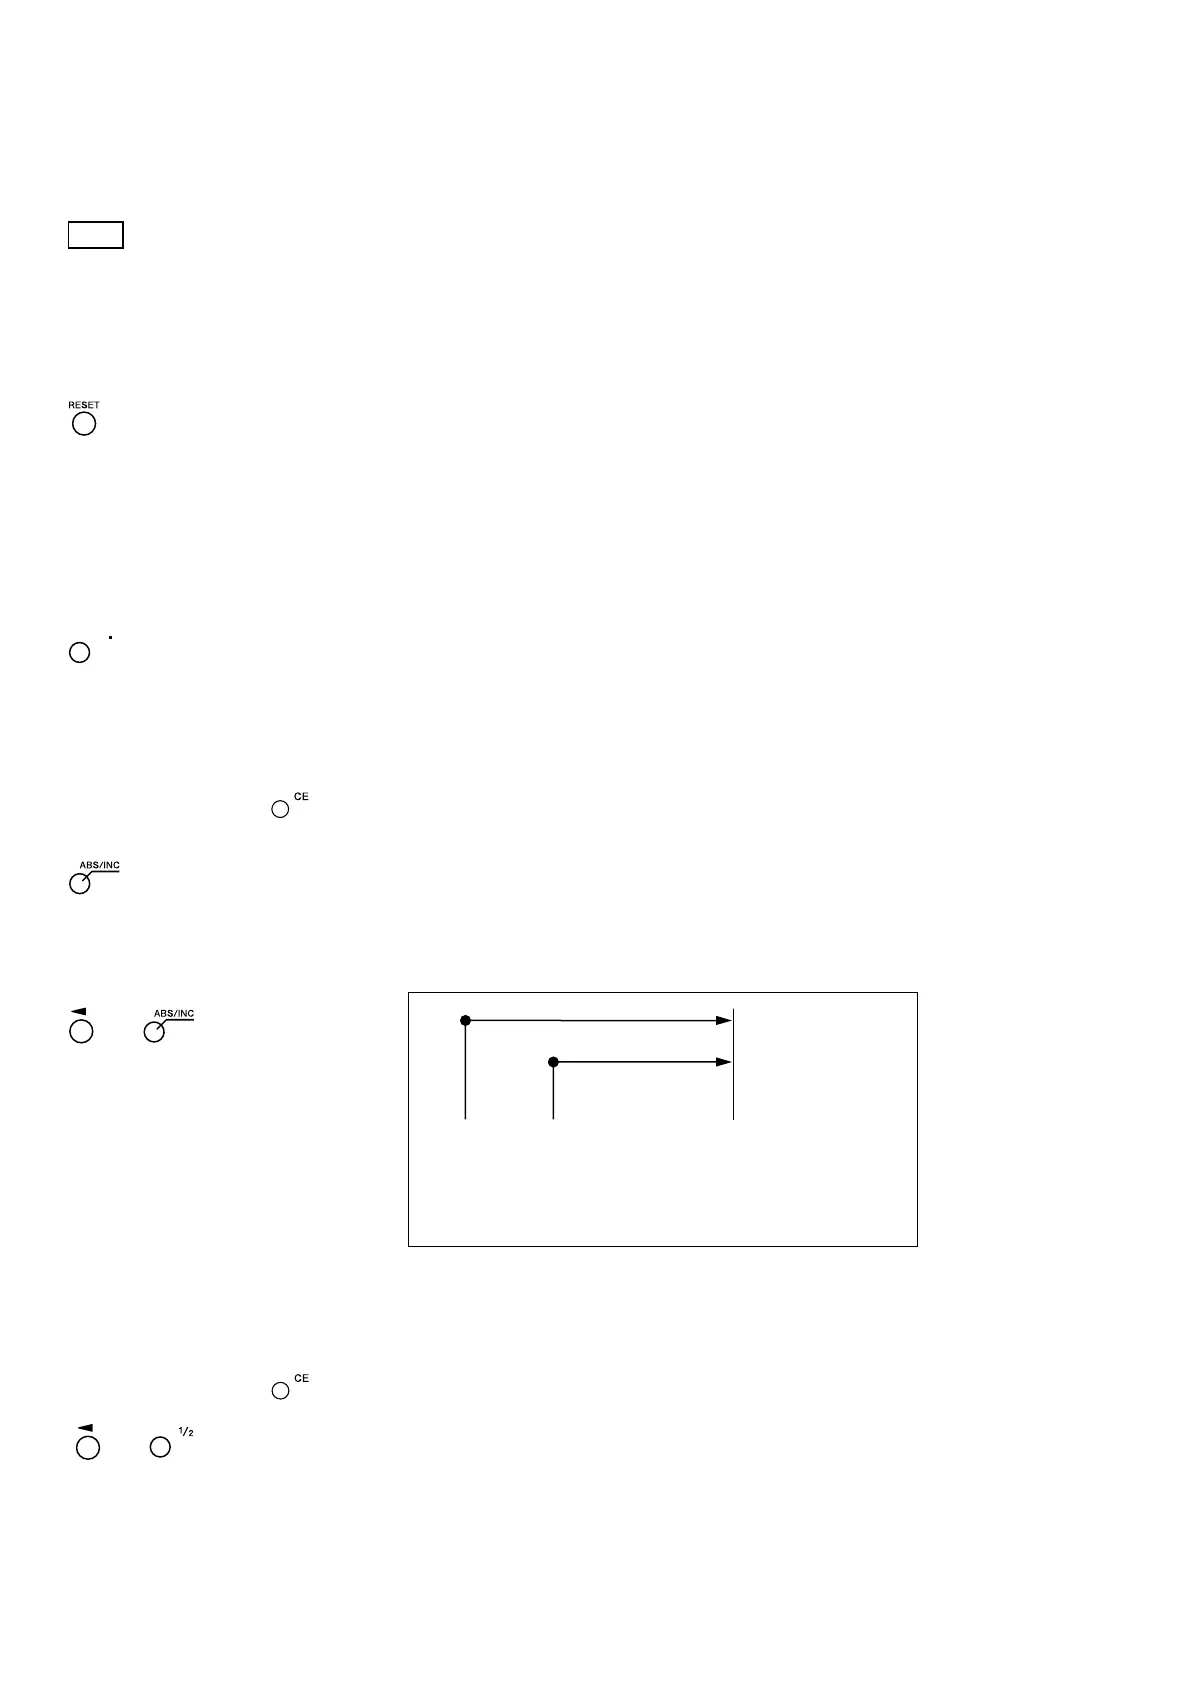
7-2-3. Absolute/Incremental Mode Selection
These operations can be performed when the mode lamps are not lit.
How to cancel: Press the key when selecting axis (the axis label will be flashing).
ABS lamp lights up : ABS value display (Absolute mode)
The absolute position from the datum point is displayed.
ABS lamp goes out : INC value display (Incremental mode)
The position from the machining point based on reset or preset
machining is displayed.
7-2-4. Halving
This operation can be performed when the mode lamps are not lit.
How to cancel: Press the key when selecting axis (the axis label will be flashing).
• Halves the INC value (the value displayed for each operation will be half the
value).
• If you perform a halving operation while in INC mode, the distance from the
center value will be displayed.
• Cannot be used in ABS mode.
→
(select axis)
→
For each axis
(select axis)
All axes
Datum point Reset Present position
Absolute mode
display (ABS)
Incremental mode
display (INC)
The initial datum point “0” is set to the position where
“5. Settings” are performed.
You can also set the datum point to any desired position.
In this case, see “7-2-7. Datum Point Mode”.