(E) 7-5
7. Operation Method
LH71A / LH72
7-2-7. Datum Point Mode
The datum point mode has the following two functions.
“Machining datum point (datum point No. 0)” and “Multiple datum point (datum point No. 1 ~)” functions
(for LH71A general-purpose applications)
See Page 7-5 to 7-9.
“Tool master (tool No. 1)” and “Tool offset (tool No. 2 ~)” functions (for LH71A lathe applications and
LH72)
See Page 7-10 to 7-14.
Machining datum point (datum point No. 0)
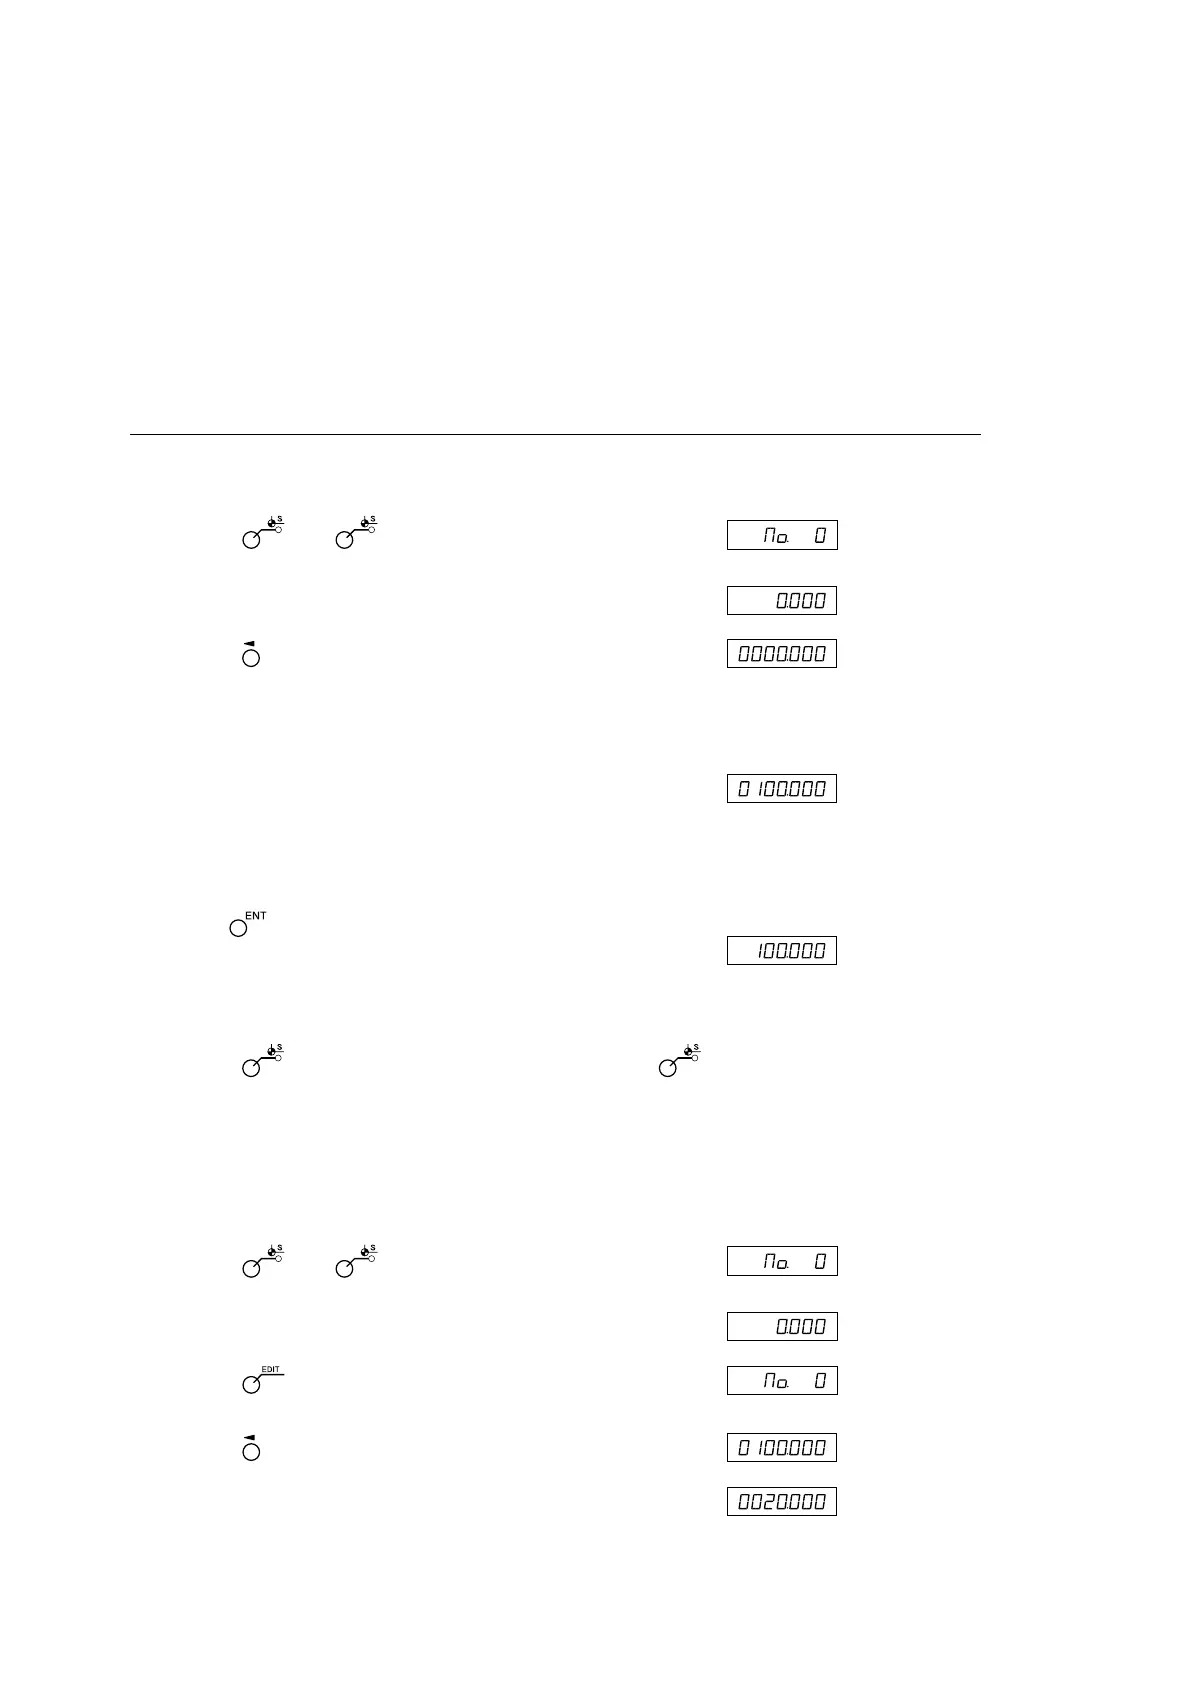
<Setting of machining datum point> Display
1 Press the key. ( lamp lights up)
↓
2 Press the key corresponding to the axis to be set.
If a machining datum point has already been set, the value of
the machining datum point that was set previously is
displayed.
3 Use the numeric key to enter the value.
∗ When you want to use a value that was set previously, there
is no need to enter the value using the numeric key.
Proceed to step 4.
4 Use the key to finalize the setting.
The current value becomes the machining datum point.
When the machining datum point is set, this value is stored in
the memory.ß
5 Press the key. The system exits the datum point mode. (
lamp goes out)
<Editing the machining datum point>
You can edit a stored machining datum point value.
Display
1 Press the key. ( lamp lights up)
↓
2 Press the key.
↓
3 Press the key corresponding to the axis to be edited.
4 Use the numeric key to enter the value.
(Datum point
display for each
axis)
(Datum point
display for each
axis)
(Example:
20.000)
(Example:
100.000)