(E) 8-5
8. Applied Functions
LH71A / LH72
8-1-3. Simple R Cutting Function
This function can be used for rough cutting of an arc. This function is available for 2-axis and 3-axis
models only.
a) Cutting the outer diameter
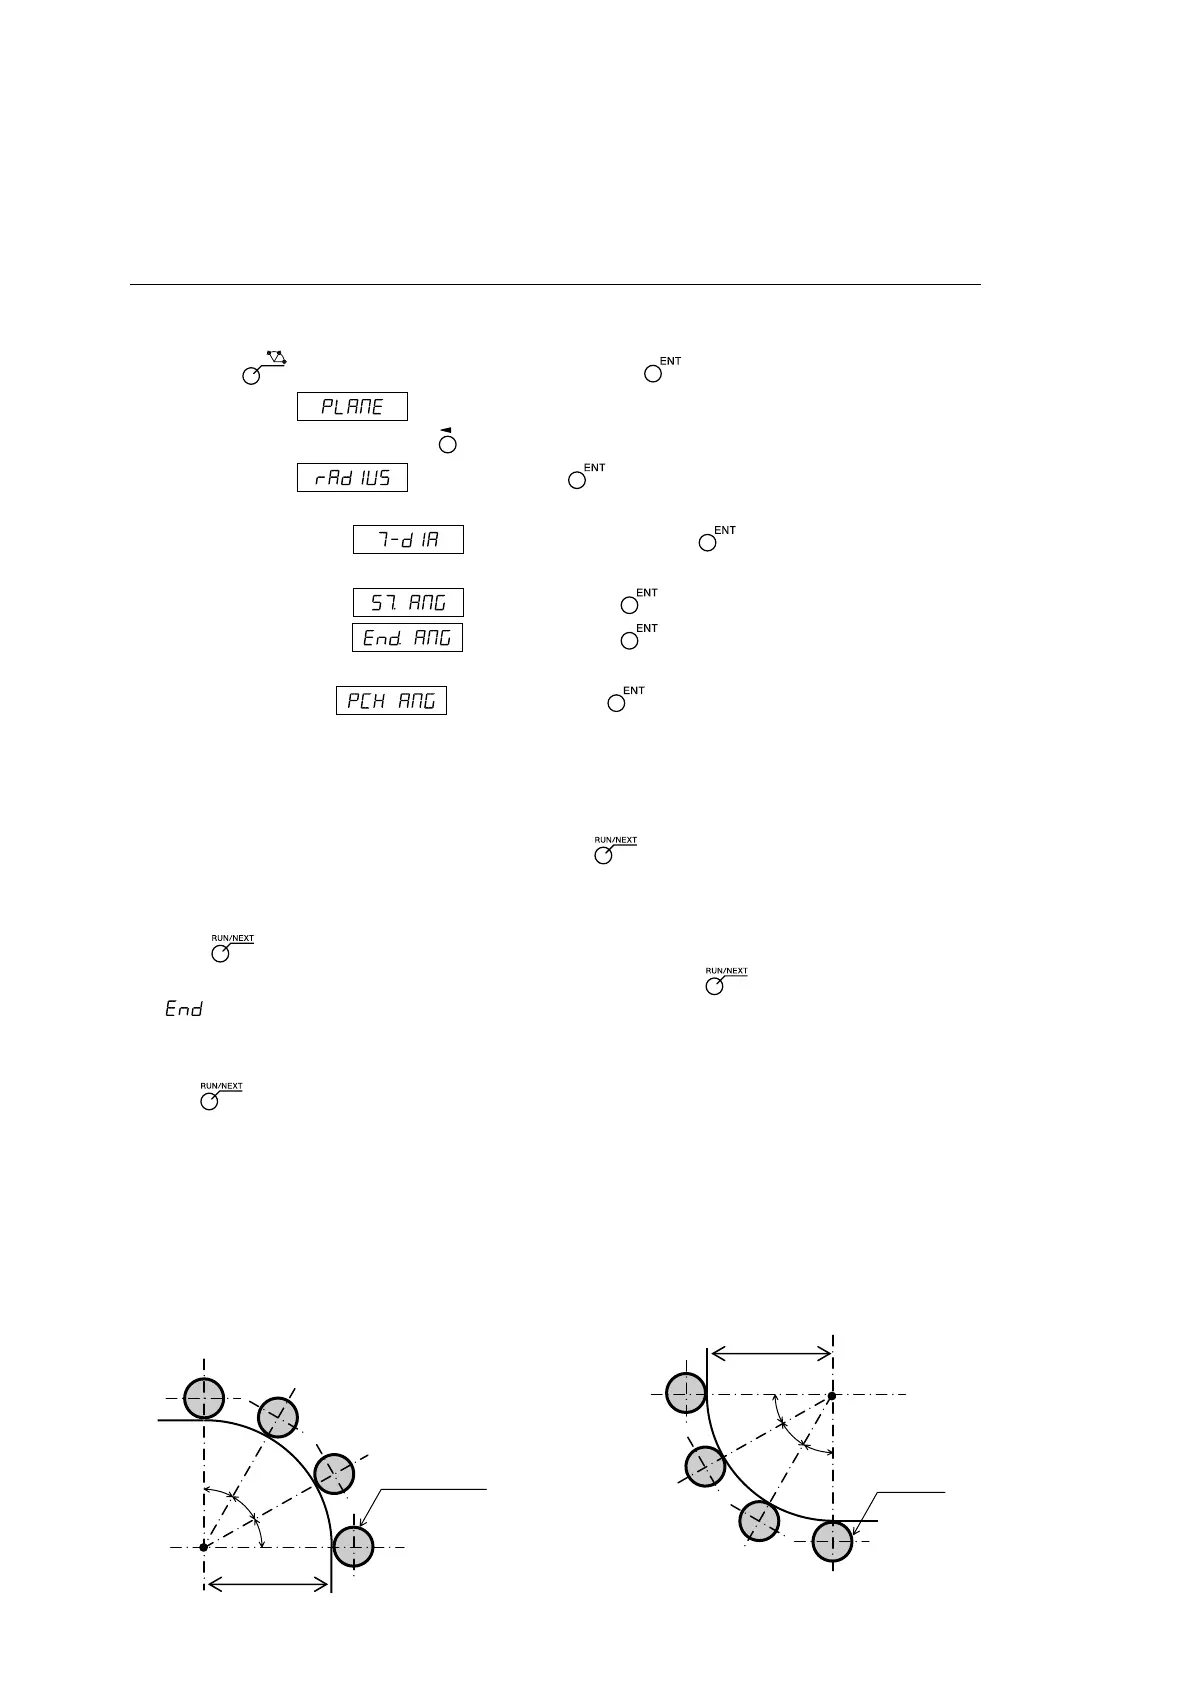
Parameter input
1 Press the key so that ARC flashes, and then press the key (ARC lights up).
2 Select the plane . (for three-axis model)
The options change each time the key is pressed (1-2: X-Y plane, 2-3: Y-Z plane, 1-3: X-Z plane).
3 Enter the radius , and then press the key.
Make the entry based on the input units (mm (inch)) and minimum input resolution.
4 Enter the tool diameter with “+”, and then press the key.
Make the entry based on the input units (mm (inch)) and minimum input resolution.
5 Enter the starting angle , and then press the key. Input range: 0.00 to 359.99 degrees
6 Enter the Ending angle , and then press the key. Input range: 0.00 to 359.99 degrees
Note) You cannot enter an angle smaller than the starting angle. (Except 0 degree)
7 Enter the pitch angle , and then press the key. Input range: 0.01 to 359.99 degrees
Note) Pitch angle must be set within the angle between the starting and ending angle.
The angle between the staring and ending angle must be dividable by pitch angle.
Cutting ends before reaching the ending angle in case of indivisible setting.
Execution
1 Move to the center (start position), and then press the key to execute.
2 The position of the No. 1 holes is displayed.
3 Move the machine to display “0”.
4 Press key and repeat above procedures by pitch angle.
5 After machining of the final position has been completed, press the key.
is displayed, and the current values are displayed.
<Repeat operation>
• Return to the starting position again.
• Press key to repeat the process with same parameters.
Ending angle
X
Y
No. 1
No. 2
No. 3
20
No. 4
30˚
30˚
30˚
0˚
90˚
φ6
Starting angle
Tool diameter
φ6
X
Y
No. 1
No. 2
No. 3
20
No. 4
30˚
30˚
30˚
180˚
270˚
R center
R center
Starting angle
Ending angle
Tool
diameter
L Example a-1
Parameter
Radius : 20 mm
Tool diameter : φ6
Starting angle : 0°
Ending angle : 90°
Pitch angle : 30°
L Example a-2
Parameter
Radius : 20 mm
Tool diameter : φ6
Starting angle : 180°
Ending angle : 270°
Pitch angle : 30°