(E) 8-3
8. Applied Functions
LH71A / LH72
b) Equally-spaced, angle-specified holes
Parameter input
1 Press the key so that BOLT flashes, and then press the key. (BOLT lights up)
2 Enter the diameter , and then press the key.
Make the entry based on the input units (mm (inch)) and minimum input resolution.
3 Enter the number of holes , and then press the key. Input range: 2 to 360 holes
4 Enter the starting angle , and then press the key. Input range: 0.00 to 359.99 degrees
5 Enter the Ending angle , and then press the key. Input range: 0.00 to 359.99 degrees
Note) You cannot enter an angle smaller than the starting angle. (Except 0 degree)
Execution
1 Move to the center (start position) of the bolt hole circle, and then press the key to execute.
2 The position of the No. 1 hole is displayed.
3 Move the machine to display “0”.
4 Press key and repeat above procedures up to the number of holes.
5 After the final hole has been formed, press the key. is displayed, and the current values are
displayed.
<Repeat operation>
• Return to the center of the bolt hole circle again.
• Press key to repeat the process with same parameters.
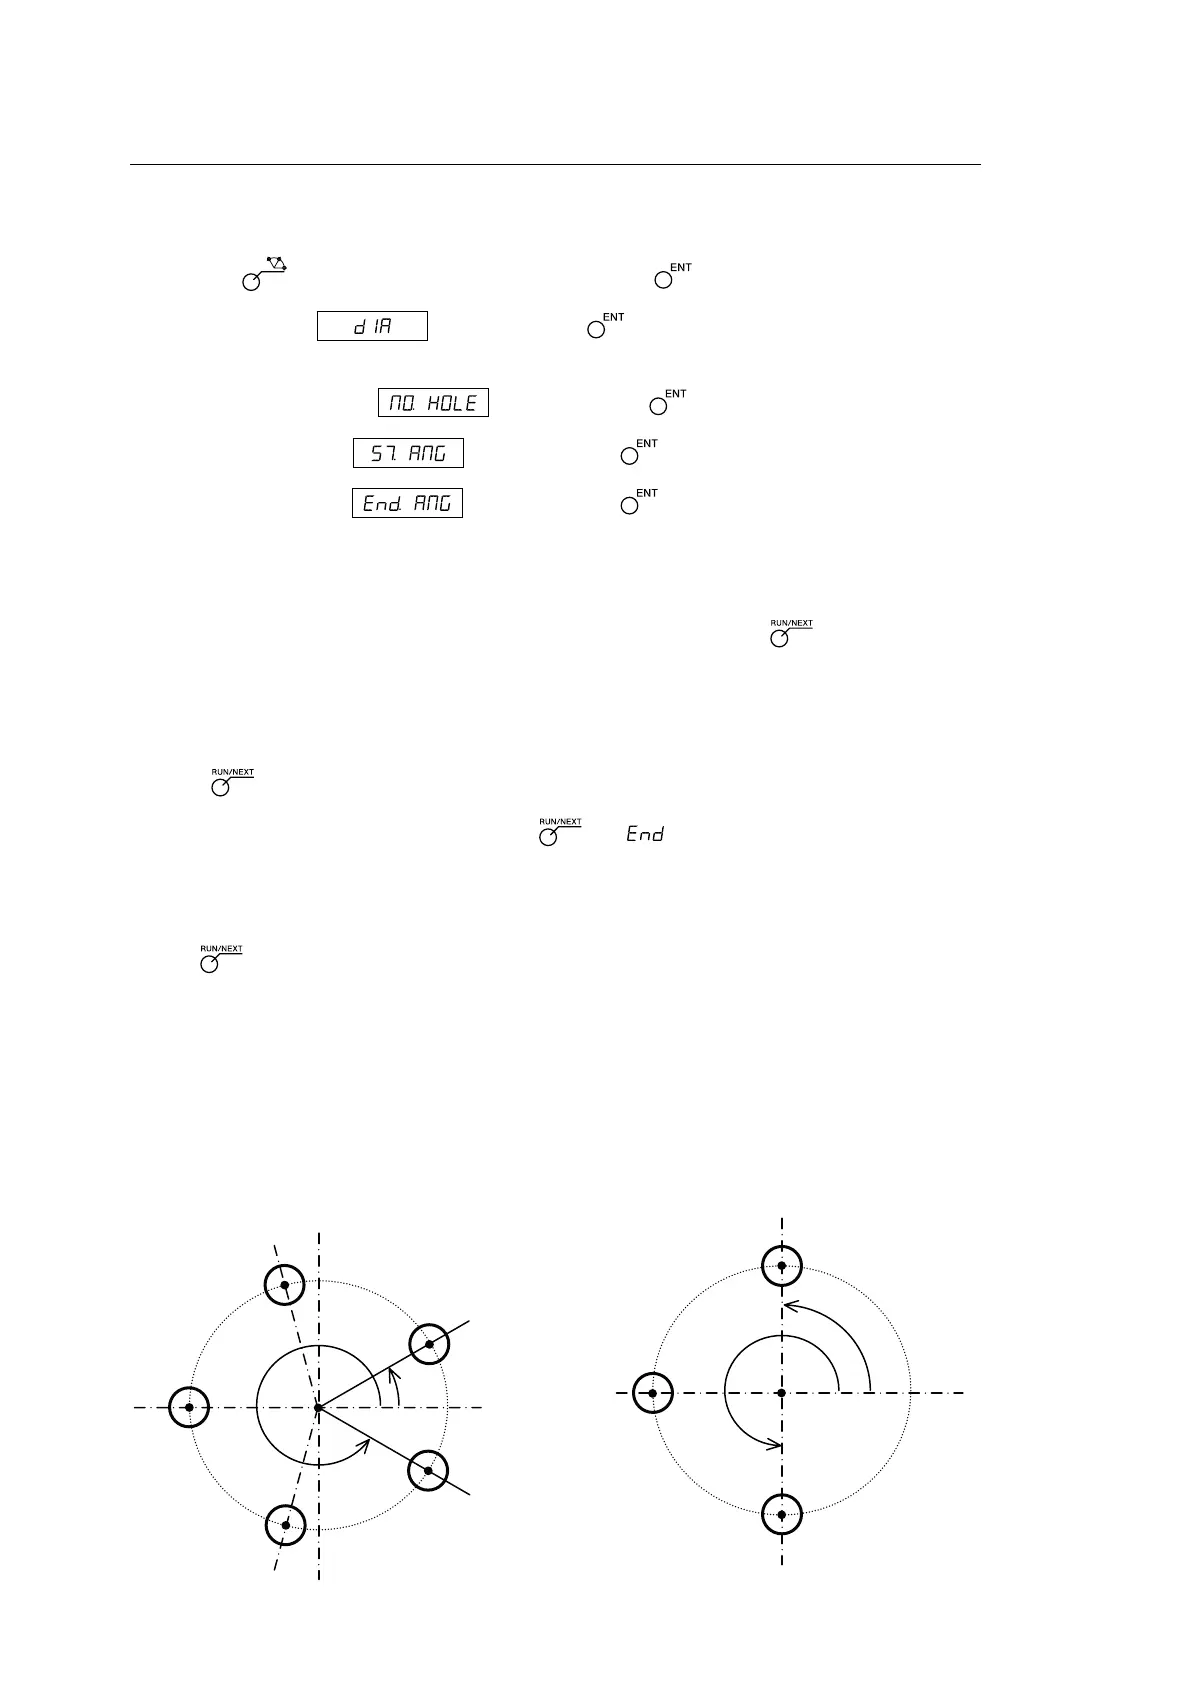
Starting angle
X
Y
No. 1
No. 2
75˚
No. 3
No. 4
No. 5
30˚
75˚
75˚
75˚
330˚
Center
Ending angle
X
Y
No. 1
No. 2
No. 3
90˚
90˚
90˚
270˚
Starting angle
Center
Ending angle
L Example b-1
Parameter
Diameter : 100 mm
Number of holes : 5
Starting angle : 30°
Ending angle : 330°
L Example b-2
Parameter
Diameter : 100 mm
Number of holes : 3
Starting angle : 90°
Ending angle : 270°