Quick IP Setup Summary
Lynx II DSA User's Manual – 7096089 157
DHCP Setup Changes: Optional for IP Network Use
To make any parameter changes to the Lynx II, you must first connect to the Lynx II using
the Direct Setup procedure above.
If the Lynx II is required to operate on a DHCP network where IP addresses are
dynamically assigned, the Lynx II’s DHCP discovery must be enabled for the Lynx II to
receive an automatic IP address assignment from the network. Once DHCP has been
enabled, disconnect the “crossover” cable and connect the Lynx II to the site's network or
router/hub connection box using the “straight-through” cable.
The Lynx II supports Universal Plug and Play. If your network allows UPnP messaging
and your PC supports UPnP discovery, then Lynx II’s UPnP operation should be enabled,
as UPnP can help identify and connect to devices on the network. When shipped from the
factory, the Lynx II’s UPnP operation is typically enabled, and the UPnP Friendly Name
used by Window’s UPnP discovery is Lynx-II. When using multiple Lynx II on a
network, the UPnP Friendly Name should be changed to uniquely identify each Lynx II.
See Universal Plug and Play on page 162 for more information.
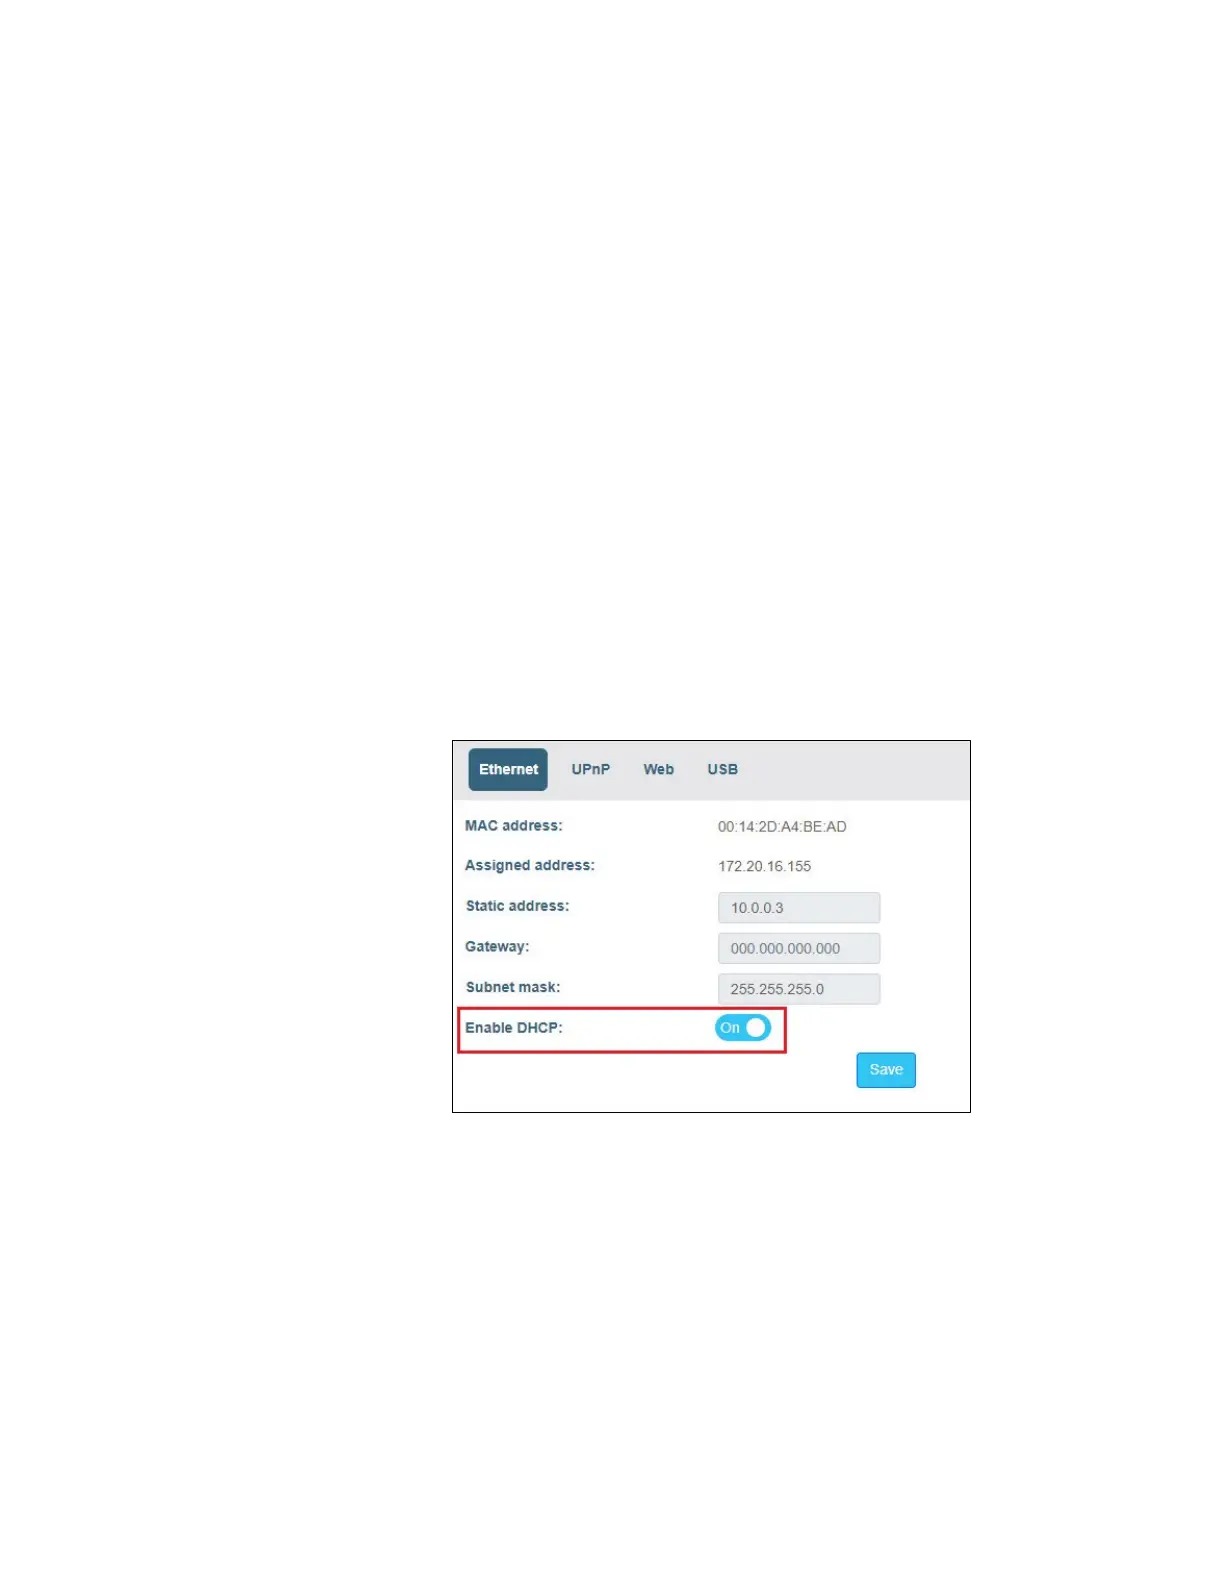
Change Assignment from Static IP to DHCP
From Maintenance, select Network Settings, select the Ethernet tab, and then slide the
Enable DHCP button to “On”.
Accept changes by pressing the Save button. Communication to the Lynx II will be lost
until the Lynx II is physically disconnected from the PC and connected to the Network via
the “straight-through” cable connection. Communication between the PC and Lynx II can
be re-established after the PC’s Network Adapter is [re]configured to utilize DHCP. See
the section below.
Note: If there is a connection to a network or a computer and a DNS server does not
provide an address, the default address will be a link-local address of
169.254.xxx.xxx.
 Loading...