User’s Guide Kona cutting plotter
Operation panel
AP-75380 - Revision 1.2 95
4
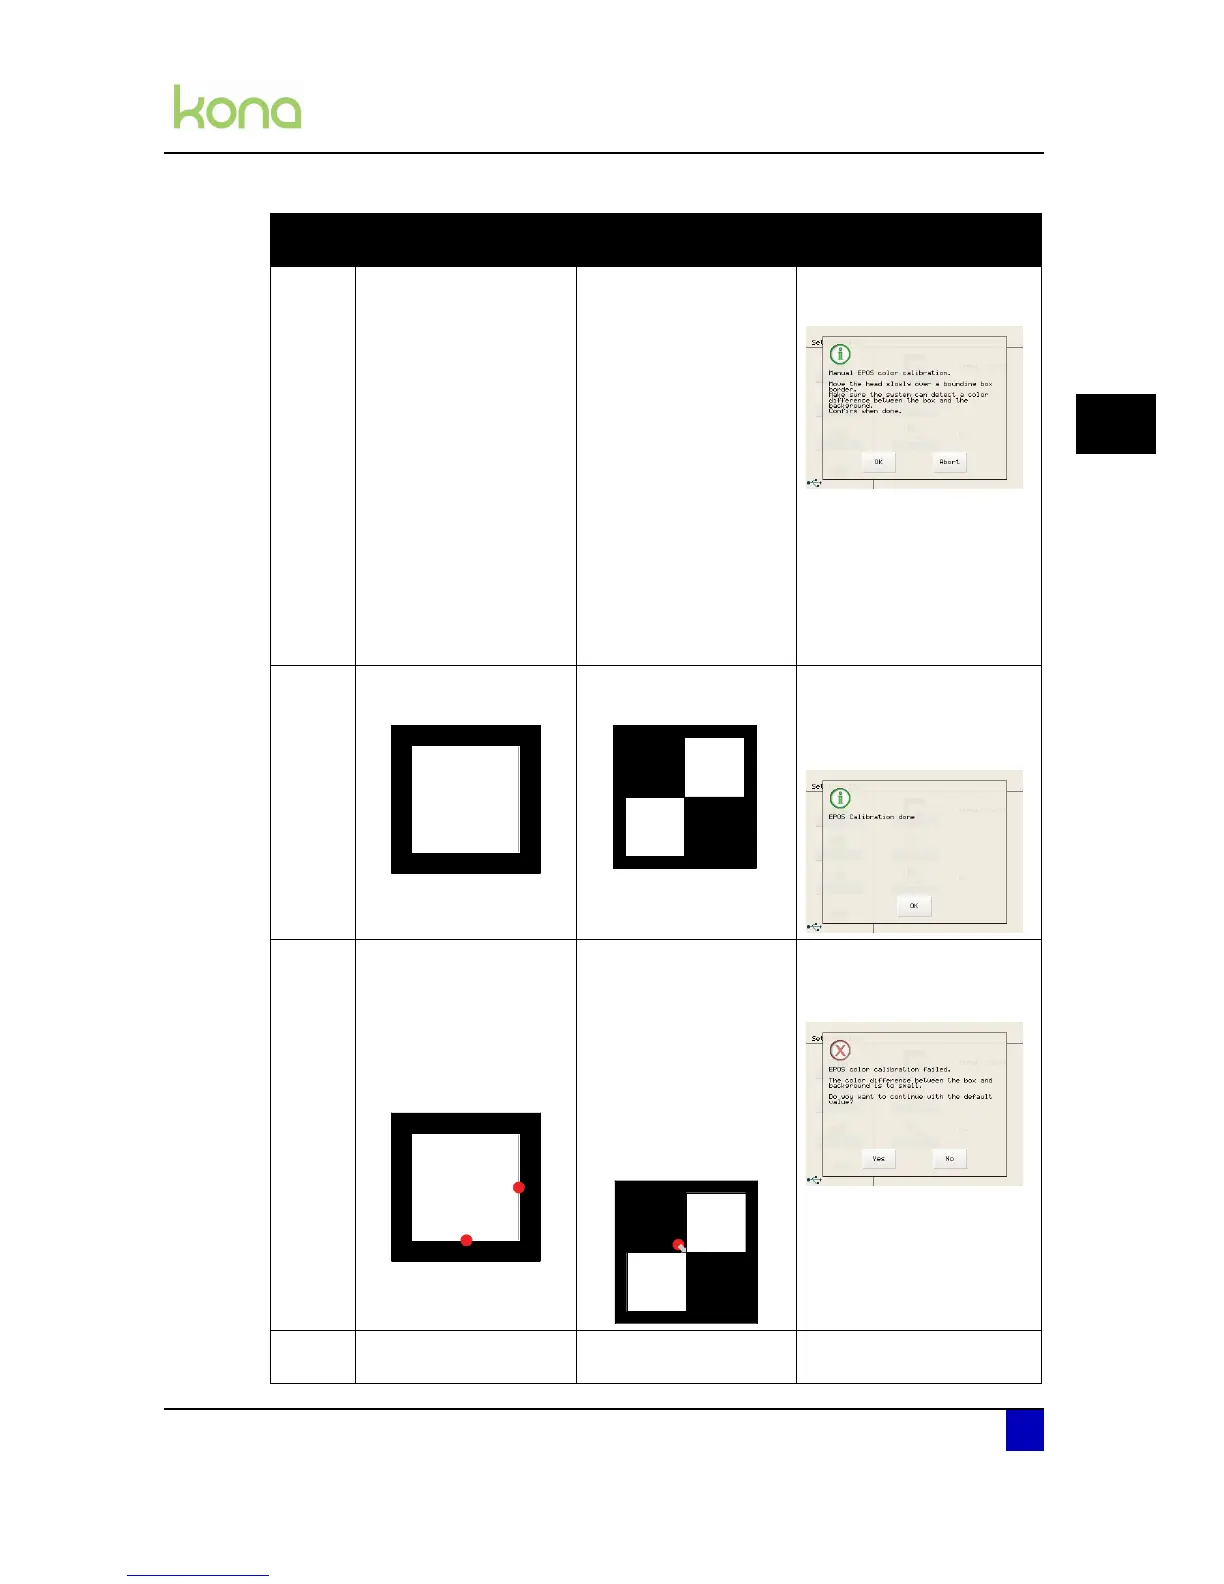
Step 7: The machine will
present the test pattern
by feeding the vinyl
The machine will
present the test pattern
by feeding the vinyl
The Kona displays
following screen:
Pull the media manually
forward until a bounding
box is visible.
Move the head a couple
of times over the
bounding box and press
OK.
Step 8: Weed out the square
and press OK
Weed out the squares
and press OK
m
If the epos alignment is
correctly executed, the
Kona shows following
screen:
Step 9: The cutter will
automatically measure
the bottom and right side
of the box, to know the
distance between the
EPOS sensor and the
knife tip.
The EPOS laser will be
activated and will move
to the approximate
centre of the cross. In
case the laser is not
positioned on the centre,
guide it to the perfect
centre of the two
squares and confirm the
position with OK.
In case the alignment is not
well executed, the Kona will
show following warning:
Perform the above steps
again to become a
proper calibration.
Step 10: The EPOS calibration is
finished.
The EPOS calibration is
finished.
The EPOS calibration is
finished.
Automatic
(Recommended)
Manual Position Manual color