Remove the Motherboard
166 Oracle Server X6-2 Service Manual • June 2016
Note - Install the DIMMs only in the sockets (connectors) that correspond to the sockets from
which they were removed. Performing a one-to-one replacement of the DIMMs significantly
reduces the possibility that the DIMMs will be installed in the wrong slots. If you do not
reinstall the DIMMs in the same sockets, server performance might suffer and some DIMMs
might not be used by the server.
14.
Remove the processors from the failed motherboard.
For instructions, see “Remove a Processor” on page 125.
15.
Remove the processor socket covers from the replacement motherboard and
install the processors.
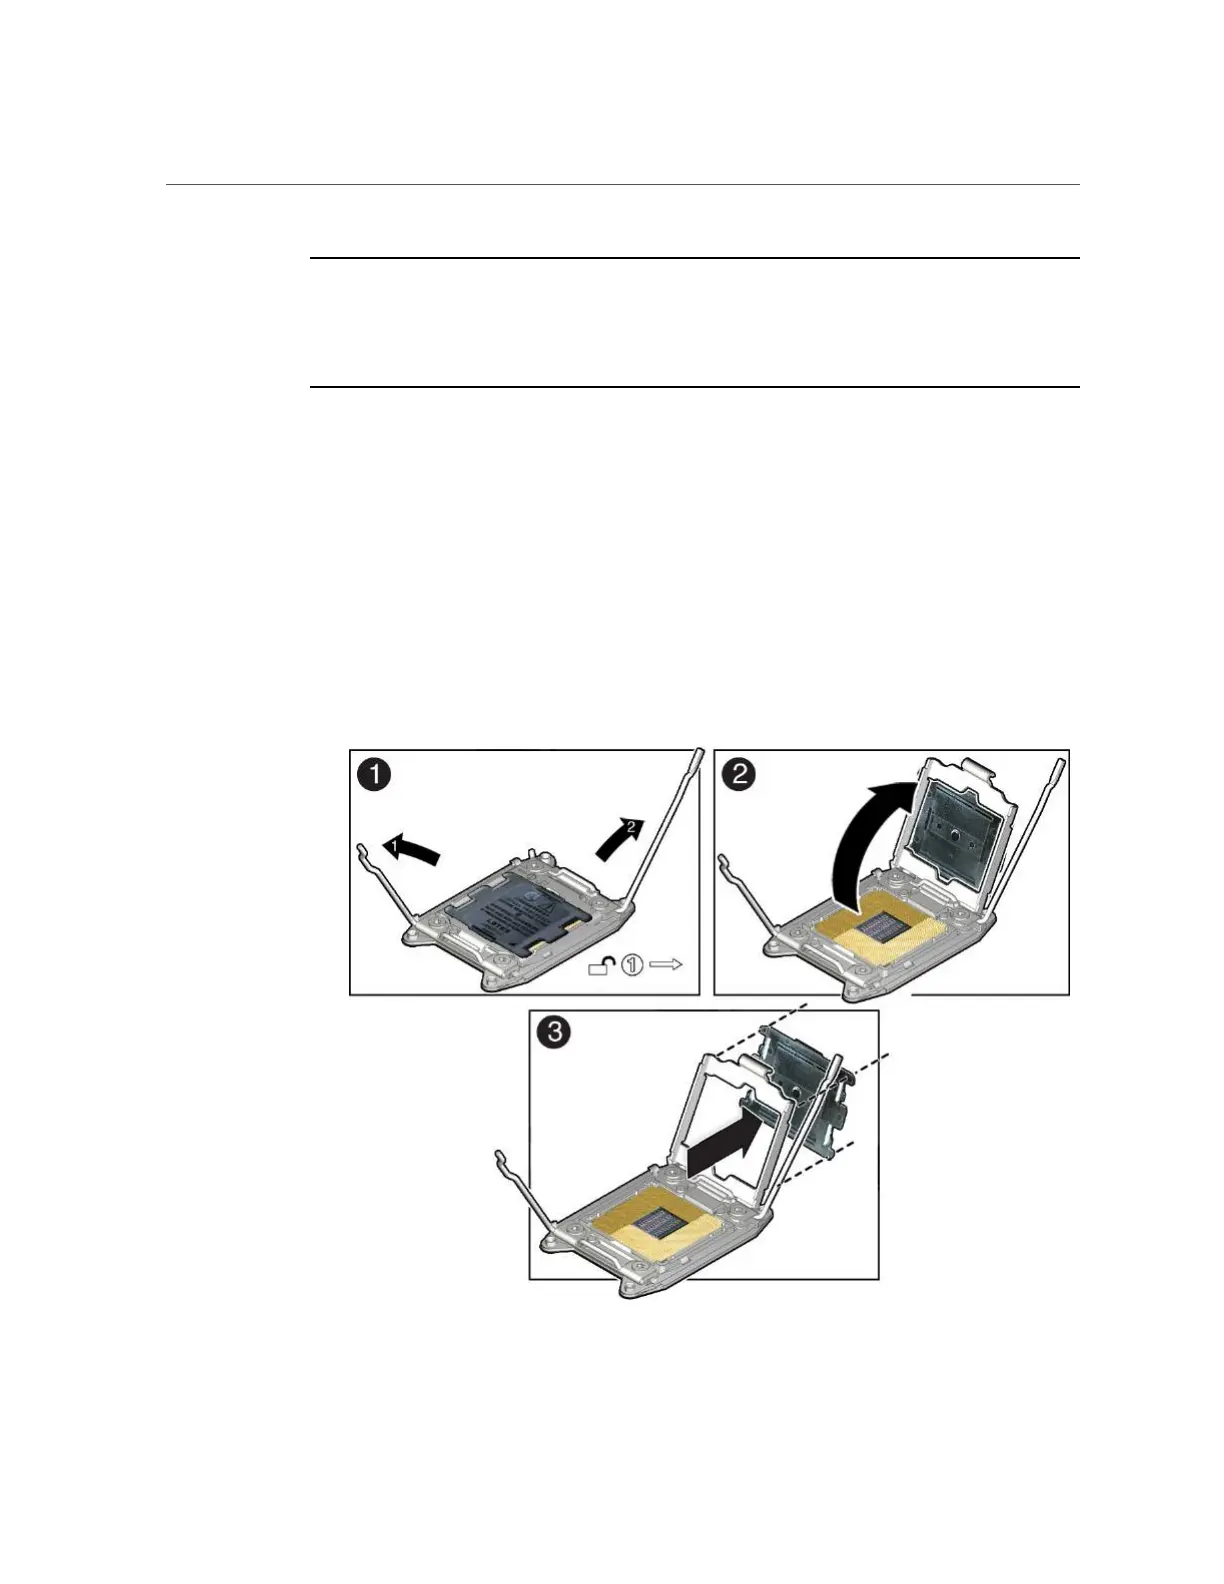
a.
Disengage the processor ILM (independent loading mechanism) assembly
hinge lever on the right side of the processor socket (viewing the server
from the front) by pushing down on the lever and moving it to the side away
from the processor, and then rotating the lever upward [Frame 1].