Remove the Motherboard Assembly
5.
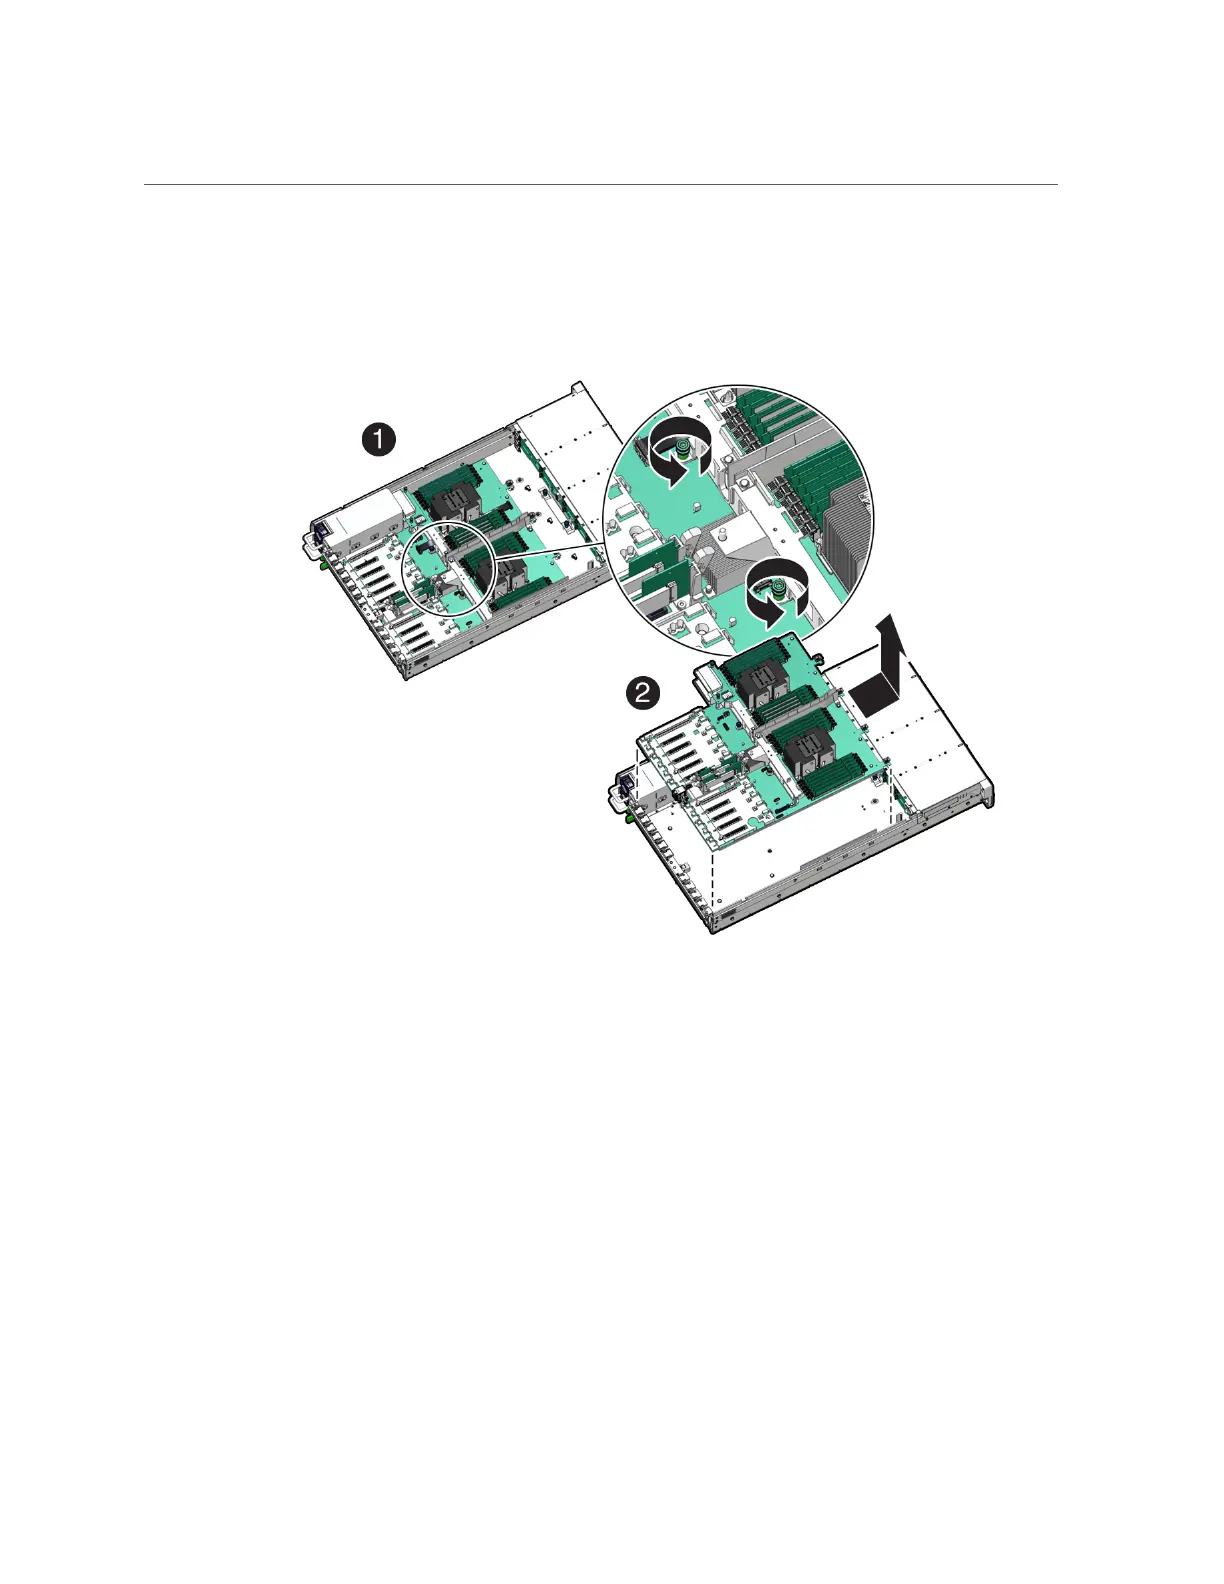
Using a Torx T25 screwdriver, loosen the two captive screws that secure the
motherboard mid-wall to the chassis [1].
6.
With the server in the extended maintenance position, remove the motherboard
from the server with all reusable components that populate the motherboard in
place [2].
a.
Carefully slide the motherboard forward, and while holding the motherboard
mid-wall, lift it out of the chassis.
b.
Place the motherboard assembly on an antistatic mat, and next to the
replacement motherboard.
7.
Remove the following reusable components from the motherboard and install
them onto the replacement motherboard.
Servicing the Motherboard Assembly (FRU) 207

 Loading...


