Install a Processor
Install a Processor
Caution - Be careful not to touch the processor socket pins. The processor socket pins are very
fragile. A light touch can bend the processor socket pins beyond repair.
1.
Attach an antistatic wrist strap to your wrist, and then to a metal area on the
chassis.
See “Take Antistatic Measures” on page 65.
2.
Ensure that the replacement processor is identical to the failed processor that
you removed.
For a description of the processors that are supported by the server, see “Product
Description” on page 15.
3.
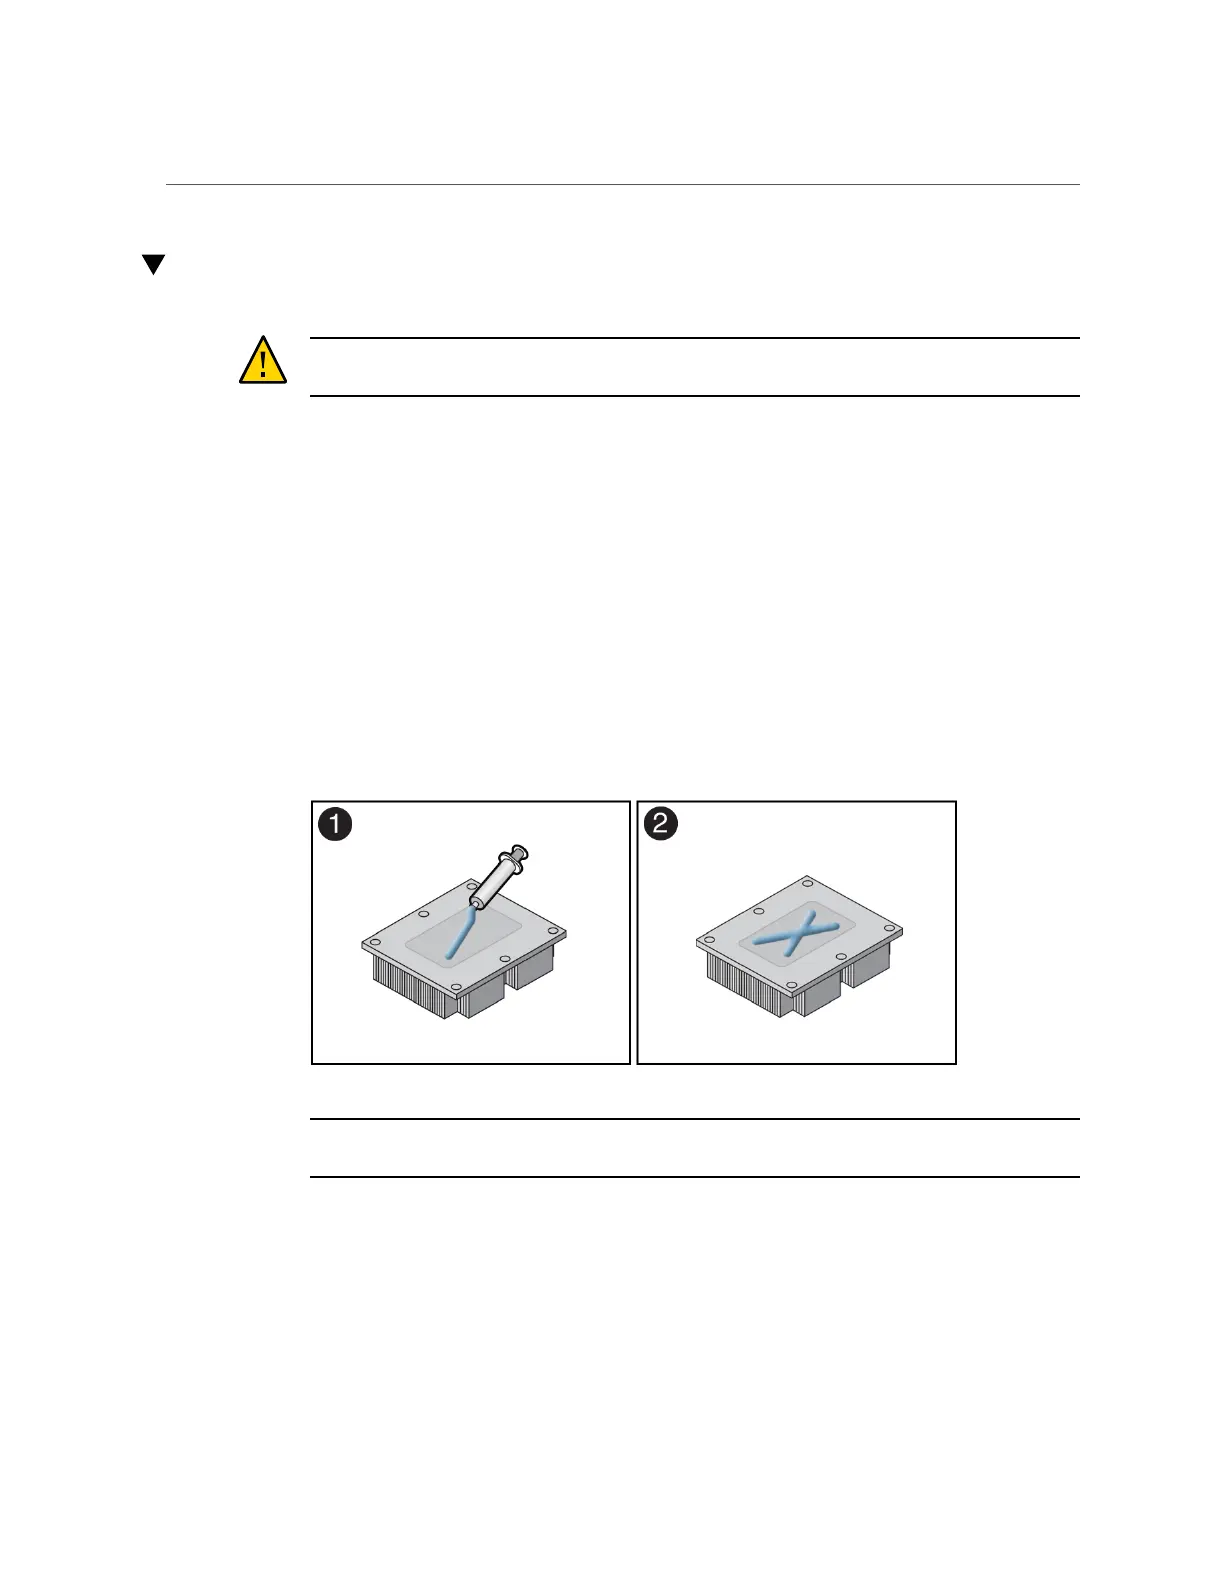
Use the syringe supplied with the new or replacement processor [1] to apply 0.3
cc of thermal interface material (TIM) in an "X" pattern to the processor contact
area of the heatsink [2].
Note - Do not distribute the TIM; the pressure of the heatsink will do so for you when you
install the heatsink.
4.
Install the new processor.
a.
Open the box that contains the new processor but do not remove it from its
packaging tray.
152 Oracle Server X8-2L Service Manual • January 2021