Install NVMe Cables
Install NVMe Cables
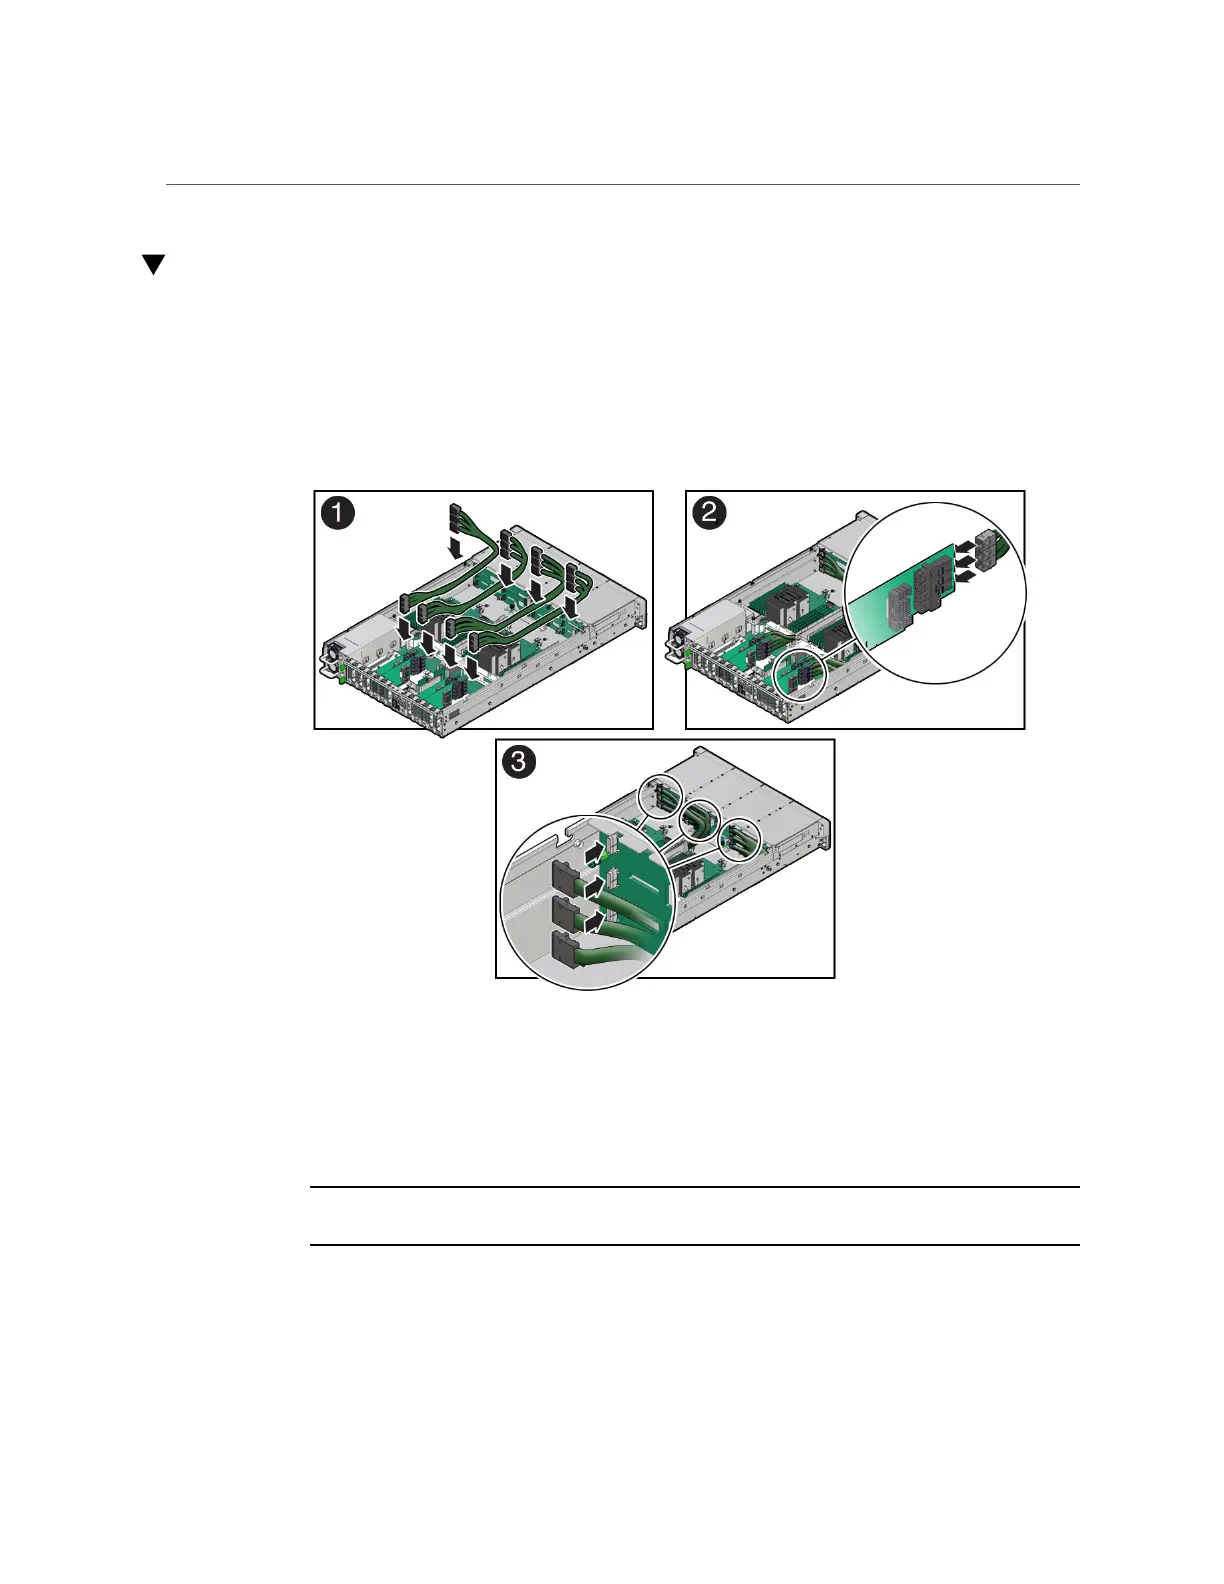
1.
Install the NVMe cables between the disk backplane and rear PCIe slots [1].
Route the NVMe cable bundle for Oracle PCIe NVMe switch cards 3 and 4 through the cable
trough in the middle of the chassis. Route the NVMe cable bundle for Oracle PCIe NVMe
switch cards 8 and 9 through the cable trough along the left side of the chassis.
2.
Reconnect the NVMe cables to the Oracle PCIe NVMe switch cards in PCIe slots
3, 4, 8, and 9 [2].
Plug each cable into its connector until you hear an audible click. To ensure proper NVMe
cable connections, see the NVMe cable connections table in Step 3. See also “Install a PCIe
Card” on page 137.
Note -NVMe cable assembly, part numbers 7345517 (long NVMe cable) and 7345518 (short
NVMe cable) are required to connect Oracle PCIe NVMe switch cards to the disk backplane.
3.
Reconnect the NVMe cables to the disk backplane [3].
198 Oracle Server X8-2L Service Manual • January 2021

 Loading...


