Install a DIMM
b.
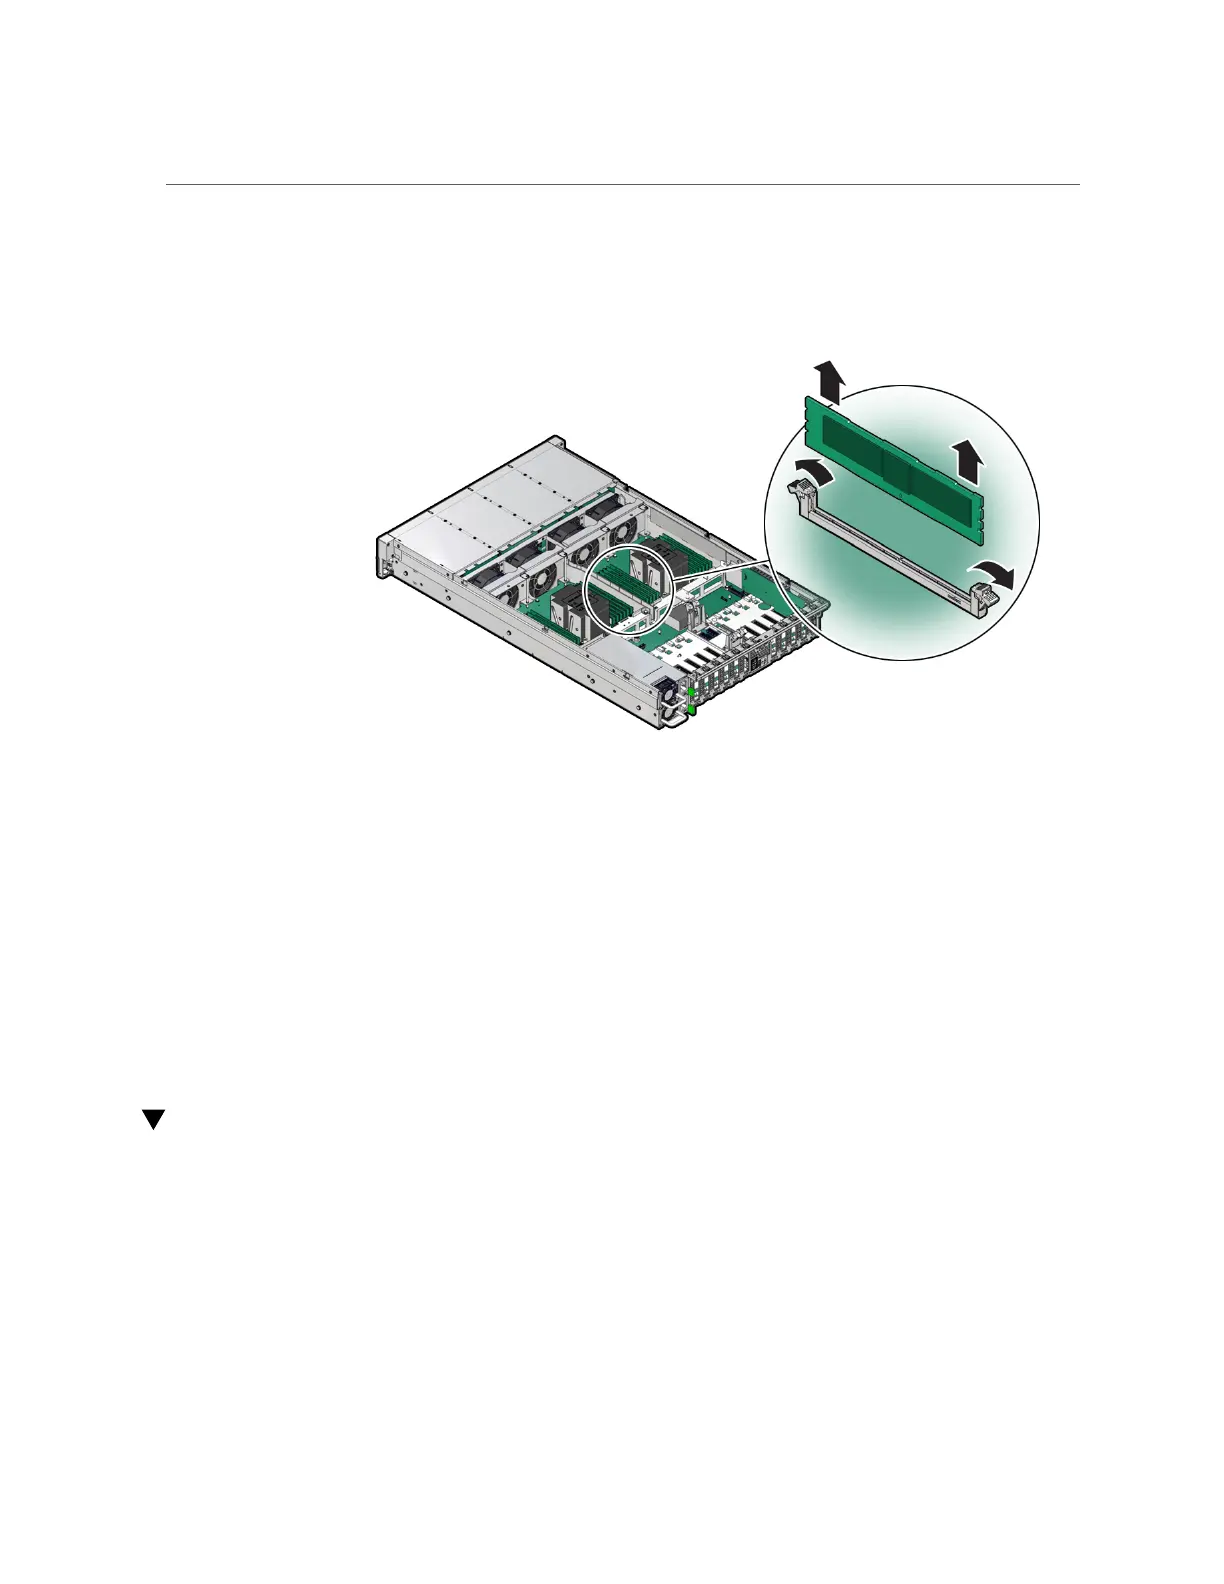
Carefully lift the DIMM straight up to remove it from the slot.
4.
Replace each failed DIMM with either another DIMM of the same rank size (quad-
rank or dual-rank) or leave the slot empty.
For DIMM replacement instructions, see “Install a DIMM” on page 130.
Related Information
■
“DIMM and Processor Physical Layout” on page 120
■
“DIMM Population Rules” on page 122
■
“Populating DIMMs for Optimal System Performance” on page 123
■
“Install a DIMM” on page 130
Install a DIMM
1.
Unpack the replacement DIMM and place it on an antistatic mat.
2.
Ensure that the replacement DIMM matches the size, type, and rank of the DIMM
it is replacing.
130 Oracle Server X8-2L Service Manual • January 2021