Install a Power Supply
6.
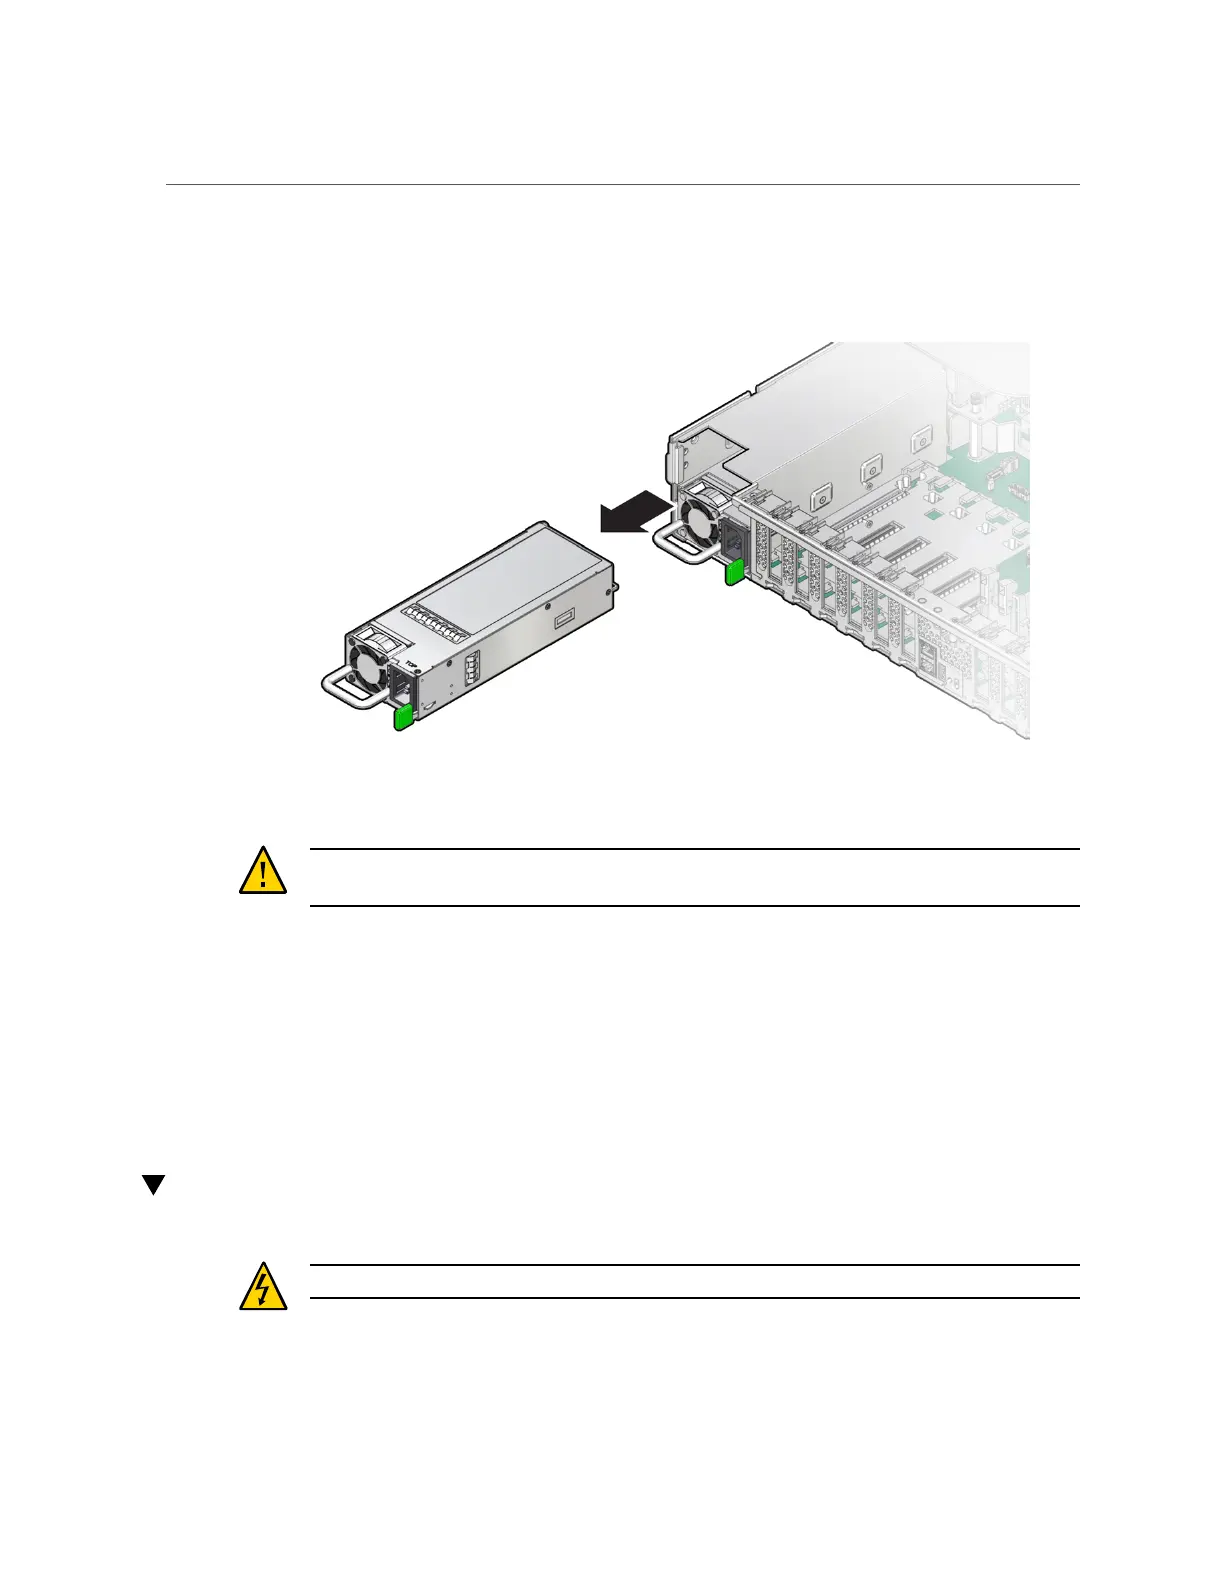
Grasp the power supply handle and push the power supply latch to the left.
7.
Pull the power supply out of the chassis.
Caution - Whenever you remove a power supply, you should replace it with another power
supply; otherwise, the server might overheat due to improper airflow.
8.
Continue to “Install a Power Supply” on page 96.
Related Information
■
“Back Panel Components and Cable Connections” on page 18
■
“Power Supply Status Indicators” on page 33
■
“Install a Power Supply” on page 96
Install a Power Supply
Caution - Always replace the failed power supply with the same type model of power supply.
96 Oracle Server X8-2L Service Manual • January 2021