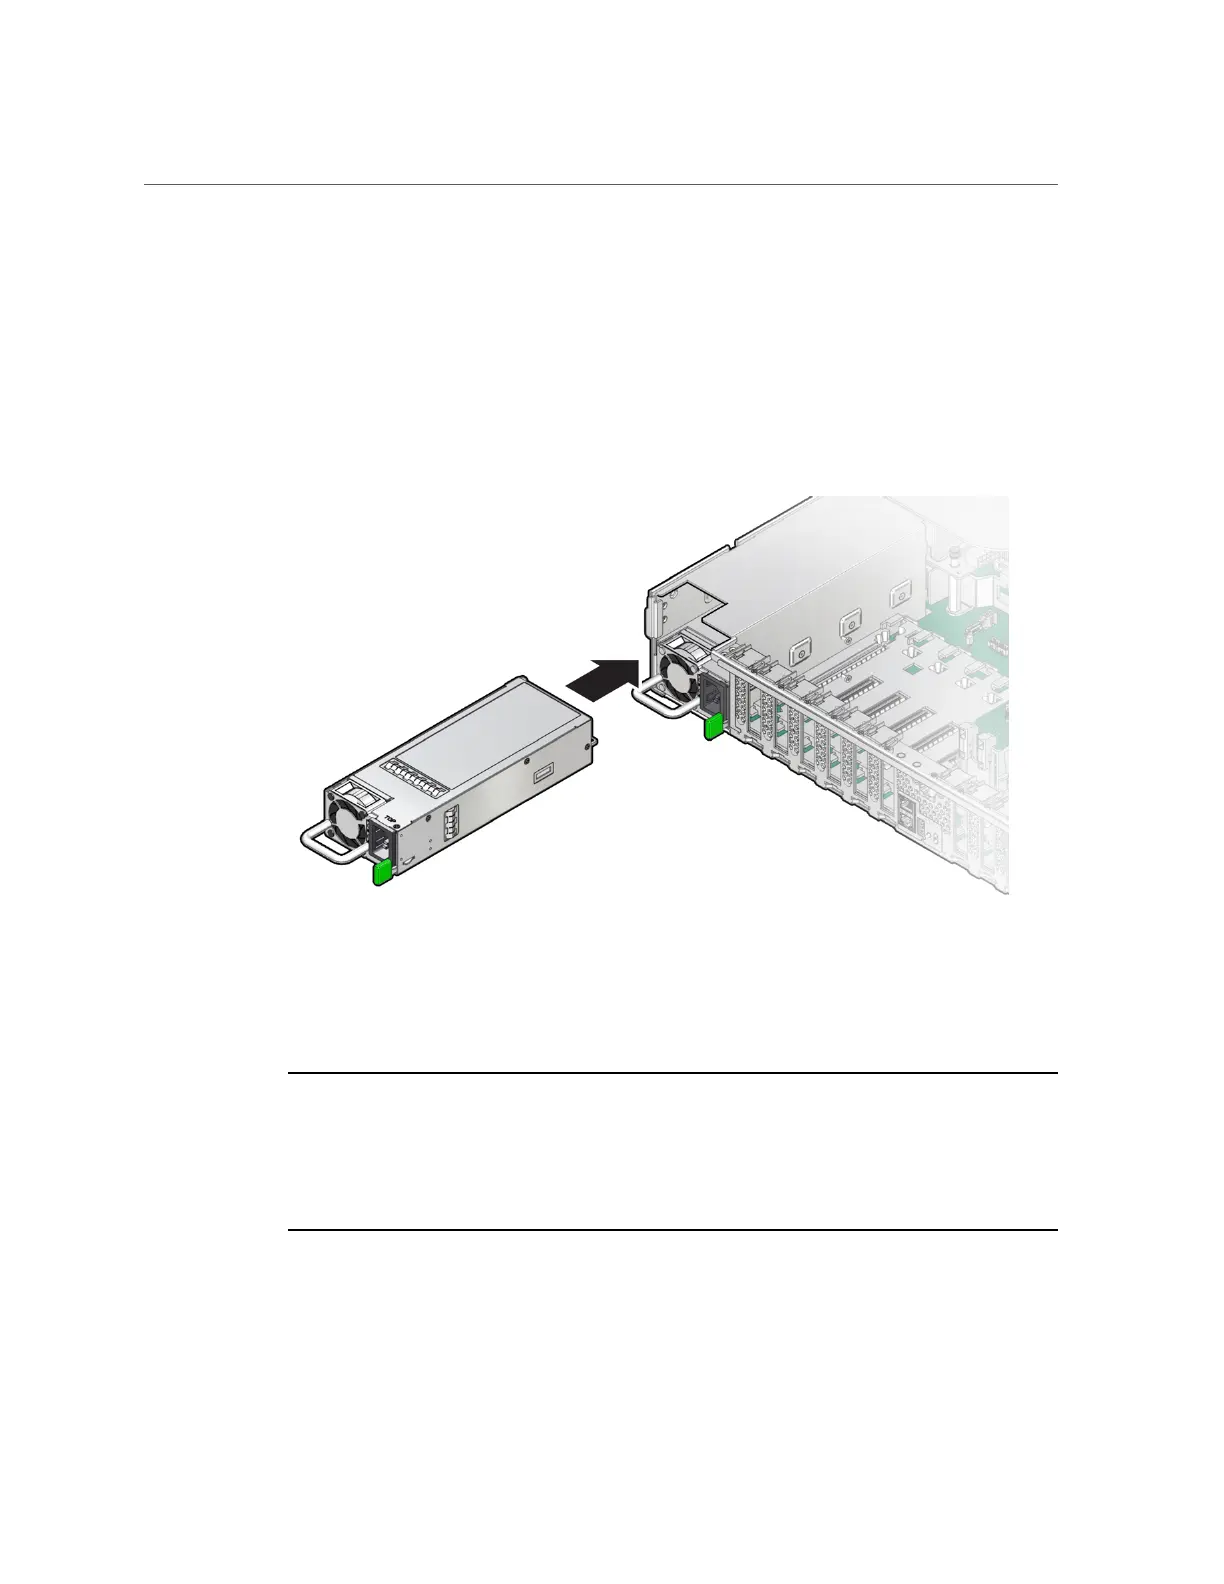
Install a Power Supply
1.
Remove the replacement power supply from its packaging, and place it on an
antistatic mat.
2.
Align the replacement power supply with the empty power supply slot.
3.
Slide the power supply into the slot until it is fully seated.
You will hear an audible click when the power supply fully seats.
4.
Reconnect the power cord to the power supply.
5.
Verify that the amber Fault-Service Required LED on the replaced power supply
and the Fault-Service Required LEDs are not lit on the front and back panels.
Note - After you have replaced Power Supply 0, you might need to reset the Oracle ILOM
service processor (SP) to propagate the key identity properties (KIP) data to the new power
supply. For instructions on resetting the SP, refer to the Oracle Integrated Lights Out Manager
(ILOM) 5.0 Configuration and Maintenance Guide at https://www.oracle.com/goto/ilom/
docs. Power Supply 1 does not contain KIP data, and therefore does not require an SP reset
after replacement.
6.
If you disconnected the two CMA left-side connectors, reconnect the
connectors.
Servicing Power Supplies (CRU) 97