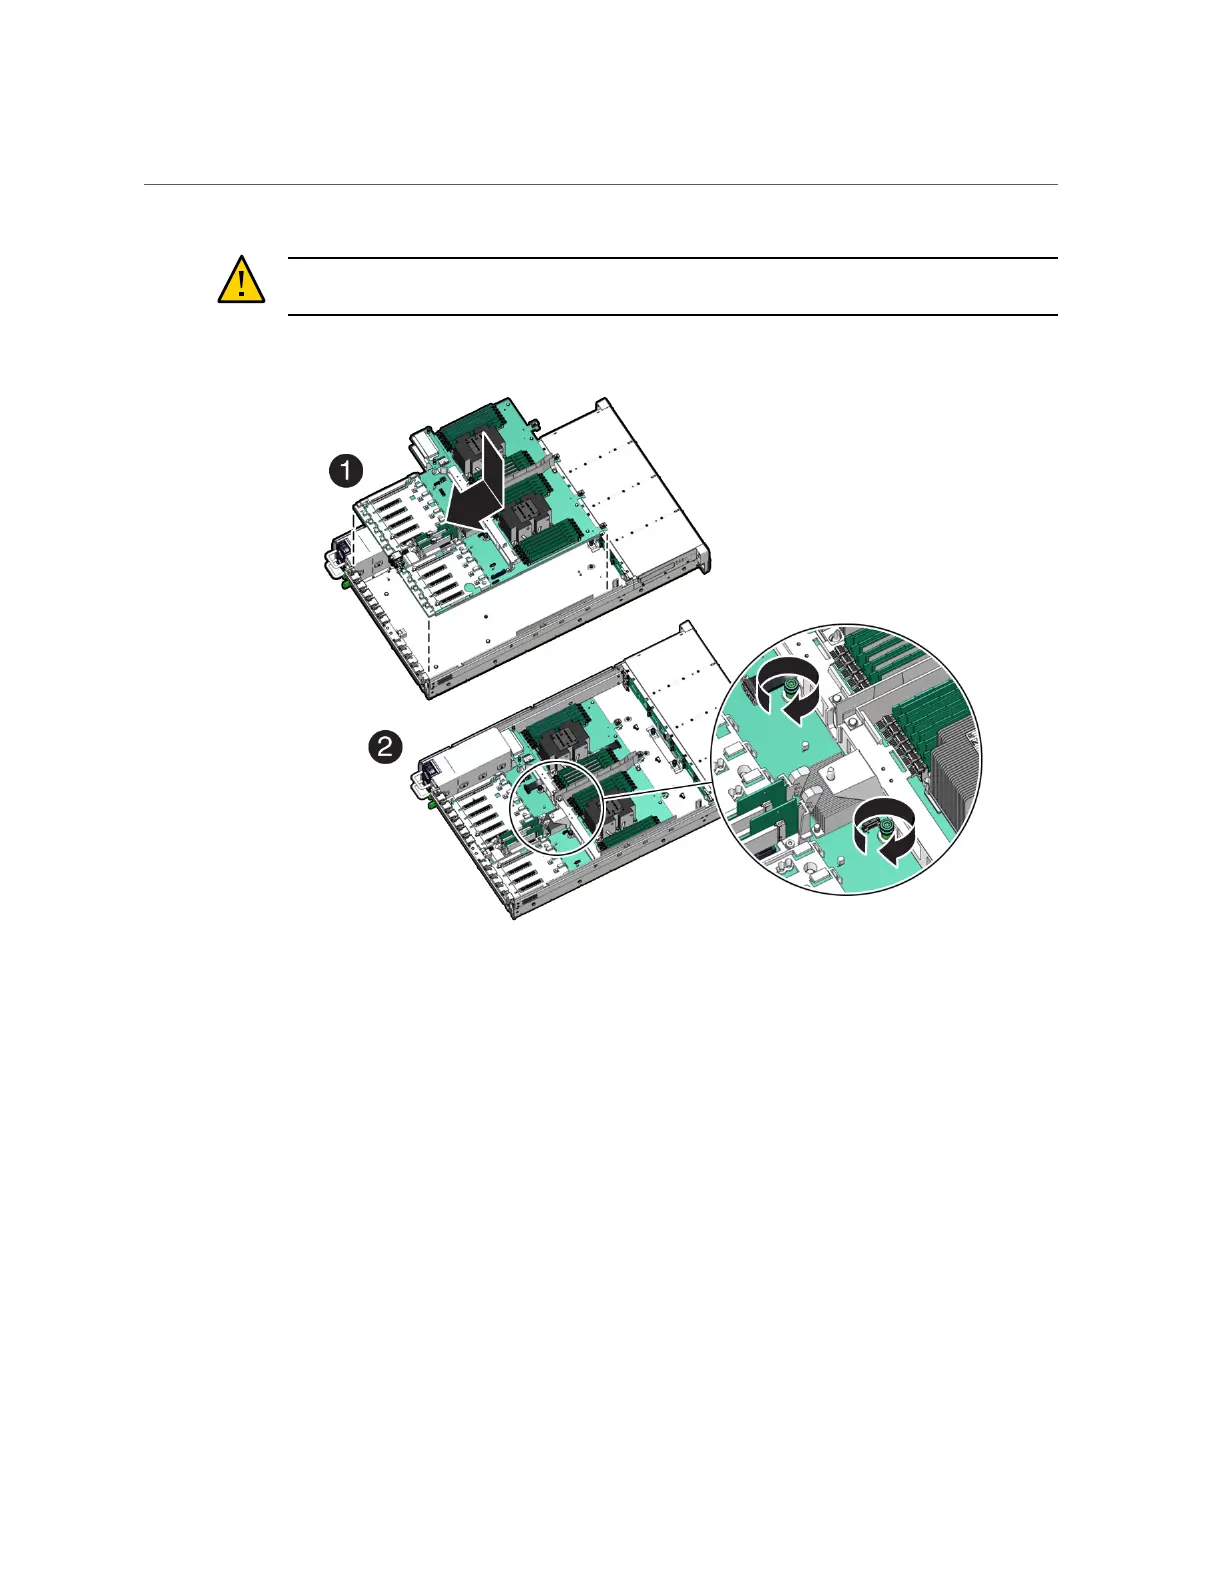
Install the Motherboard Assembly
Caution - Be careful not to damage the rear Locate Button/LED when placing the motherboard
into the chassis.
3.
Using a Torx T25 screwdriver, tighten the two captive screws to secure the
motherboard mid-wall to the chassis [2].
4.
Reconnect the following cables to the motherboard:
■
SER MGT RJ-45 serial cable
Reinstall and reconnect the SER MGT RJ-45 cable between the motherboard and back
panel.
■
Disk backplane power cable
See “Servicing the Disk Backplane (FRU)” on page 159.
■
Disk backplane auxiliary signal cable
Servicing the Motherboard Assembly (FRU) 213

 Loading...


