Using Schedule Windows
Pipeline User’s Guide
129
74-0085-05
USING SCHEDULE WINDOWS
The Schedule window is the main interface of the Pipeline Control application. When Pipeline Control
opens, it displays the schedule you opened it with or it displays a new, untitled schedule, so you can begin
work immediately.
The Schedule Panel
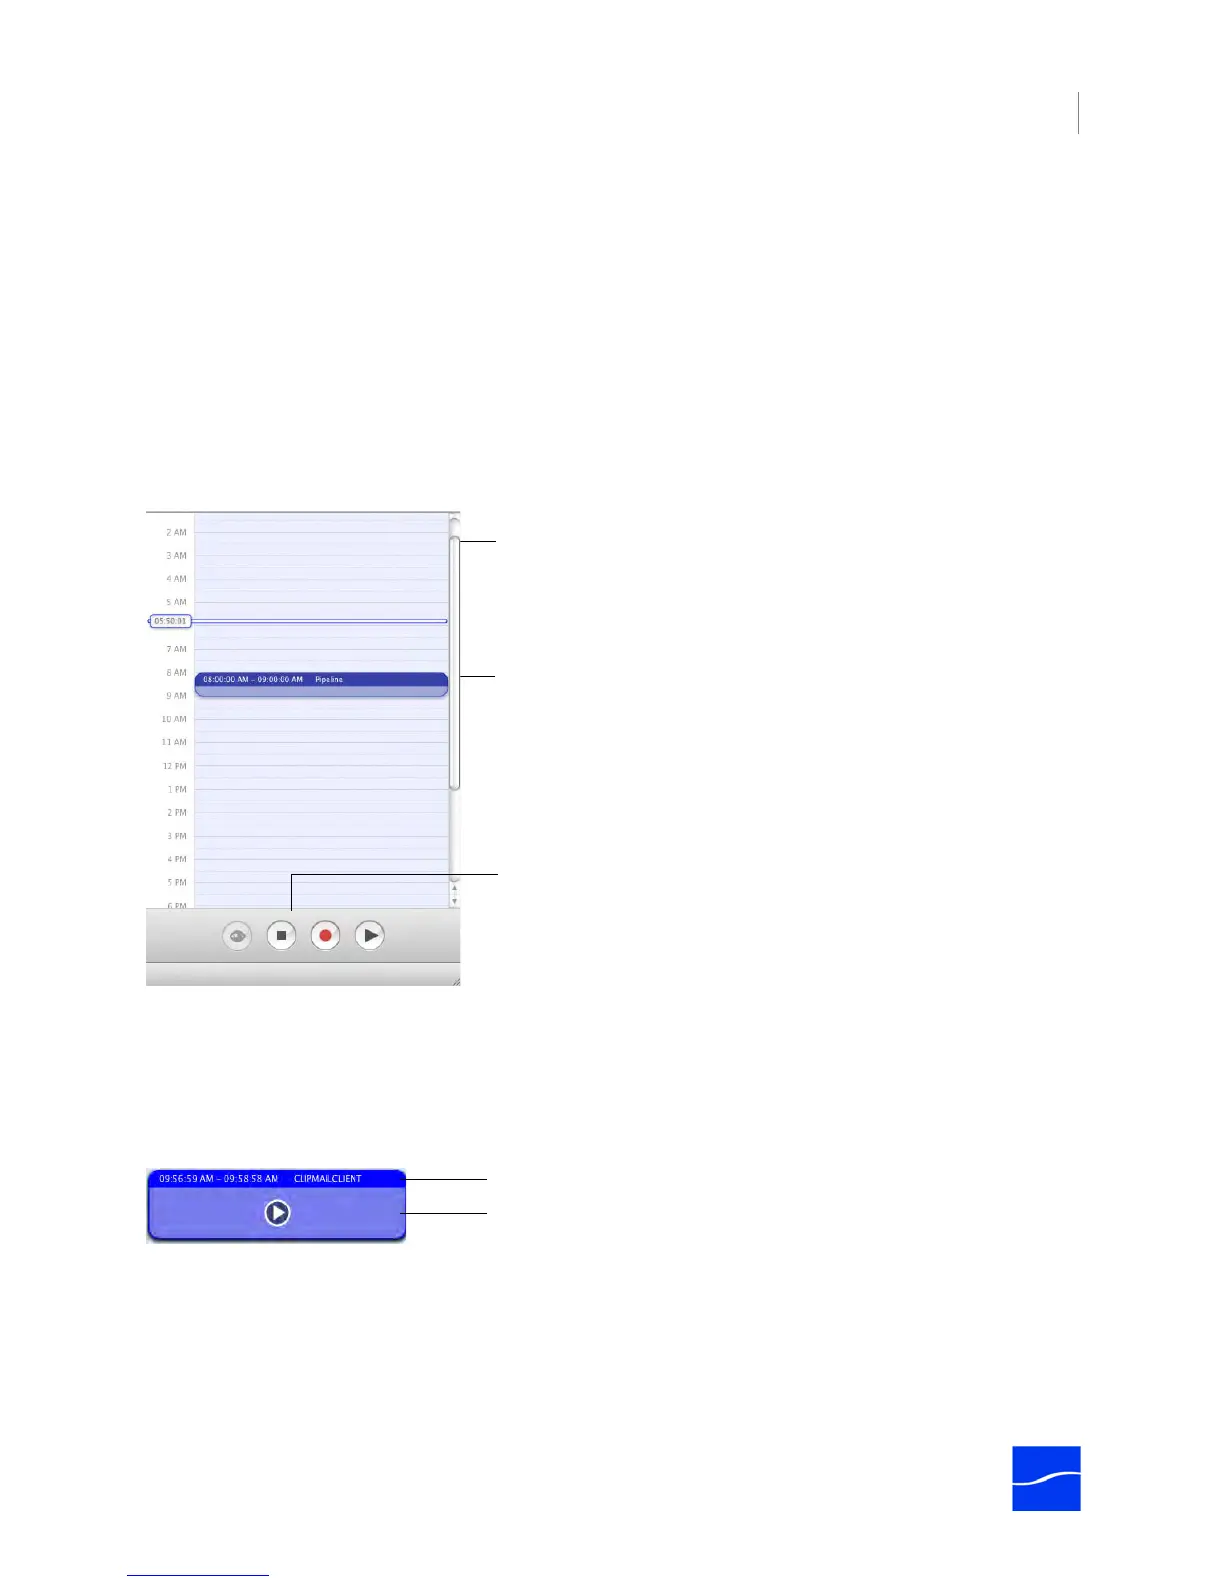
The schedule panel is a vertically-oriented view of a 24-hour period. It is marked by a vertical event timer
display down the left side, with space on the right to add clip events. The time displayed in the Event Timer
area is controlled by the clock source you specify.
Figure 8–1. The schedule panel allows you to create and manage your clip events.
You add clip events by clicking and dragging in the schedule (for capture) or by dragging and dropping a
file onto the schedule (for playout) from the Finder. Each file you add is checked to make sure that the file
contains supported audio and video tracks, or it is rejected.
When you add a new clip event, it snaps to a preset block of time, based on how far you are zoomed in on
the schedule.
Figure 8–2. Clip events in your schedule provide details about the clip.
When you add a clip event to a schedule for capture, the event only displays the time and name of the clip,
in the title. Once the event has been captured, a file is associated with the clip event, so it displays a Play
icon in the body when you hover over it. When you add a local file to a schedule (by dragging it onto the
schedule), it also creates a clip event. When you hover over it, it immediately displays a Play icon in the
body. Click the Play icon to preview the clip.
Event Timer. Indicates current time
in schedule.
Clip Event. Click and drag to create
a new event or drop a file onto the
schedule from the Finder.
Preview, Idle, Capture, and Playout
buttons.
Play. When representing an actual file, you can click the
Play button to preview it.
Title. Displays the start and end time, and name of clip.