Importing Media Into Final Cut Pro |
Episode Desktop
81
74-0085-05
Importing Streaming Media Clips from Pipeline
You can use the Pipeline Import dialog to create one or more clips, and encode and import each clip as a
QuickTime movie directly from a Pipeline that is attached via Ethernet (directly or via LAN). (You can also
crash record media from Pipeline into a file – see Crash Recording Media with Pipeline Import Dialog on
page 86.)
To encode and import media from Pipeline, follow these steps:
1. Display Pipeline browser. Select File > Import > Pipeline to display the Pipeline browser.
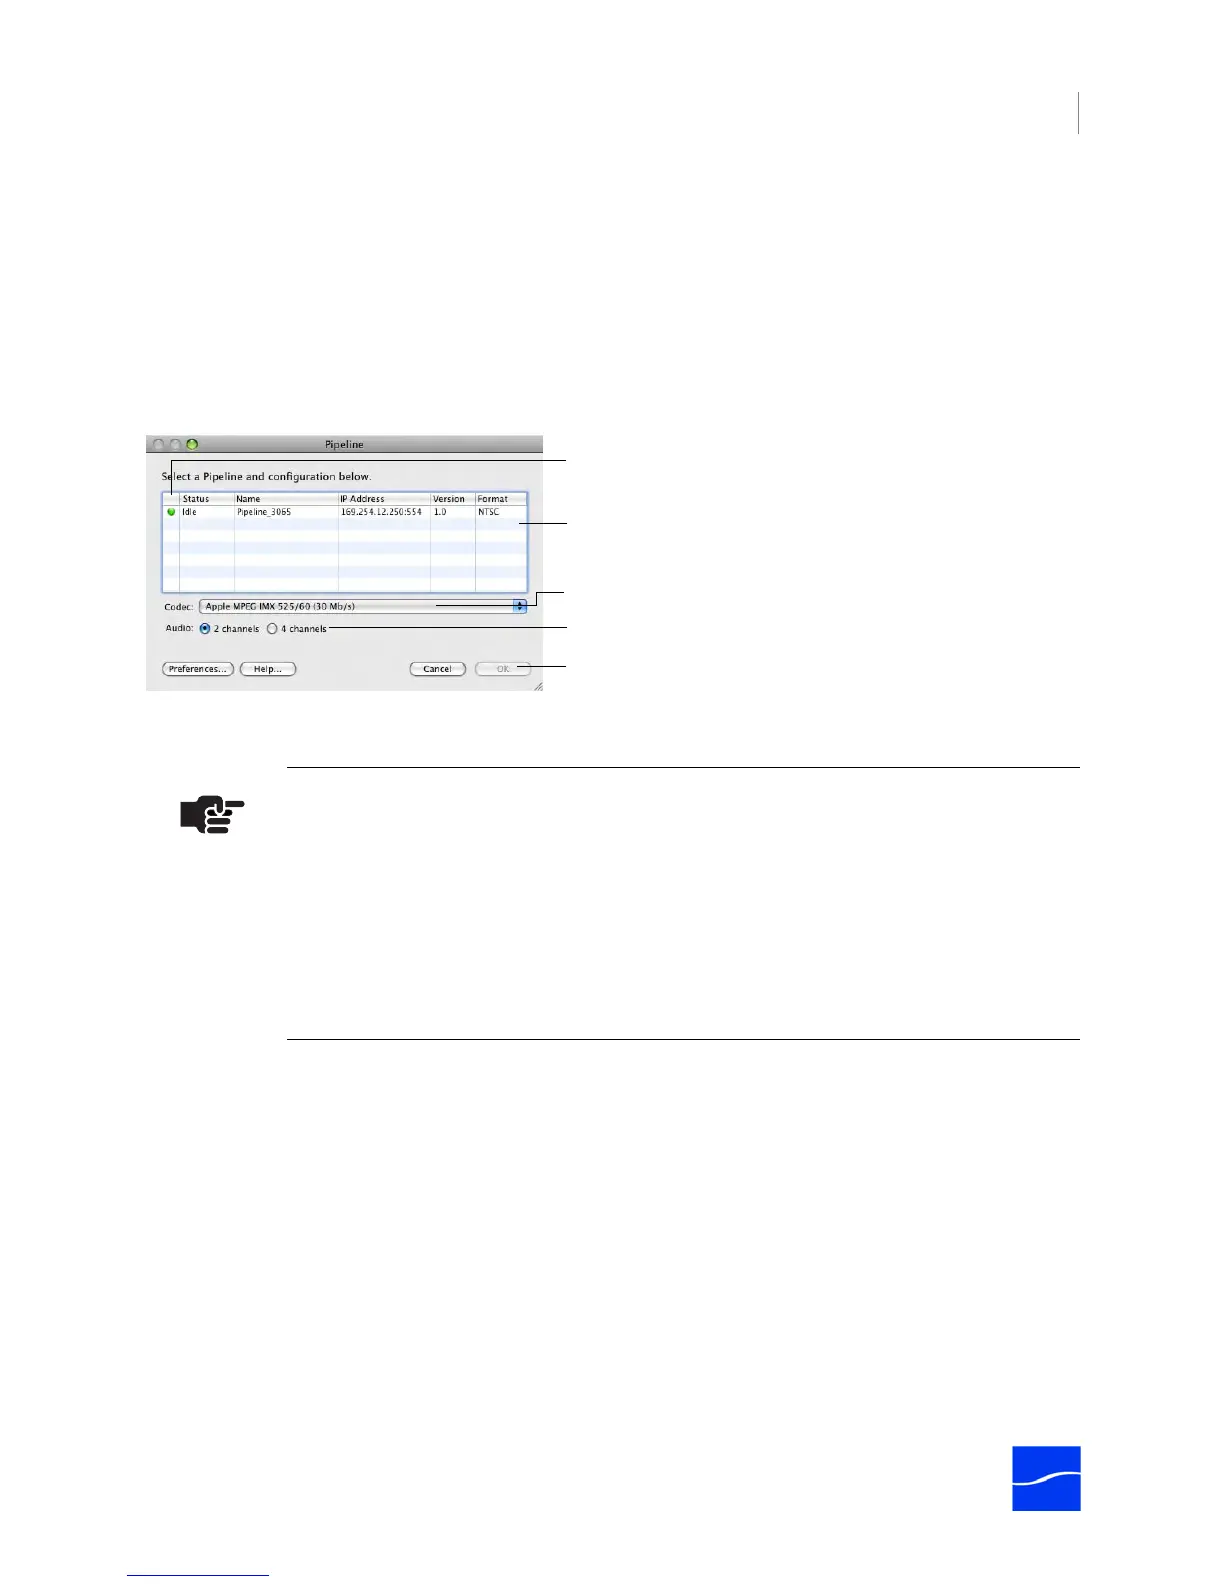
Figure 6–8. Pipeline browser displays all Pipelines – select one and set the codec for this import.
2. Select Pipeline and codec and Connect. Select the Pipeline and select the codec you want to use
for this import operation, plus 2 or 4-channel audio.
Click OK to connect and display the Pipeline Import dialog. (The codec that matches your project is
selected by default.)
Note
In Final Cut Pro, the MPEG2 50mb/sec i-frame codec is not available.
If your Pipeline is in NTSC mode, DVCPro is in the list, because from the NTSC video
compression perspective, there is no difference between DV and DVCPro: both are
720x480, 25mb/sec using 4:1:1 chroma sampling.
In PAL mode, DV compression is 720x576, 25mb/sec with 4:2:0, while DVCPro
compression is 720x576, 25mb/sec with 4:1:1. Therefore, both DV and DVCPRO
display in the list.
Bonjour is used to identify Pipelines on the network. Select the
Pipeline and verify the status before connecting. Other details
include IP address, software revision, and current format.
Select the codec to use to encode the media you’re streaming.
Select 2 or 4-channel audio.
Click OK to connect after selecting a Pipeline.
Status: Idle | Playing | Capture. You can only connect to idle
Pipelines.