Using the Clip List Panel
Pipeline User’s Guide
141
74-0085-05
USING THE CLIP LIST PANEL
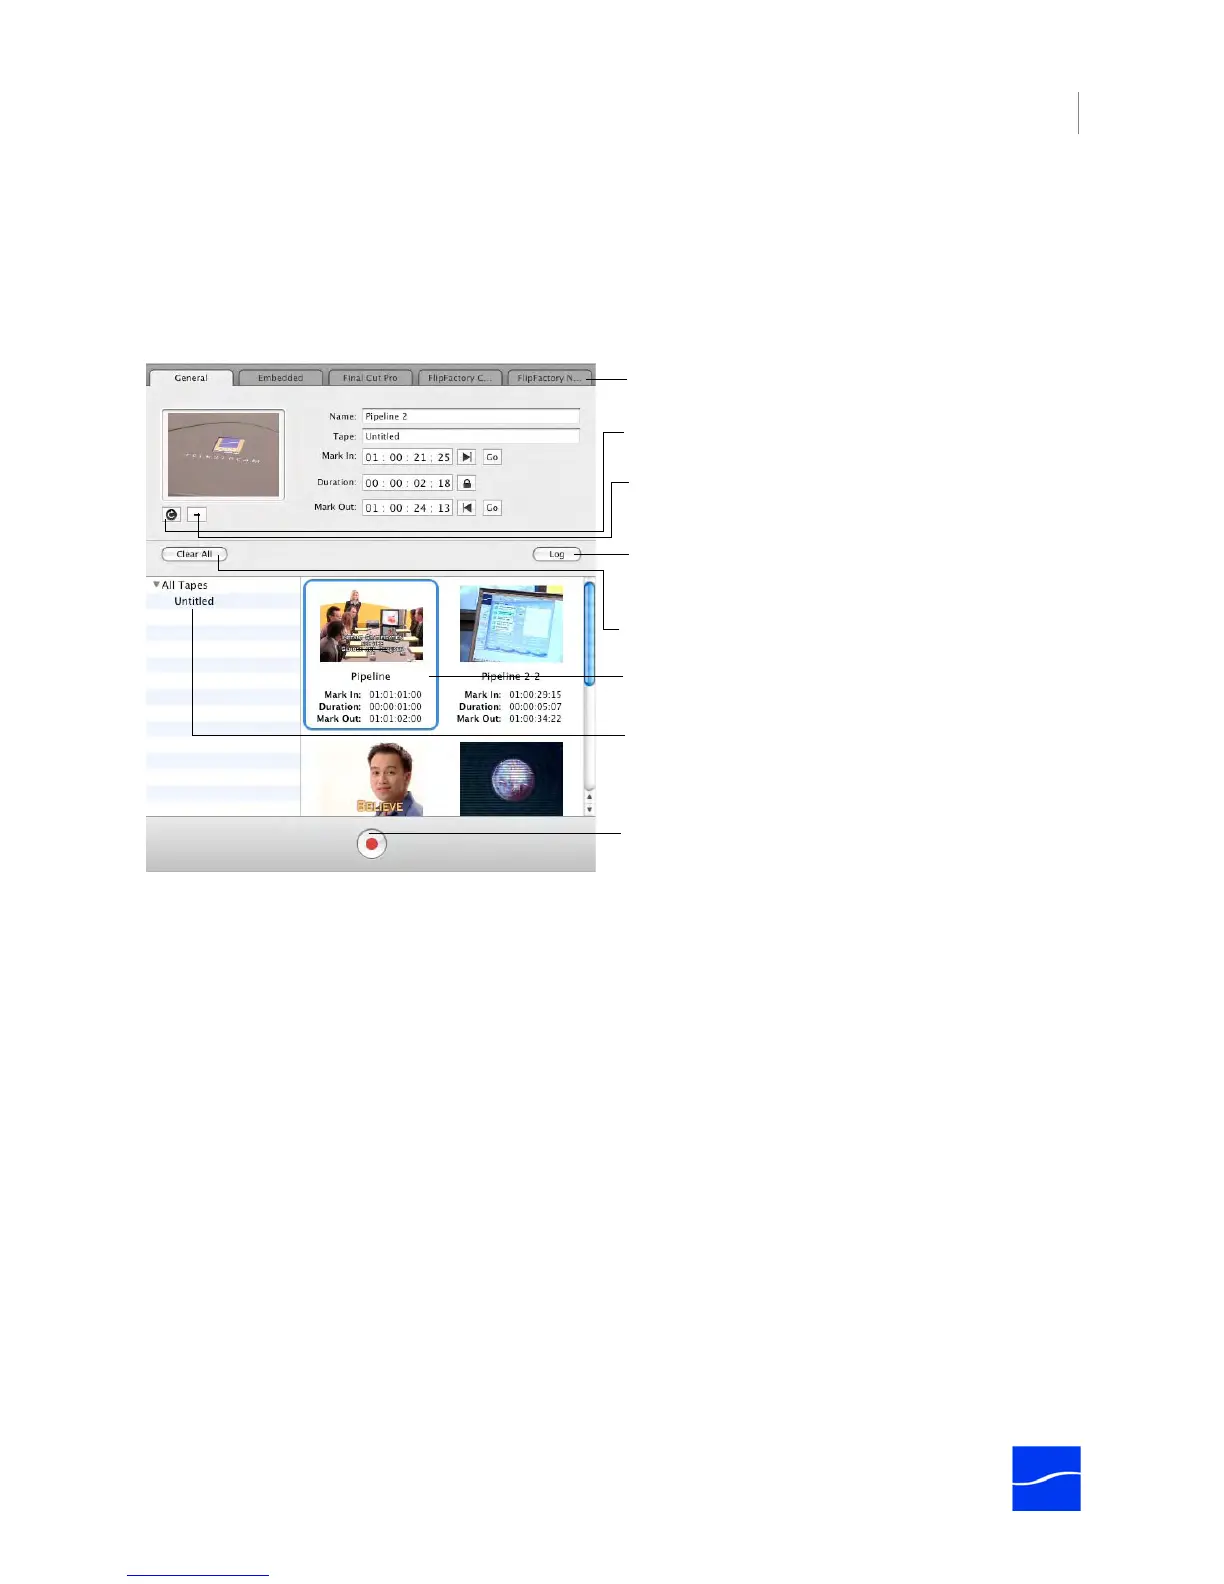
The Clip List panel displays on the right of the Log and Capture window – it includes the General Tab for
mark-in and mark-out points, several metadata tabs, plus the clip list, and a Capture button below the list.
Each of the tabs holds data for the selected clip.
Figure 9–3. The Clip List panel allows you to work with and capture clips.
Creating a Clip
To create a clip, insert your tape, make sure the Pipeline is connected, and follow these steps:
1. Click the General tab to display mark-in and mark-out controls.
2. Play/scrub the video using the VTR controls, then click the Mark In button to mark the start timecode (at
right of Mark In code value field in the General tab of the Clip List panel).
3. Click the Mark Out button to mark the end timecode (at right of end timecode value field). When you
have a start and end timecode value (and the start timecode is previous to the end time code).
4. Optionally, enter a start timecode and a duration – the end timecode will be calculated for you.
5. Optionally, enter metadata on the Embedded, Final Cut Pro, and FlipFactory tabs.
6. Click Log to create the clip and add it to the list.
When not in edit mode, any data entry or edits you perform in any tab is for the next clip you may create.
Deleting a Clip
To delete a clip, select it from the clip list and press the Delete key or select Clip > Delete.
Replace the current preview thumbnail with the frame
currently displayed in the Preview panel.
Remove the current preview thumbnail.
You can create clips from multiple tapes, identified by
tape name. Select the tape you want to capture from (or
All Tapes) before clicking the Capture button below
Mark-in and out, and metadata group tabs.
Click to remove values from all tabs for the selected clip.
Click to add a new clip to the clip list, using the values in
the tabs.
Click a clip to select it; double-click to edit its values.
Click to capture each clip from the selected tape (or
all tapes) and save each one as a file.