Cylinder Block, Liners, Pistons, and Rods
02
030
3
RG,RG34710,106 –19–01NOV00–3/4
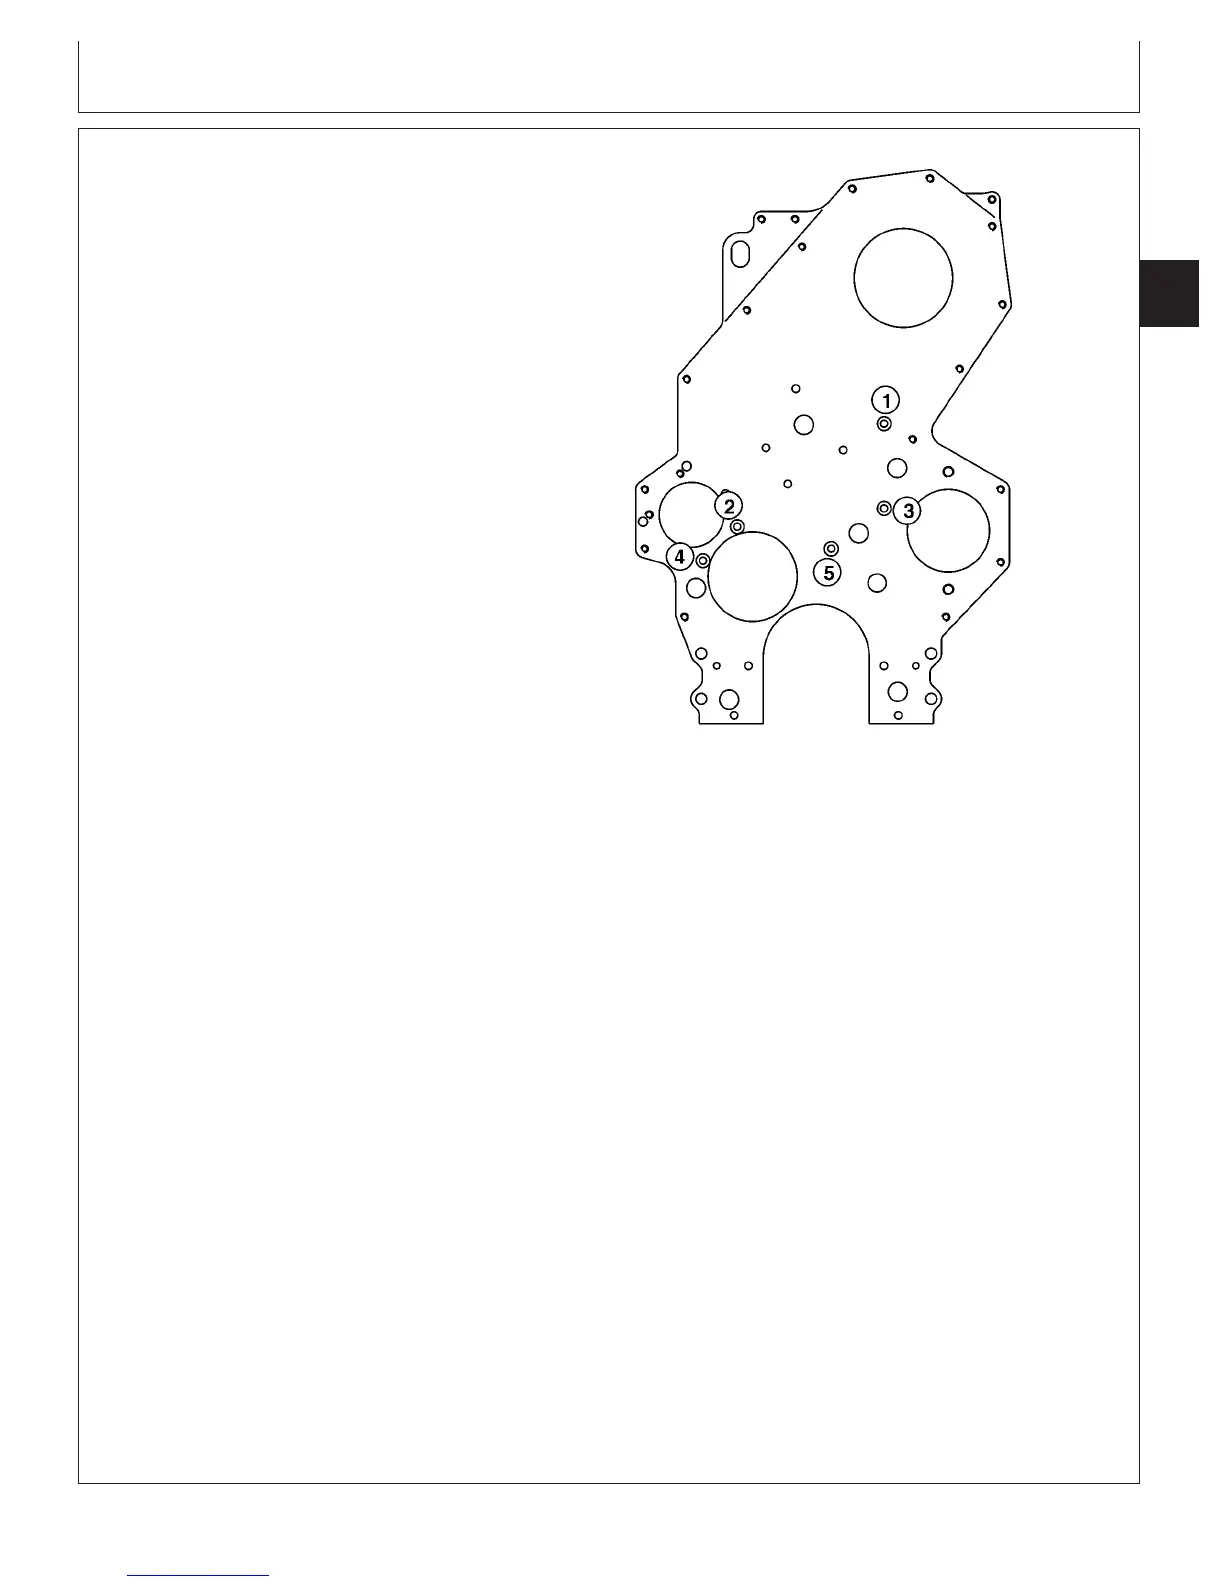
RG8814 –UN–20MAY98
Front Plate Torque Sequence
Install Front Plate
IMPORTANT: All gasket contact surfaces MUST BE
clean, dry, and free of sealant and oil.
Earlier service front plate gaskets used
sealant. New gaskets DO NOT require
sealant.
1. Install new gasket onto dowels in cylinder block.
2. Install front plate onto front face of block.
3. Install five countersunk screws and tighten to
specifications, following sequence in illustration.
Specification
Front Plate-to-Cylinder Block Cap
Screws—Torque 50 N•m (37 lb-ft)..............................................................
4. Install engine oil pump assembly. (See INSTALL
ENGINE OIL PUMP in Group 060.)
5. Install idler gear and camshaft gear. Adjust gear
backlash. (See CHECK AND ADJUST
CAMSHAFT-TO-CRANKSHAFT TIMING in Group
050.)
6. Install auxiliary drive gear (if equipped). (See REMOVE
AND INSTALL AUXILIARY DRIVE IDLER GEAR AND
BEARING in CTM67, OEM Engine Accessories, Group
54.)
7. Install timing gear cover. (See INSTALL TIMING GEAR
COVER in Group 040.)
8. Install engine oil pan. (See INSTALL ENGINE OIL PAN
in Group 060.)
9. Install crankshaft vibration damper and pulley. (See
INSTALL CRANKSHAFT VIBRATION DAMPER AND
FRONT OIL SEAL in Group 040.)
10. Remove JDG971 Timing Pins and install rocker arm
cover. (See REMOVE AND INSTALL ROCKER ARM
COVER in Group 020.)
11. Install crankshaft timing pin plug and tighten to
specifications.
CTM100 (06APR04)
02-030-3
P
OWER
T
ECH
10.5 L & 12.5 L Diesel Engines
040604
PN=143
Continued on next page