Camshaft and Timing Gear Train
02
050
22
RG,RG34710,196 –19–25OCT00–2/7
9. No. 3 Bushing:
Install JDG968-1 Bushing Remover in front of tower
No. 5 and JDG968-3 Guide in rear of tower No. 6.
10. Install 313793 Forcing Screw with double nut toward
rear of engine.
11. Use a 152.4 mm (6.0 in.) extension with ratchet to
reach double nut.
12. No. 4 Bushing:
Install JDG968-1 Bushing Remover in rear of No. 7
tower and JDG968-3 Guide in front of No. 6 tower.
13. Install 313793 Forcing Screw with double nut toward
rear of engine. No extension needed.
14. Thoroughly clean bushing bores in cylinder head and
inspect for damage. Clean lubricating oil holes as
needed.
RG,RG34710,196 –19–25OCT00–3/7
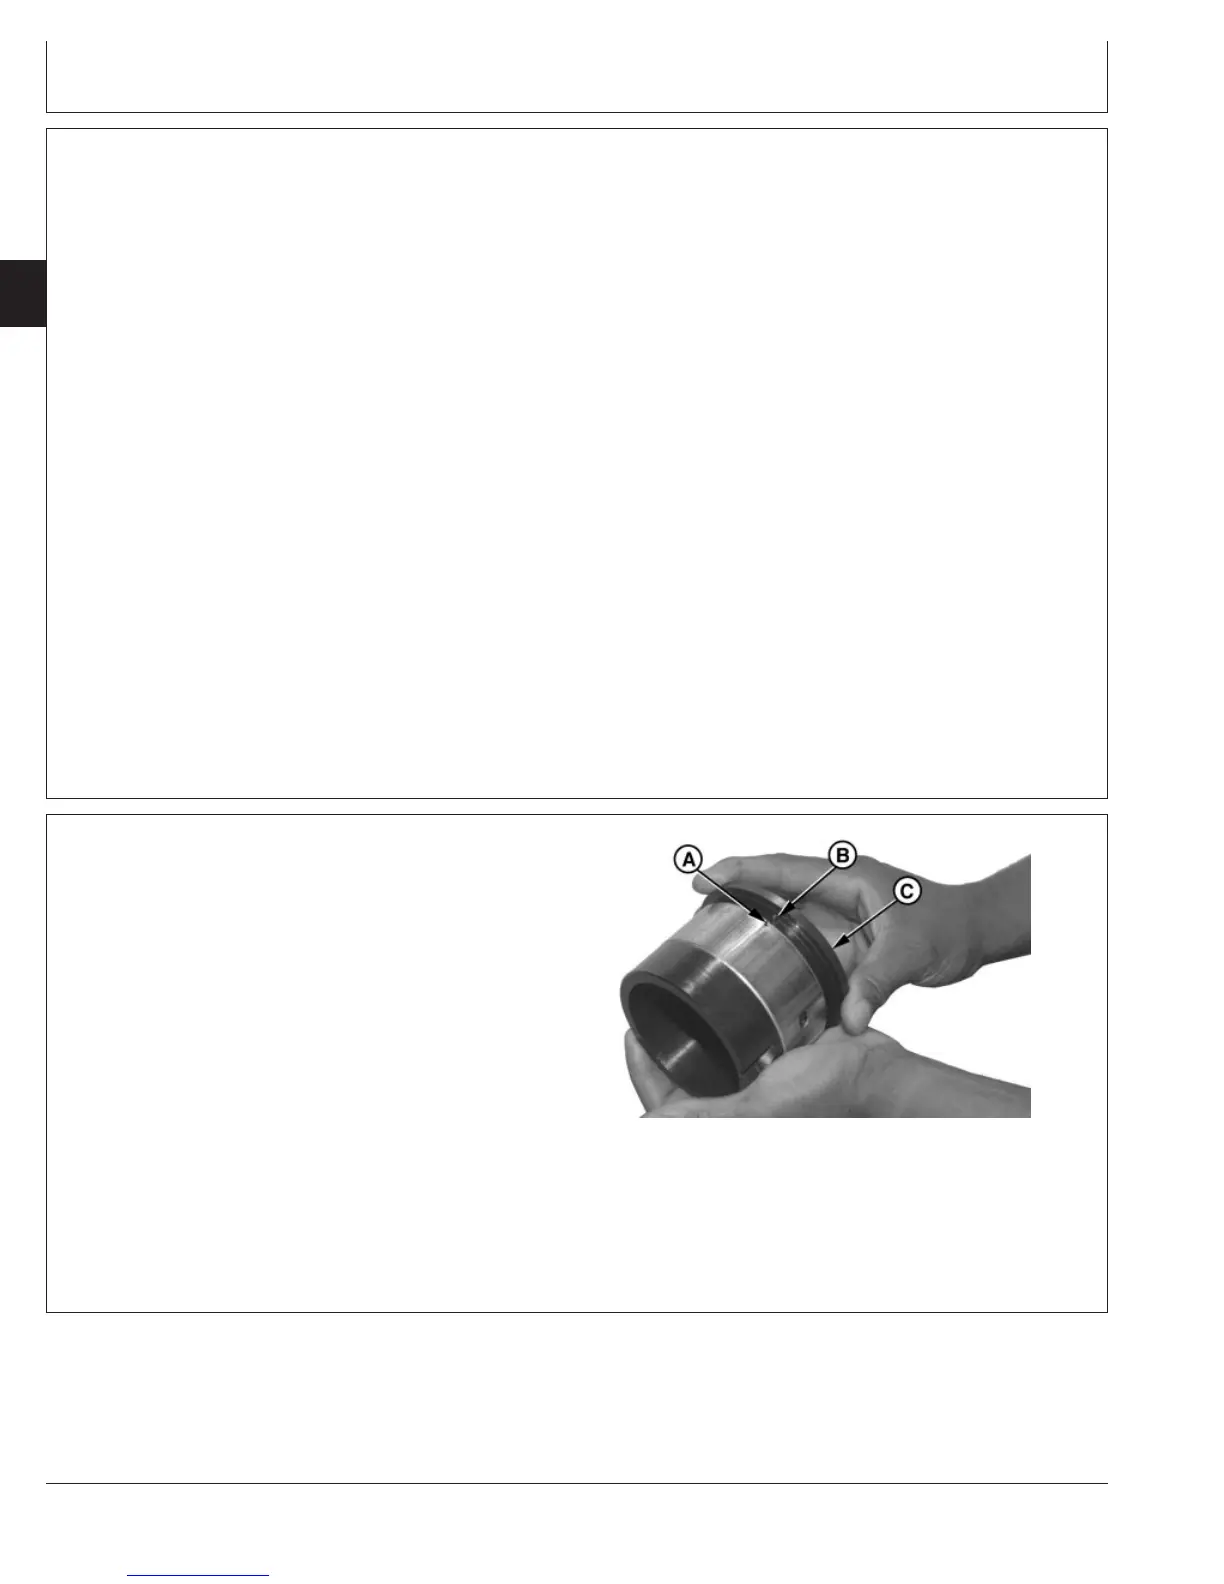
RG8334 –UN–09DEC97
Positioning Replacement Bushing on Installer
A—Notch Alignment
B—Alignment Sleeve
C—Bushing Installer
Install Camshaft Bushings
IMPORTANT: ALWAYS install bushings from front
side of cylinder head bushing bore and
drive toward rear.
1. No. 1 Bushing:
Apply a light coat of TY6333 or TY6347 High
Temperature Grease to ID of bushing bore in cylinder
head.
2. Align notch (A) in new camshaft bushing with notch in
JDG968-4 Alignment Sleeve (B). Position JDG968-2
Bushing Installer (C) onto end of sleeve with index slot
engaged in notches in bushing and sleeve.
Continued on next page
CTM100 (06APR04)
02-050-22
P
OWER
T
ECH
10.5 L & 12.5 L Diesel Engines
040604
PN=262