© Precor Incorporated, Unauthorized Reproduction and Distribution Prohibited by Law Page 152
13 With assistance, lift the front arm out of the lower main shaft clamp and upper arm, gently set the front
arm on a flat work surface.
Note: On April 3, 2013 the front arms and cams were redesigned so that the cams are pressed onto
the front arm axle. If you are servicing an AMT12 that has this configuration, skip the cam removal
steps.
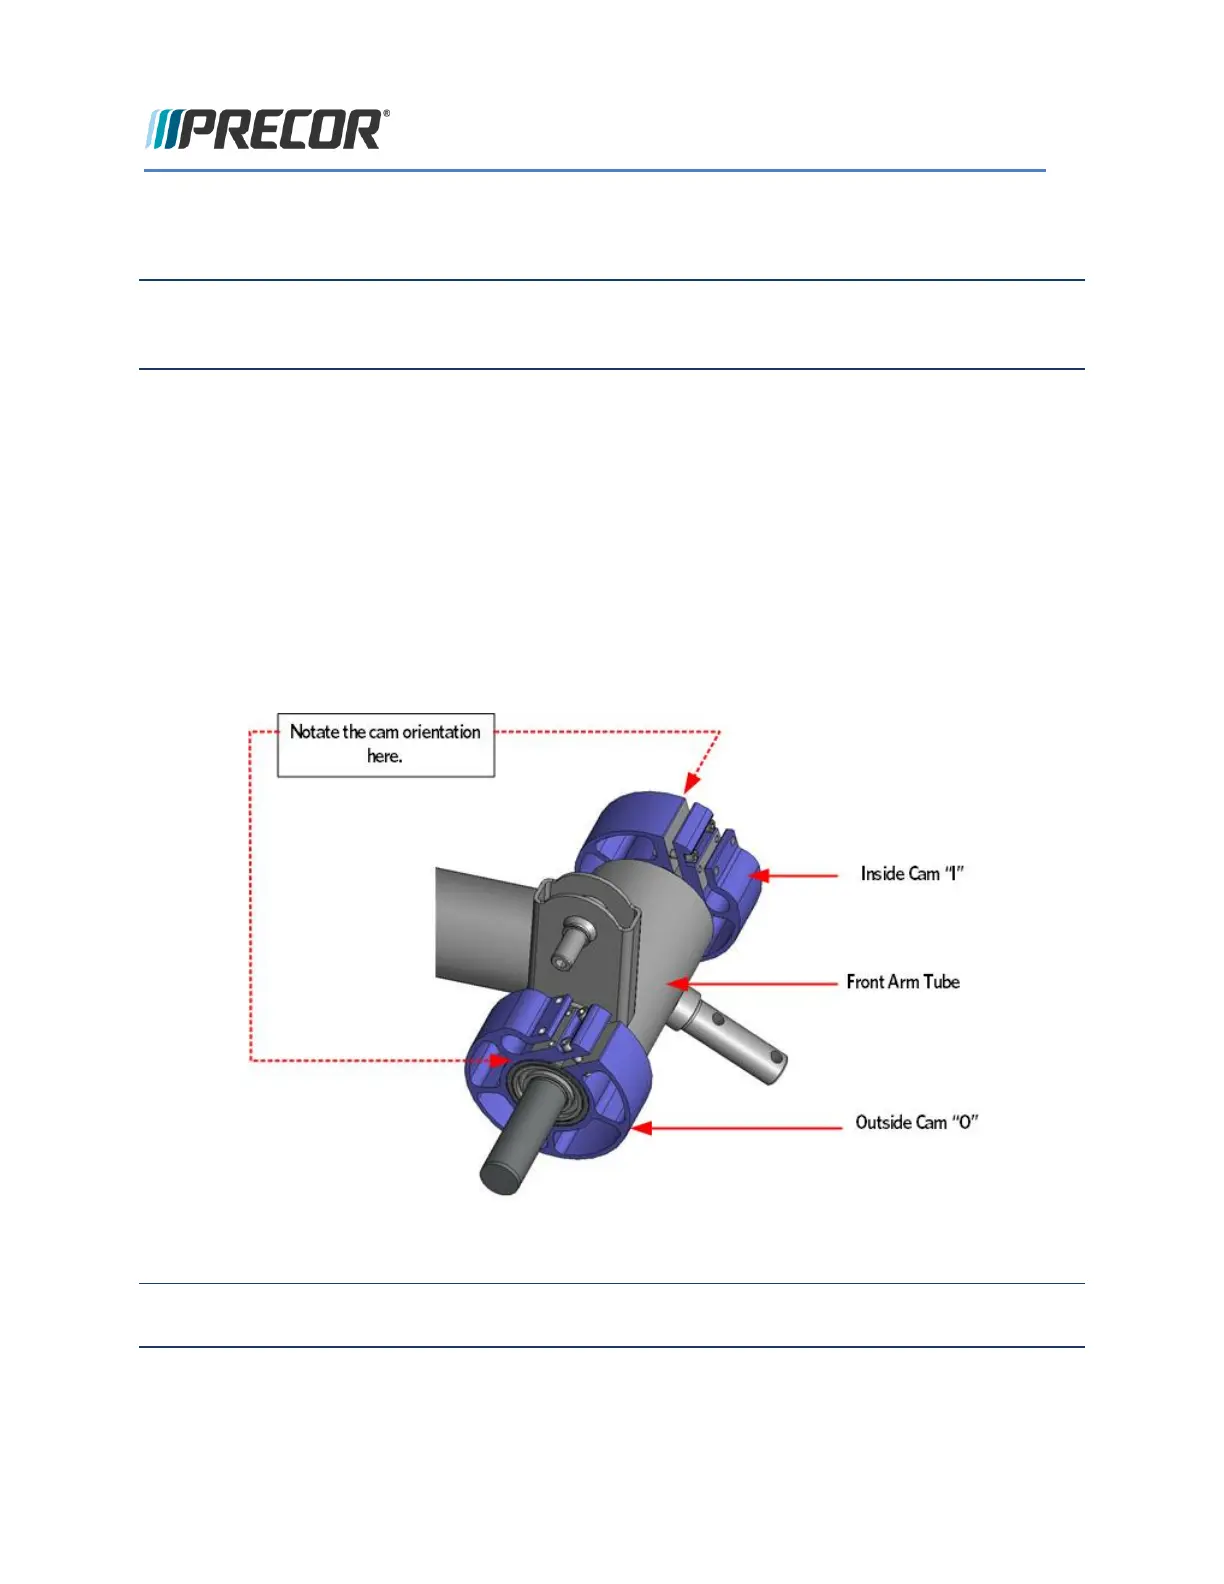
1 Diagnostics Mark the sides of the inside and outside cams with a notation to indicate the sides facing
away from the front arm tube. For example, mark the outside cam with an "O" and the inside with an "I".
FIGURE 131: FRONT ARM CAM ORIENTATION
Note: Any time the flat belt terminal screws are removed from the flat belt clamp or cams, the screws
must be discarded and replaced with new screws.
2 Remove and discard the four screws and shims that secure the two flat belt cams to the front arm tube,
slide the cams off the front arm tube.
3 Remove the two square keys that align the cam to the front arm tube.