127
Editing a Sample
9.
If you are sure you want to write the multisample, press
[ENTER].
If you decide to cancel, press [EXIT].
Never switch off the Fantom-XR while data is being saved.
10.
When the data has been written, the Create Patch screen
will appear.
If you want to use the multisample as a patch, create the patch
as described in step 4 and following of
“Creating a Patch from
a Sample (Create Patch)”
(p. 124).
If you don’t want to use the multisample as a patch, simply
press [EXIT].
* You cannot listen to a multisample unless you assign it to a part as a
patch. If you press [EXIT] at this point, the multisample will be saved,
but if you want to actually play it, you’ll need to assign the saved
multisample to a patch using a separate procedure (p. 124).
Assigning a multisample to the
desired keys
In order to assign a multisample to the desired keys, you’ll need to set
the Original Key of each sample to the appropriate keys. Then, when
you execute the Create Multisample operation, the Fantom-XR will
assign the samples to the keyboard and set the split points automatically.
1.
In the Sample List screen, select the sample that you want
to include in your new multisample.
2.
Press [MENU].
The Sample Utility screen will appear.
3.
Use or to select “Sample Parameter.”
4.
Press [ENTER].
The Sample Parameter screen will appear.
fig.15-020
5.
Set the Original Key to the note number of the key to which
you want to assign the sample.
6.
Press [SHIFT] so it lights, and then press .
The Sample LIST screen will appear. Select the next sample.
7.
Press [ENTER].
The Sample Parameter screen will appear.
Specify the Original Key of the selected sample.
* If you open the Sample List screen from the Sample Parameter screen
in this way, you can press [ENTER] to return directly to the Sample
Parameter screen. This is convenient when you’re setting the Original
Key of several samples.
8.
Repeat steps 5–7 to specify the Original Key of each sample.
9.
When you’ve finished setting the Original Key of all
samples, create the multisample as described in “Creating
a Patch from Multiple Samples (Create Multisample)” (p.
126).
This operation cuts the portions of the sample that are earlier than
the Start Point and later than the Loop End Point.
* You cannot execute this with more than one sample selected.
1.
In the Sample List screen, select the sample that you want
to edit.
2.
Either press [ENTER], or press [SHIFT] so it lights and then
press [SAMPLING].
The Sample Edit screen will appear.
3.
Set the start point and end point of the sample as described
in “Setting the Start/End Points of the Sample” (p. 122).
4.
Press [SHIFT] so it lights, and then press .
The Sample Modify Menu screen will appear.
* Alternatively, you can press [ENTER] to access the screen.
5.
Use or to select “Truncate.”
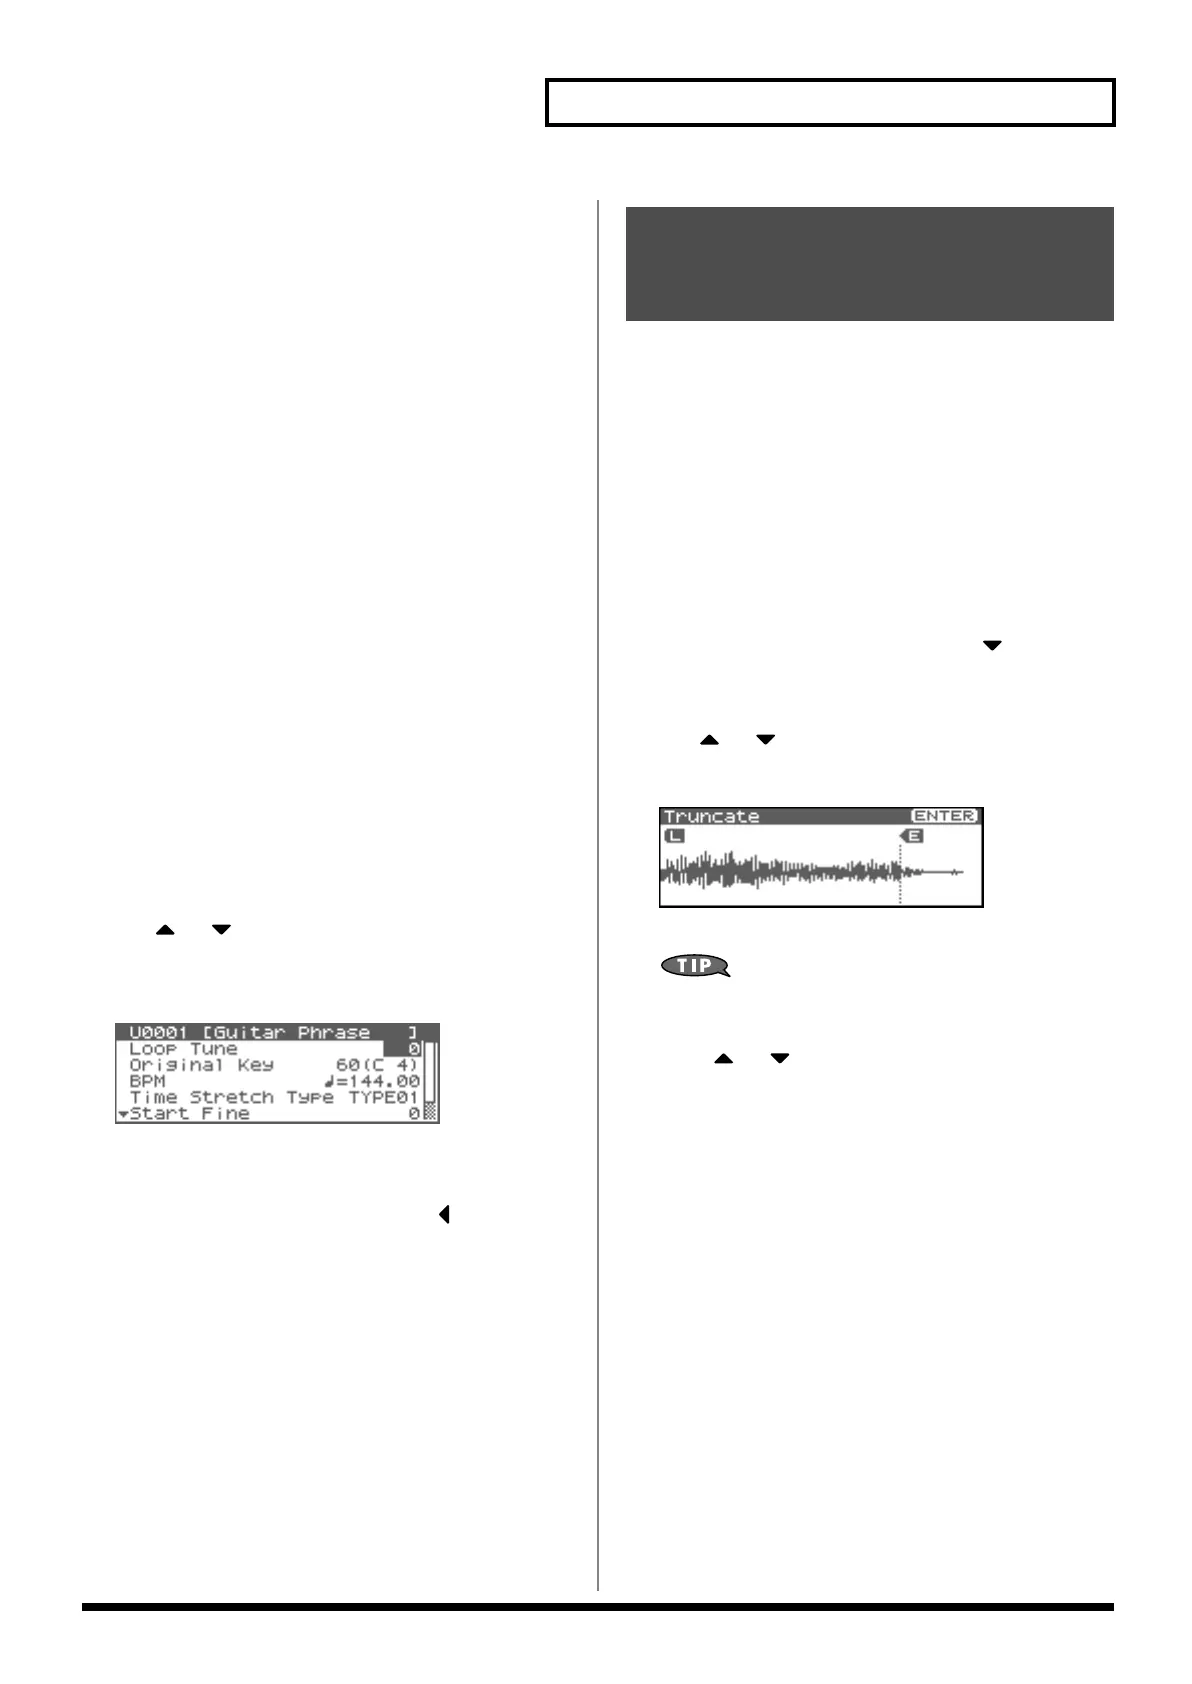
6.
Press [ENTER].
fig.15-021
7.
Press [ENTER].
You can press the OUTPUT knob to audition the sound of the
sample that you have specified the range in the step 3.
8.
Press or to select how the sample will be handled.
• Add as a new sample
The currently selected sample will be created as a new sample.
• Replace an existing sample
The currently selected sample will be replaced by the edited
sample.
9.
Press [ENTER].
A message will ask you for confirmation.
10.
Press [ENTER] to execute the Truncate operation.
* To cancel, press [EXIT].
Removing Unwanted
Portions of a Sample
(Truncate)
Fantom-XR_r_e.book 127 ページ 2006年4月4日 火曜日 午前10時14分

 Loading...