47
Creating a Patch
1.
Select the patch in the Patch Play screen (p. 40).
You cannot edit the patches in the GM2 group.
If you want to create a patch from scratch (rather than starting
from an existing patch), execute the
Initialize
operation (p. 69).
2.
Press [SHIFT] so it lights, and then press .
The Patch Edit Menu screen will appear.
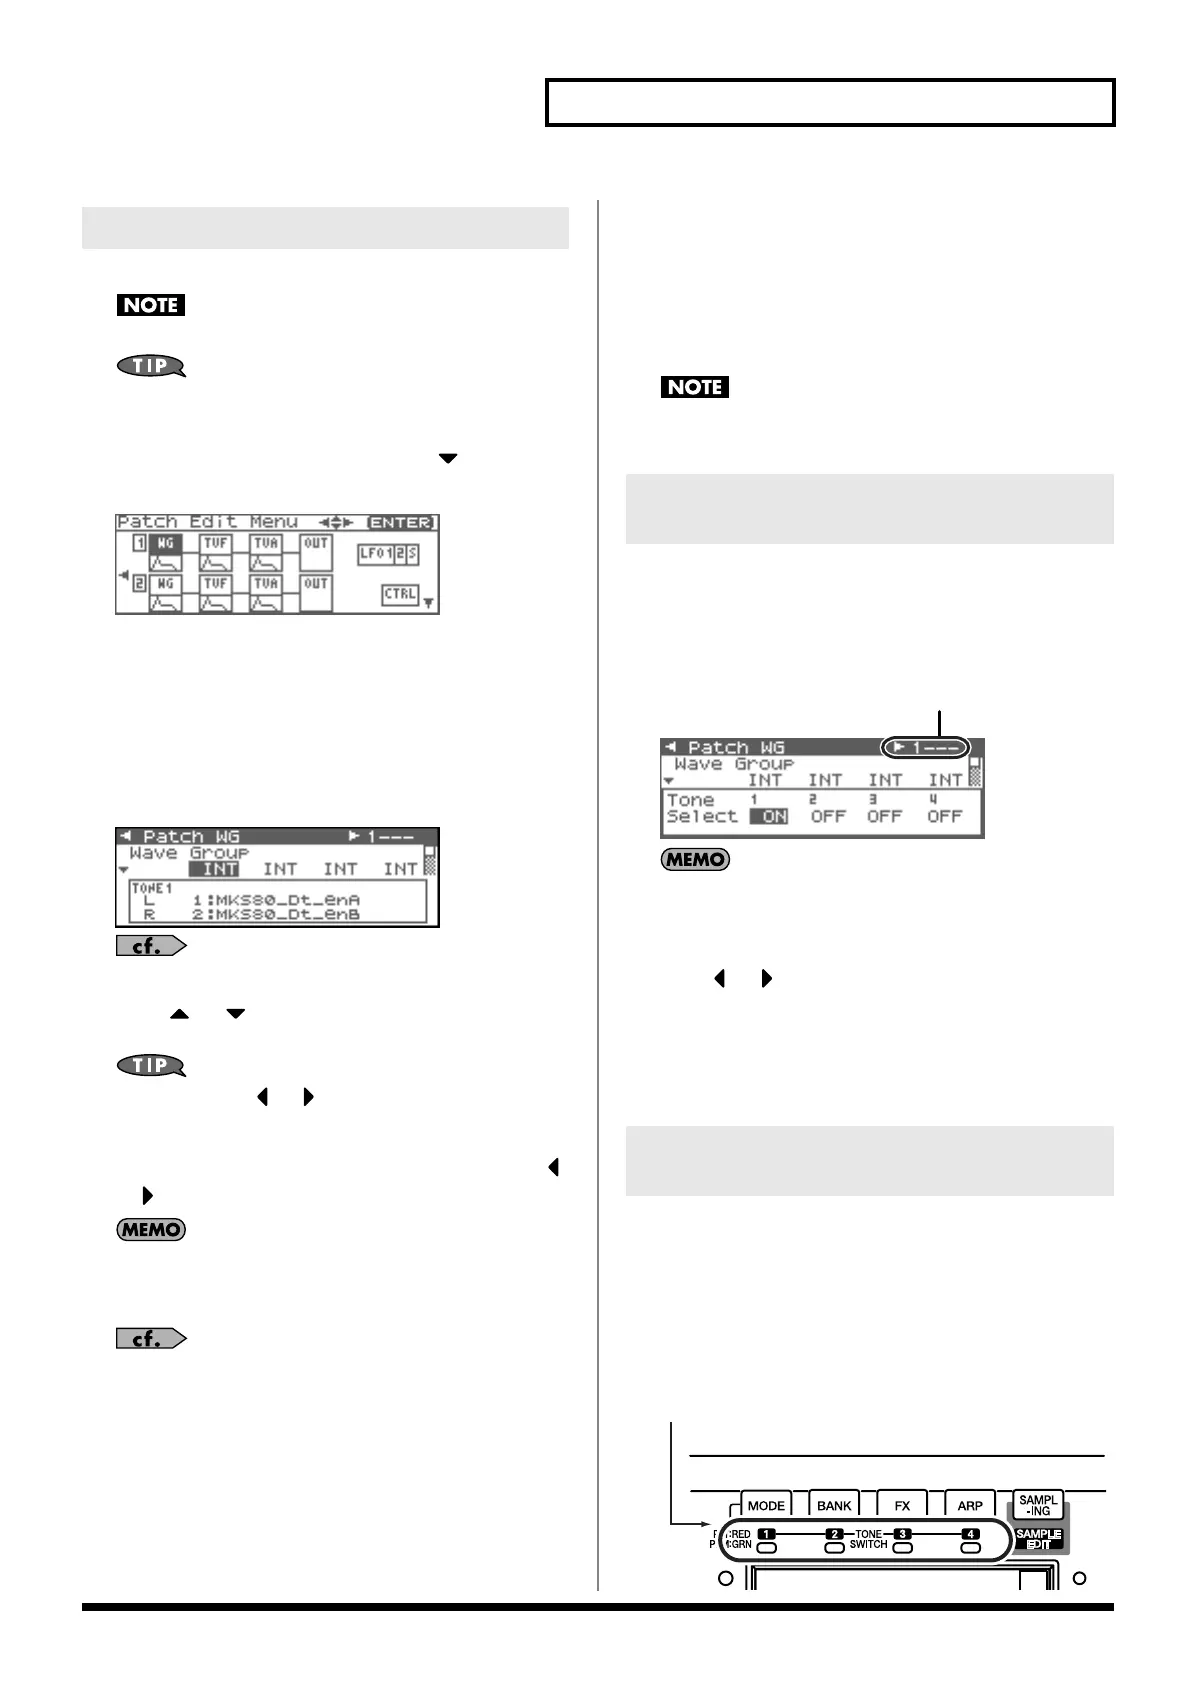
fig.06-003
3.
Refer to “Patch Edit Menu screen structure” (p. 46), and
turn the VALUE dial or use [CURSOR] to select the edit
group containing the patch parameter you want to adjust.
4.
Press the VALUE dial or [ENTER].
The Patch Edit screen will appear.
The screen that you see will depend on the edit group of the
selected parameter.
fig.06-003a
“Functions of Patch Parameters”
(p. 49)
5.
Press or to move the cursor to the parameter you
wish to modify.
You can also press or to move to an edit group of
another parameter.
6.
If you want to edit a parameter for a specific tone, press
or to select the tone that you want to edit.
You can press [SHIFT] so it lights, and then press [INC] to
successively turn on the tone located at the right of the selected
tone. Pressing [DEC] will turn off the tone.
If you want to select one or more tones, use the Tone Select
screen (p. 47).
7.
Turn the VALUE dial or use [INC][DEC] to get the value you
want.
If you’ve selected two or more tones, your editing will modify
the parameter values for all selected tones by the same amount.
8.
Repeat steps 3 (or 5) -7 to set each parameter you want to
edit.
9.
Save the changes you’ve made (p. 69).
If you do not wish to save changes, press [EXIT] to return to the
Patch Play screen.
If you return to the Patch Play screen without saving, the
indication “E” is displayed in the upper right of the Patch Play
screen. This “E” indication disappears when you save the patch
to the Fantom-XR’s internal user memory or to the memory card.
If you turn off the power or select a different sound while the
display indicates “E,” your edited patch will be lost.
When editing parameters that apply to a specific tone, here’s how to
specify the tone you want to edit.
1.
In the Patch Edit screen, press [ENTER].
The Tone Select screen will appear.
fig.06-004
Another way to access the Tone Select screen is to press
[MENU] in the Patch Edit screen to access the Patch Utility
screen, then choose “Tone Select” and press [ENTER].
2.
Press or to select a tone, and turn the VALUE dial or
use [INC][DEC] to switch the tone you’re editing on/off.
* You can’t switch all tones off.
3.
When you have made your selection, press [EXIT] to close
the Tone Select screen.
Since a patch is a combination of up to four tones, you can switch unwanted
(tones out of the four) off and get just the sound of a specific tone.
1.
Select the patch in the Patch Play screen (p. 40).
2.
Press [SHIFT] so it lights, and press [MODE] (Tone 1),
[GROUP] (Tone 2), [FX] (Tone 3), or [ARP] (Tone 4) to switch
the corresponding tone on/off.
fig.06-004a
How to Make Patch Settings
Selecting the Tone to edit
(Tone Select)
Selecting the Tones That Will Sound
(Tone Switch)
Selected tone(s)
If a tone is switched on, its indicator will light.
Fantom-XR_r_e.book 47 ページ 2006年4月4日 火曜日 午前10時14分