SATO M-10e TT/DT Printers Service Manual
PN 900109
Rev. A
5-2
Section 5. Mechanical Adjustments
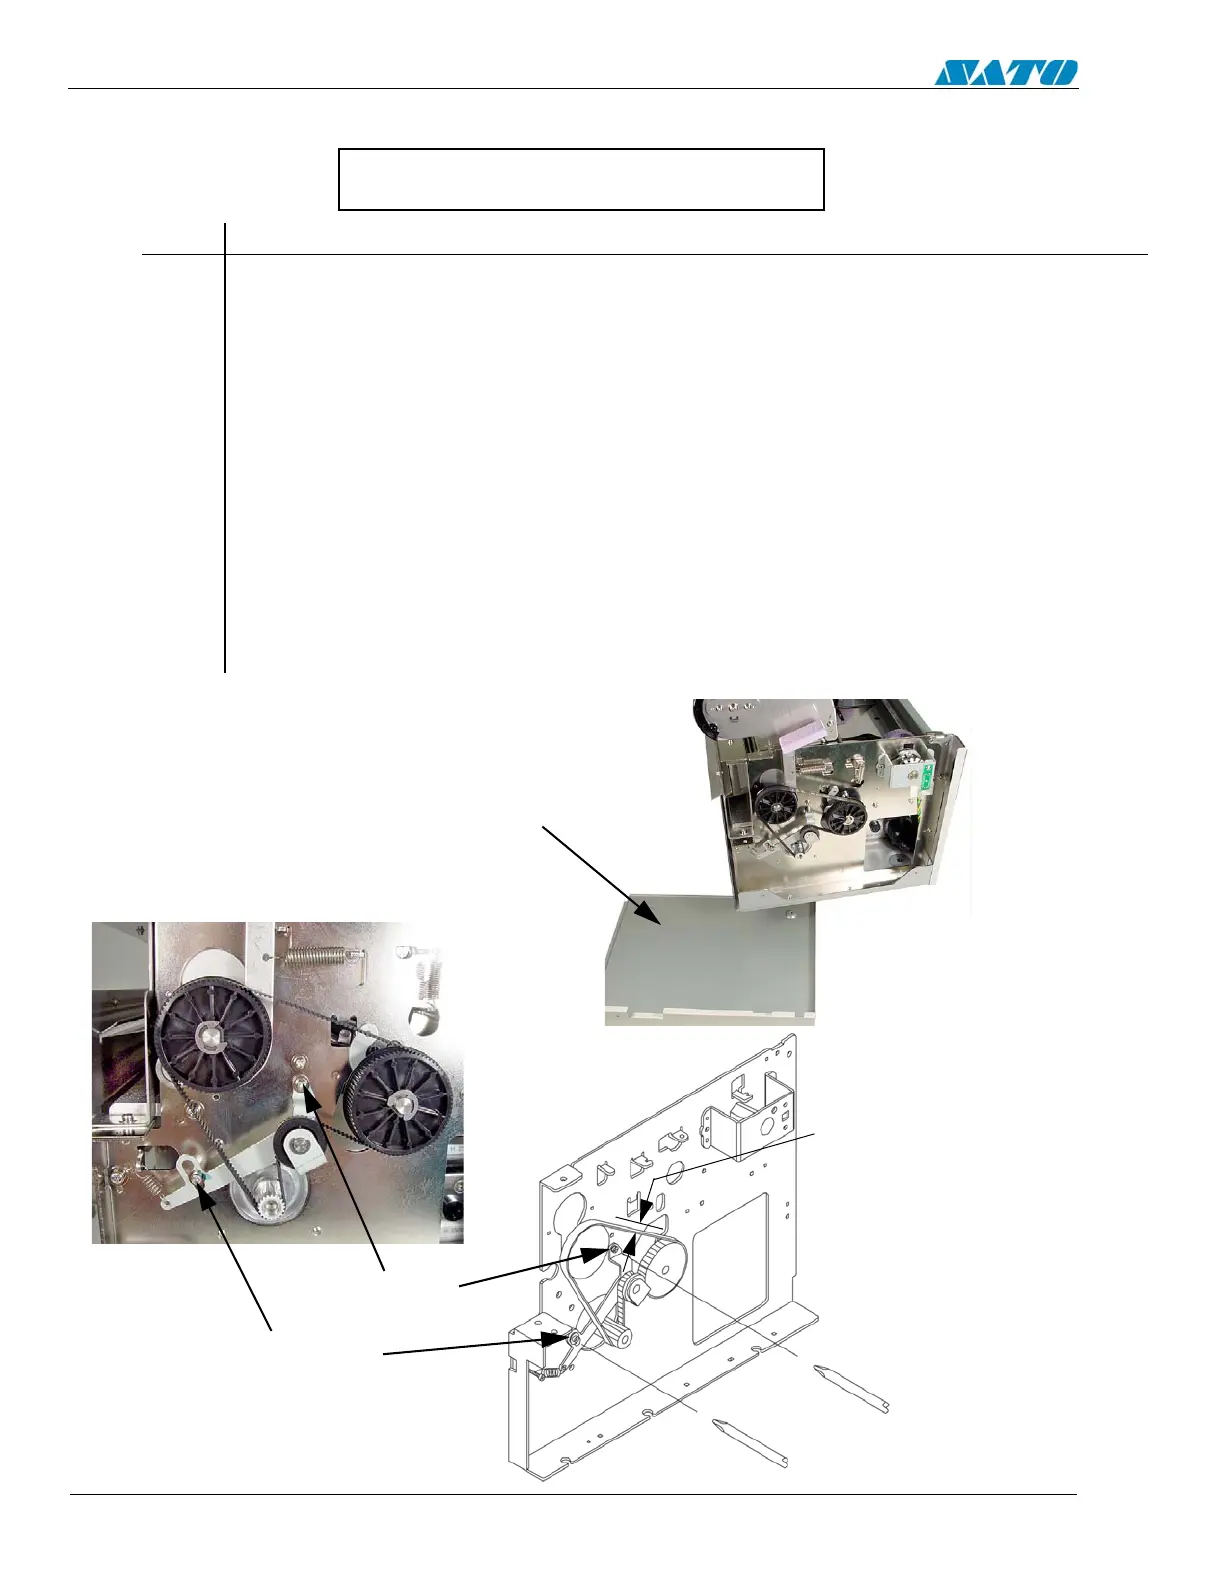
5.2 Timing Belt Adjustment
STEP PROCEDURE
1. Switch the printer OFF and disconnect the power cord.
2. Raise and remove the access cover
3. Unfasten (5) screws from the right side cover and remove.
4. Pull the center of the timing belt with the tension gauge and note the tension reading
when the belt is moved 1 to 2mm. If the tension reading is not within the range of 100-
500g, adjust the tension of the belt by loosening the screws in the order a to b. Loosen
screw b about one complete turn. The belt will be automatically stretched through the
spring.
5. Tighten the screws in the order a to b. NOTE: The screws must be tighten in this order
to achieve accurate tension.
NOTE: The deflection between the platen pulley and the feed pulley is to be 1-2mm.
If unable to obtain a suitable tension, replace the timing belt. Refer to Section 6.4
SCREW “b”
SCREW “a”
UNFASTEN (5) SCREWS
AND REMOVE THE
RIGHT SIDE COVER
TENSION RANGE
100-500g
Required Equipment: 1 Kg Tension Gauge

 Loading...


