PN 9001098
Rev. A
5-5
SATO M-10e TT/DT Printers Service Manual
Section 5. Mechanical Adjustments
5.5 Ribbon Tension Adjustment Part 1
If the ribbon is not smooth across the adjust plate (ribbon wrinkle), adjustment is required.
To remedy the problem, perform the following adjustments.
STEP PROCEDURE
1. Connect the power cord to the printer and AC outlet. Turn the printer ON.
2. Raise the access cover and load the ribbon and label stock. (NA for ribbon on
Direct Thermal Units.)
3. Check for even ribbon tension by watching the ribbon movement as it moves
upward toward the ribbon rewind spindle. If it appears uneven, (wrinkles) proceed
to Step 4.
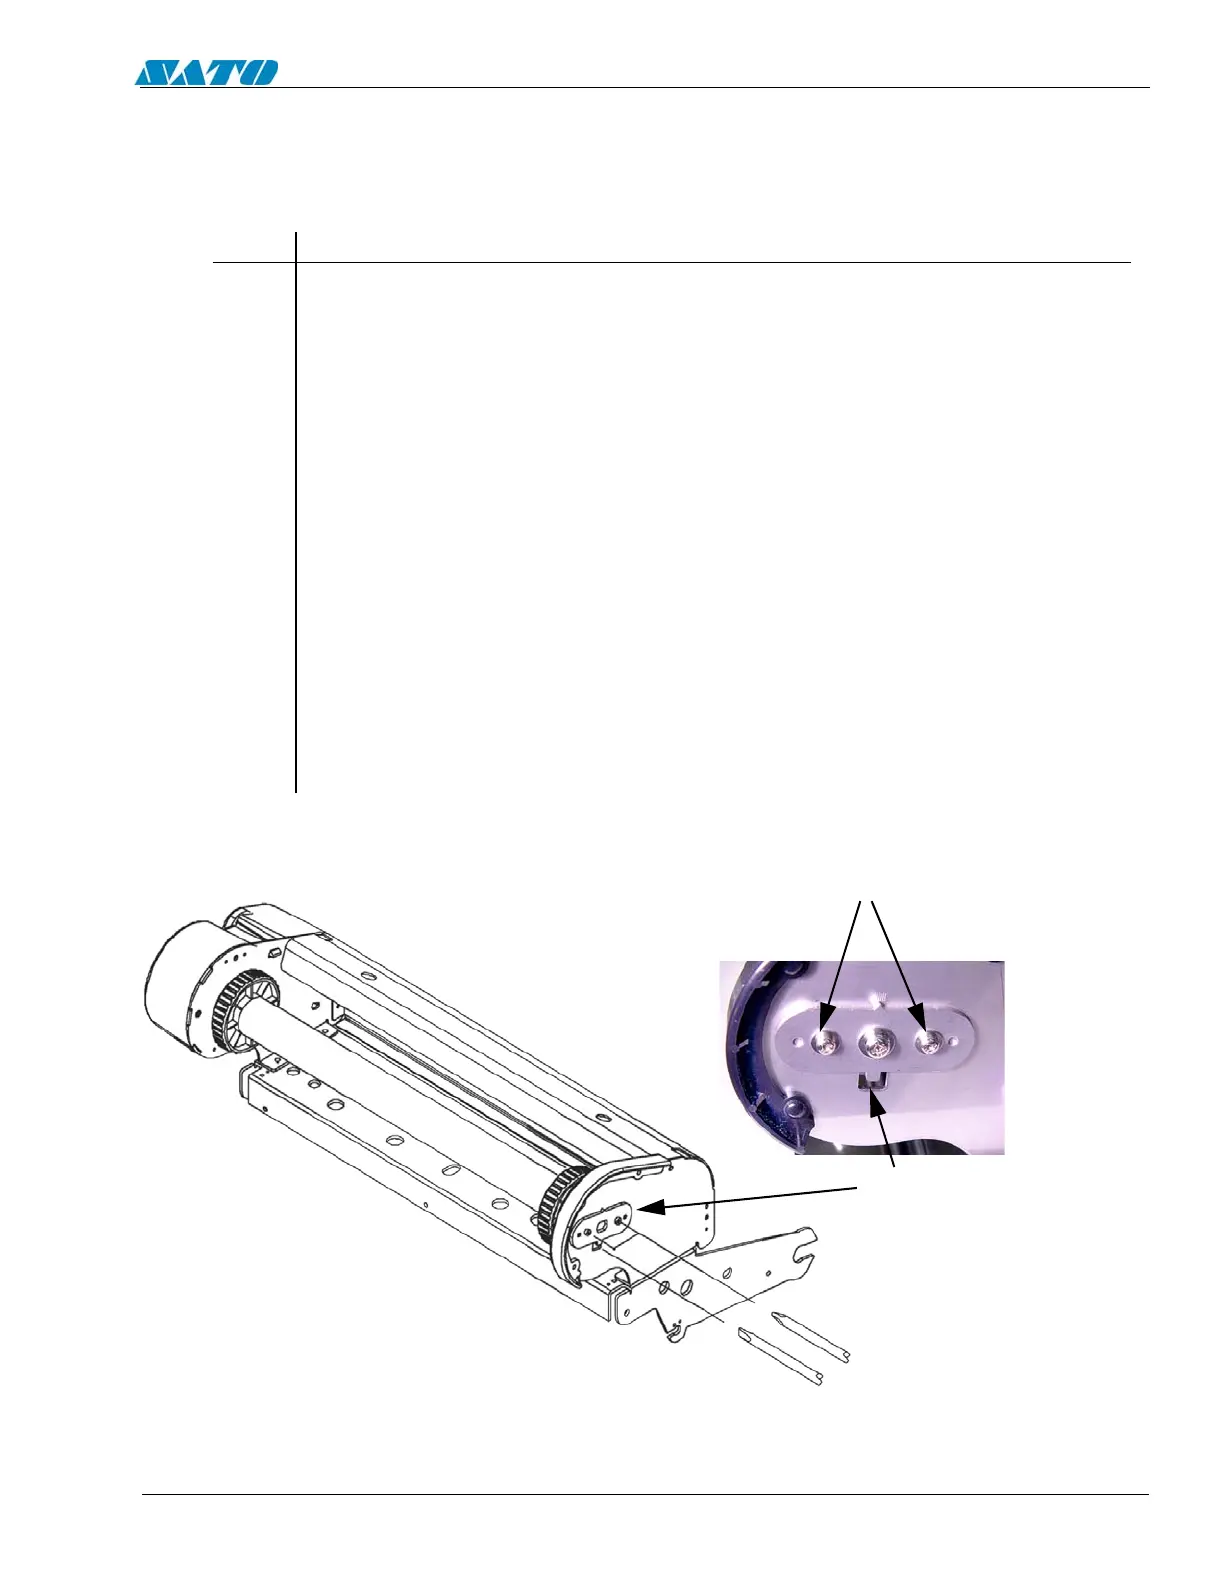
4. Reposition the ribbon adjust plate by loosening the two fixed screws of the adjust
plate at the left side of the ribbon rewinder.
5. Insert a flat blade screwdriver in the slot and adjust the front and back of the ribbon
to obtain equal tension.
6. After adjustment, tighten the two fixed secrews.
7. Verify that the label and ribbon are still tracking correctly. If still out of adjustment
perform Part 2, next page.
INSERT A FLAT BLADE
SCREW DRIVER IN
SLOT TO ADJUST
LOOSEN (2) FIXED
SCREWS

 Loading...


