SATO M-10e TT/DT Printers Service Manual
PN 900109
Rev. A
5-6
Section 5. Mechanical Adjustments
STEP PROCEDURE
Continue from Part 1 if necessary.
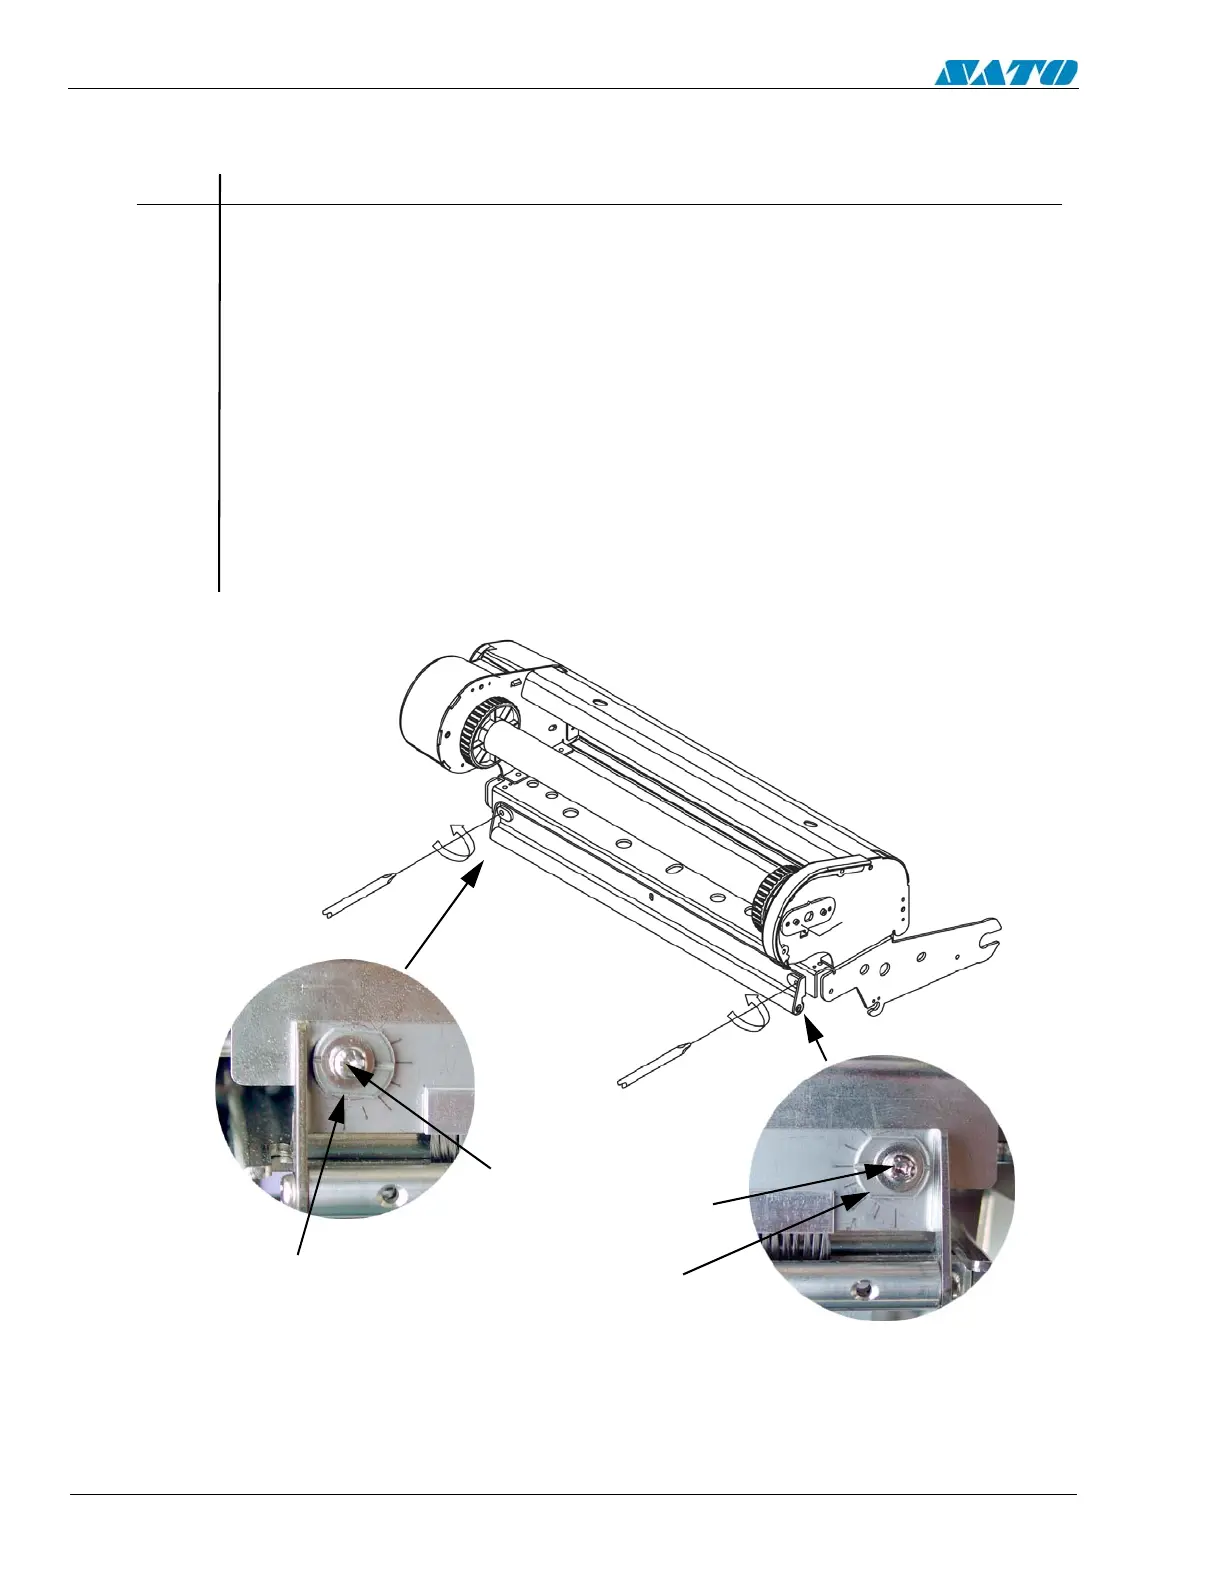
1. Loosen the locking screws, (2 places). Turn each eccentric nut clockwise to adjust
the height of the ribbon turning bar to eliminate ribbon wrinkles. (NA for ribbon on
Direct Thermal Units.)
2. Check for even ribbon tension by watching the ribbon movement as it moves
upward toward the ribbon rewind spindle. If it appears uneven, (wrinkles) proceed
to Step 4.
3. When wrinkles have been eliminated, hold the eccentrics in place with the 10mm
wrench and tighten the locking screws loosened in Step 2.
4. After adjustment, verify that the label and ribbon are still tracking correctly.
Ribbon Tension Adjustment (Part 2)
LEFT SIDE
ECCENTRIC NUT
RIGHT SIDE
ECCENTRIC NUT
LOCKING SCREWS

 Loading...


