PN 9001098
Rev. A
4-19
SATO M-10e TT/DT Printers Service Manual
Section 4. Electrical Checks and Adjustments
STEP PROCEDURE
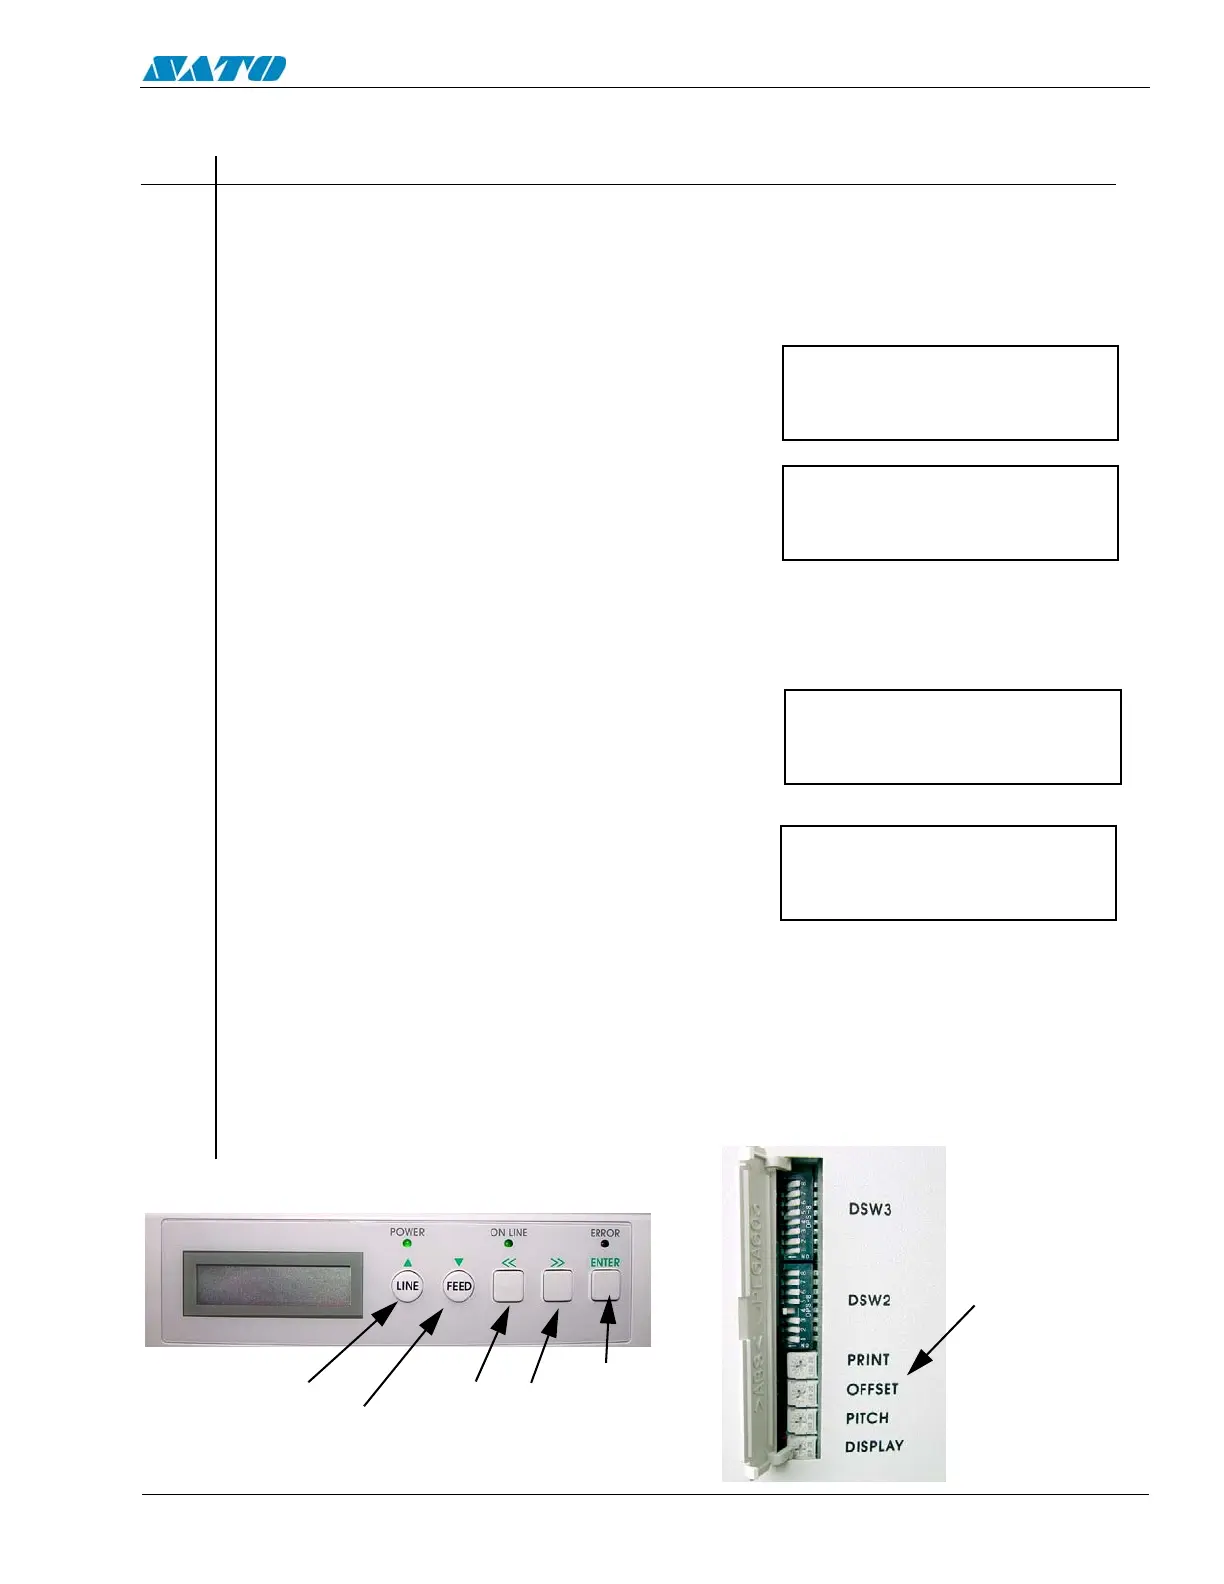
1. Switch DSW2-4 to the OFF position on the top cover.
2. Remove the printer ribbon.
3. Power on the printer while pressing the FEED key. Release the Feed key after the beep
sound and the printer will display the Test Print Mode message on the LCD panel.
4. Press the ENTER key to display the next screen.
5. Press the ENTER key and check the occuring of ribbon and error under user test print.
6. Turn OFF the power supply.
7. Set the ribbon at the printer.
8. Repeat Step 3, (Power on the printer etc.)
9. Press the ENTER key .
10. Press the ENTER key again and ensure that the user test print operation can function
normally.
11. Turn OFF the power.
NOTE: If unable to detect ribbon end, replace the ribbon sensor unit. Refer to Section 6.17
test print mode
configuration
test print size
26cm
4.13 Checking the Ribbon Sensor
LINE KEY
FEED KEY
DIRECTION
KEYS
ENTER
KEY
VR2 OFFSET
test print mode
configuration
test print size
26cm

 Loading...


