SATO M-10e TT/DT Printers Service Manual
PN 900109
Rev. A
6-2
Section 6. Replacement Procedures
6.2 Steps Prior to Some Procedures
Some procedures in this section require access to onents that are not readily accessable without
removing the covers of the unit. You will be directed to this section whenever necessary.
STEP PROCEDURE
1. Switch the printer OFF and disconnect the power cord.
2. Raise the Access Cover and remove.
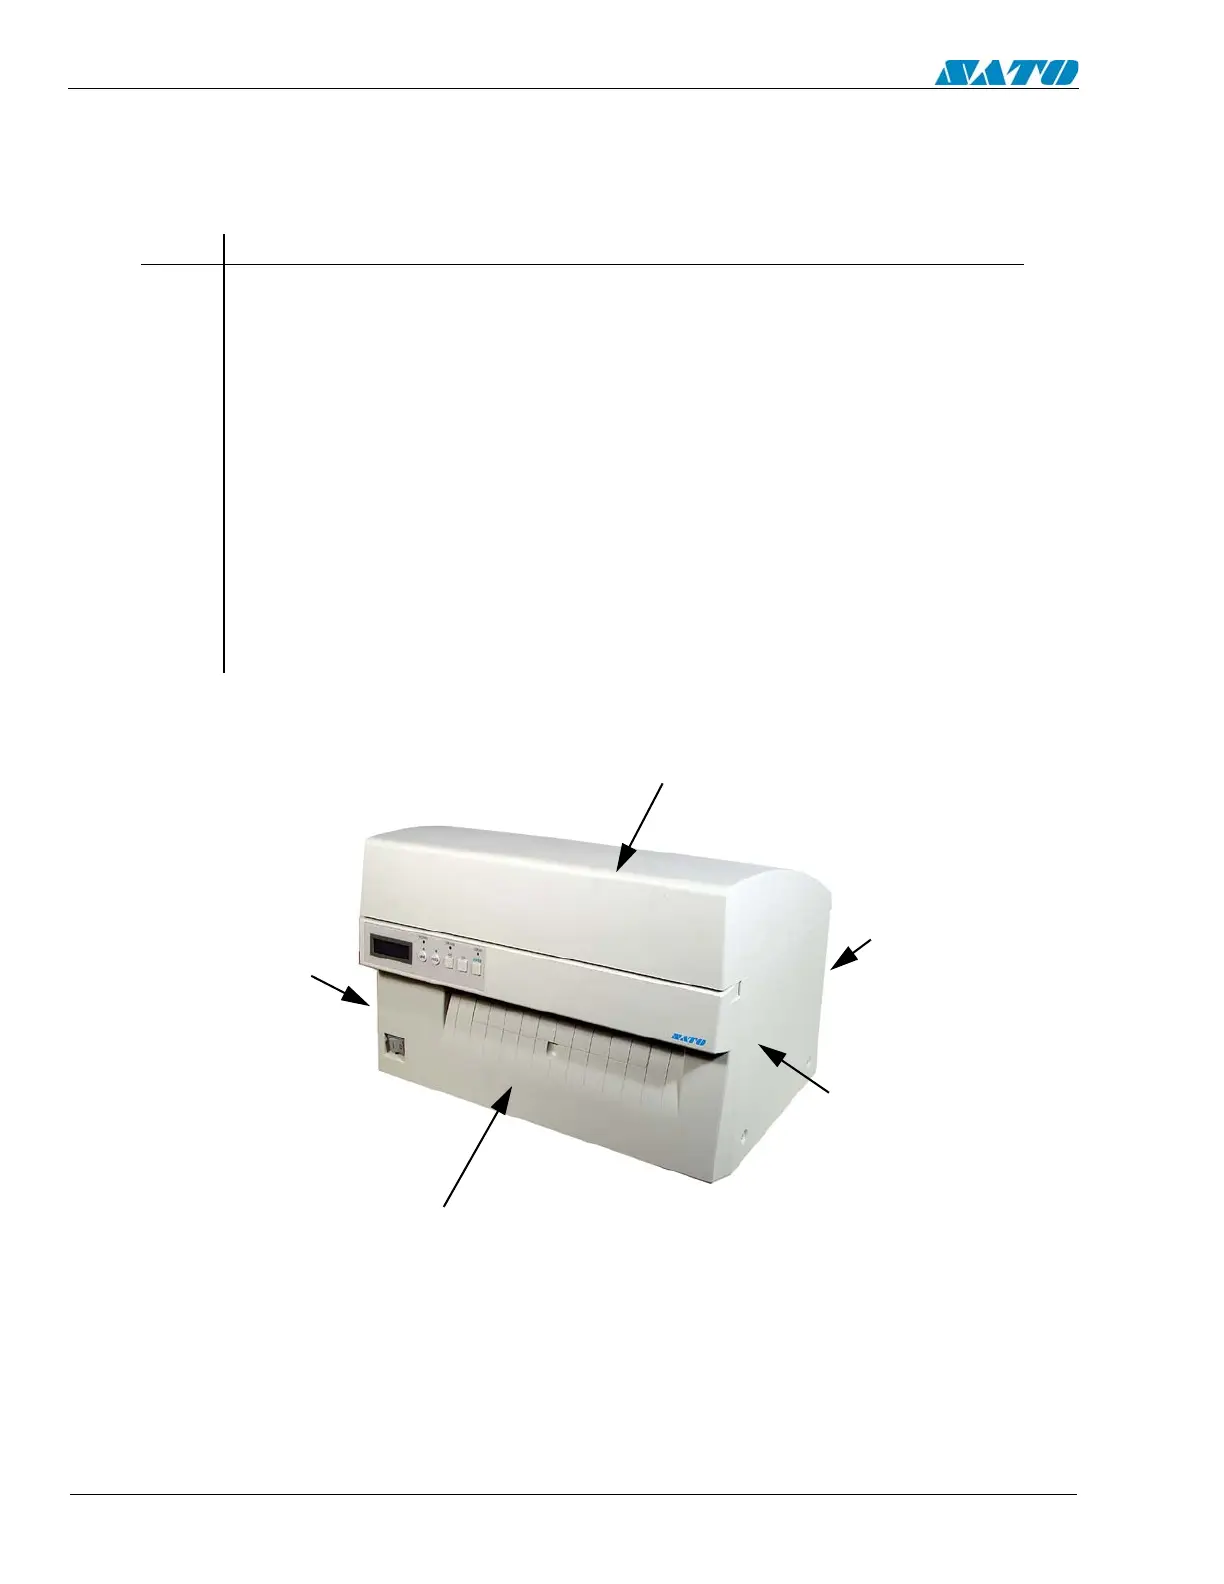
3. Refer to illustrations on page 6-3.
Detach the Front Cover.
Unfasten (2) screws from the top of front cover. Lift up cover to detach from (3)
slots. Detach (2) connectors.
4. Detach the Right Side and Left Side Covers.
Unfasten (5) screws from each side cover and remove.
5. Detach the Back Panel.
Unfasten (3) screws from back panel. Lift the panel straight up to manuver it from
the inside bracket, then pull toward your body. Disconnect cable going to the
green LED.
ACCESS COVER
RIGHT SIDE
COVER
LEFT SIDE
COVER
BACK PANEL
FRONT COVER

 Loading...


