Commissioning with PROFIBUS
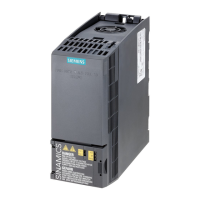
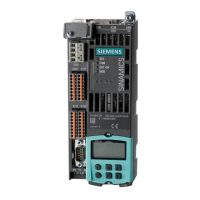
3.6 Initial commissioning using servo AC DRIVE with BOP20 as an example
Function Manual
62 Function Manual, 01/2011, 6SL3097-4AB10-0BP3
3.6.3 Quick commissioning using the BOP (example)
Table 3- 7 Quick commissioning for a motor with a DRIVE-CLiQ interface
Procedure Description Factory
setting
Note:
The drive must be set to the factory settings before first commissioning is carried out.
Device commissioning parameter filter *
0 Ready
1 Device configuration
1. p0009 = 1
30 Parameter reset
1
Device commissioning parameter filter *
0 Ready
1 Device configuration
2 Defining the drive type / function module
2. p0009 = 2
30 Parameter reset
1
Note:
When a configured DRIVE-CLiQ component is booted for the first time, the firmware is automatically updated to the status
in the non-volatile memory. This may take a few minutes and is indicated by the READY-LED on the corresponding
components flashing green/red and the Control Unit flashing orange (0.5 Hz). Once all updates have been completed, the
READY-LED on the Control Unit flashes orange at 2 Hz and the corresponding READY-LED on the components flashes
green/red at 2 Hz. For the firmware to be activated, a POWER ON must be carried out for the components.
Drive object, function module * 3. p0108[1] =
H0004
Bit 8 Extended setpoint channel
0000
Device commissioning parameter filter *
0 Ready
1 Device configuration
4. p0009 = 0
30 Parameter reset
1
Select drive object (DO) 2 ( = SERVO)
1 CU
2 SERVO
5. DO = 2
To select a drive object (DO), simultaneously press the Fn key and an arrow key.
The selected project is displayed at the top left.
1
6. p0840[0] =
r0019.0(DO 1)
BI: ON/OFF1 [CDS]
Sets the signal source for STW1.0 (ON/OFF1)
Interconnection with r0019.0 of the drive object Control Unit (DO 1)
Effect: Signal ON/OFF1 from the BOP
0
7. p1070[0] =
r1024
CI: Main setpoint [CDS]
Sets the signal source for speed setpoint 1 of the speed controller.
Interconnecting to r1024 on its own drive object
0
8. Save all
parameters
Press the P key for 3 s.
 Loading...