Handling Printed Models
7–2
DOC-06810 Rev. A
Removing Models After Printing
Afterprintingmodels,youshouldallowthemtocoolasmuchaspossible
beforehandlingthem.Ifadditionalmodelsdonothavetobeproducedon
theprinter,itisbesttolettheprintedmodelscoolintheprinter,withthe
coverclosed,aslongaspossible.
Removing the
Build Tray
From the
Printer
ThebuildtrayfortheObjet1000Plusprinterisremovable,whichaidsinthe
handlingofprintedmodels.Youuseaspecialcarttoremovethebuildtray
andtransferittothecleaningstation.
To remove the build tray:
1. PressF10.
or—
FromtheOptionsmenu,select
Go to Tray Lower Position.
Theprintblockmovesforwardandthebuildtraylowers.
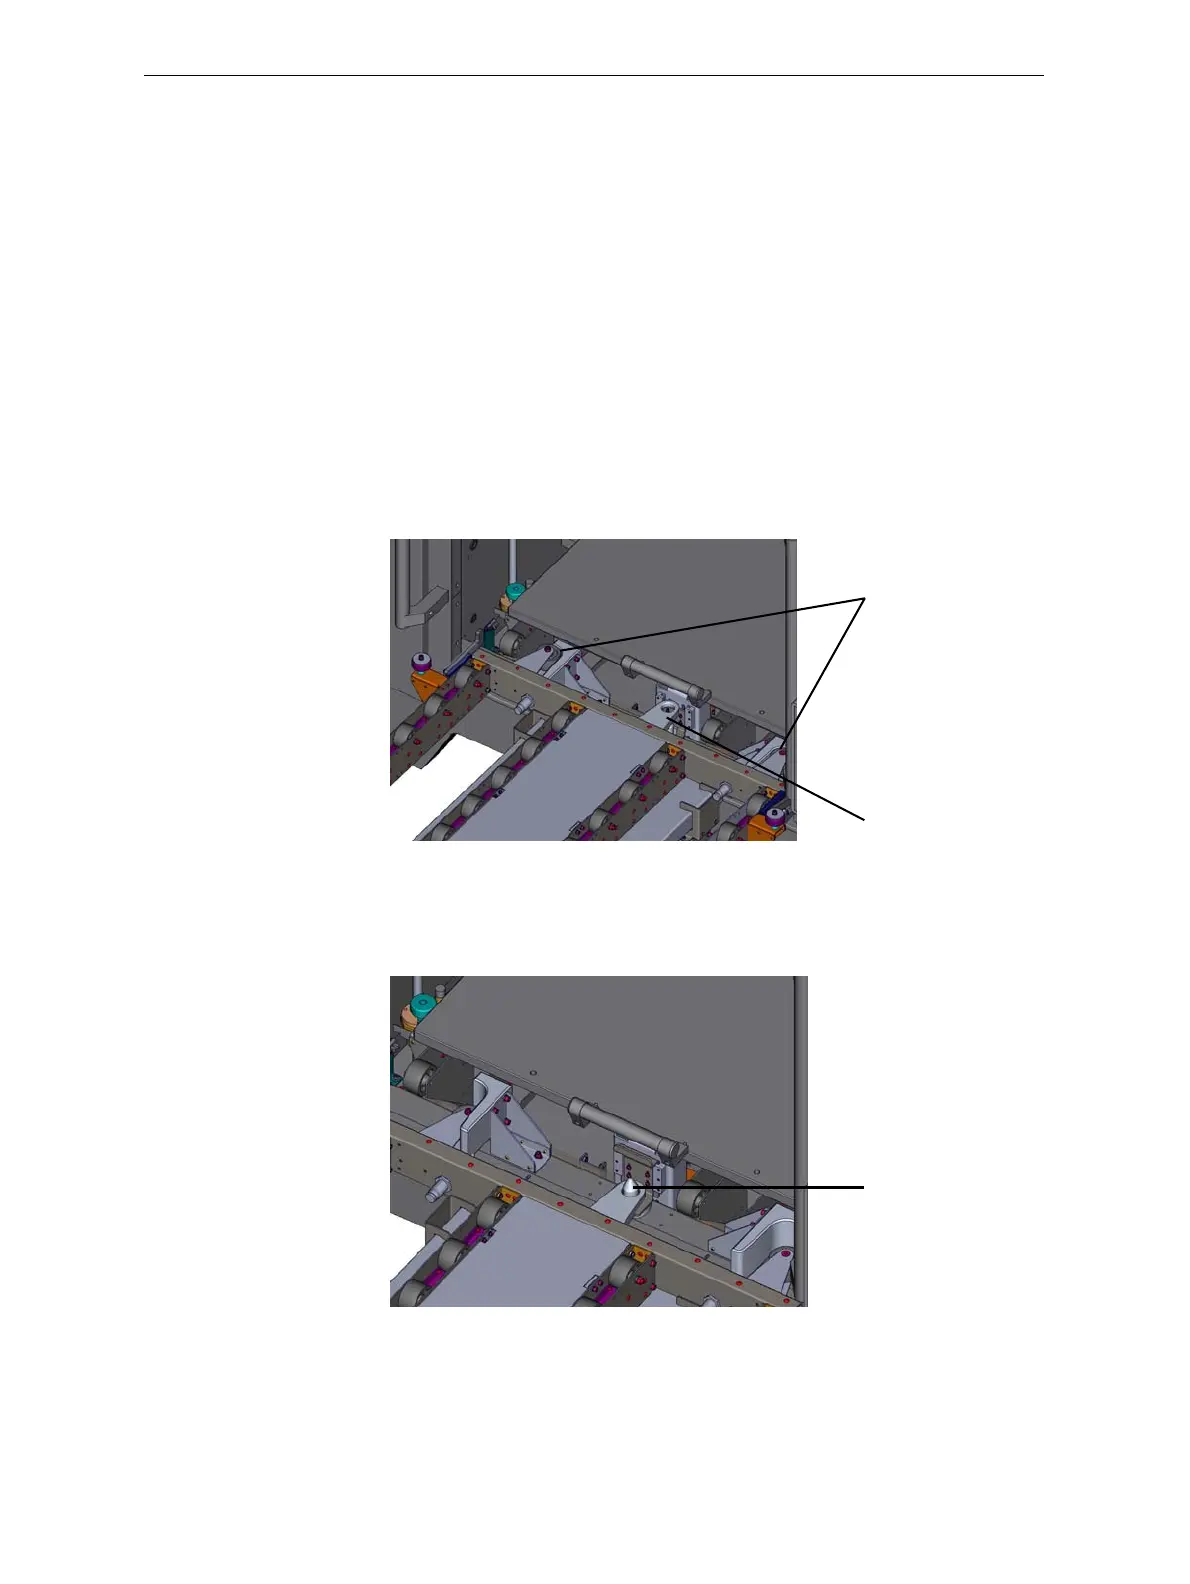
2. Raisethecart’splatformandpositionthedockingguidesasshown.
Figure 7-1:Positioning the cart for tray removal
Note: Make sure that the anchor on the platform is raised above the
docking pin on the printer.
3. Lowerthecartplatformsothattheanchorfitsoverthedockingpin.
Figure 7-2: Securing the cart to the printer
4. Pullthebuildtrayontothecart.
5. Raisethecart’splatformtoreleaseitfromthedockingpin.
Youcannowmovethecarttothecleaningarea.
Docking guides
Anchor
Docking pin