DOC-06810 Rev. A 5–33
Objet1000 Plus User Guide
Setting Model
Dimensions
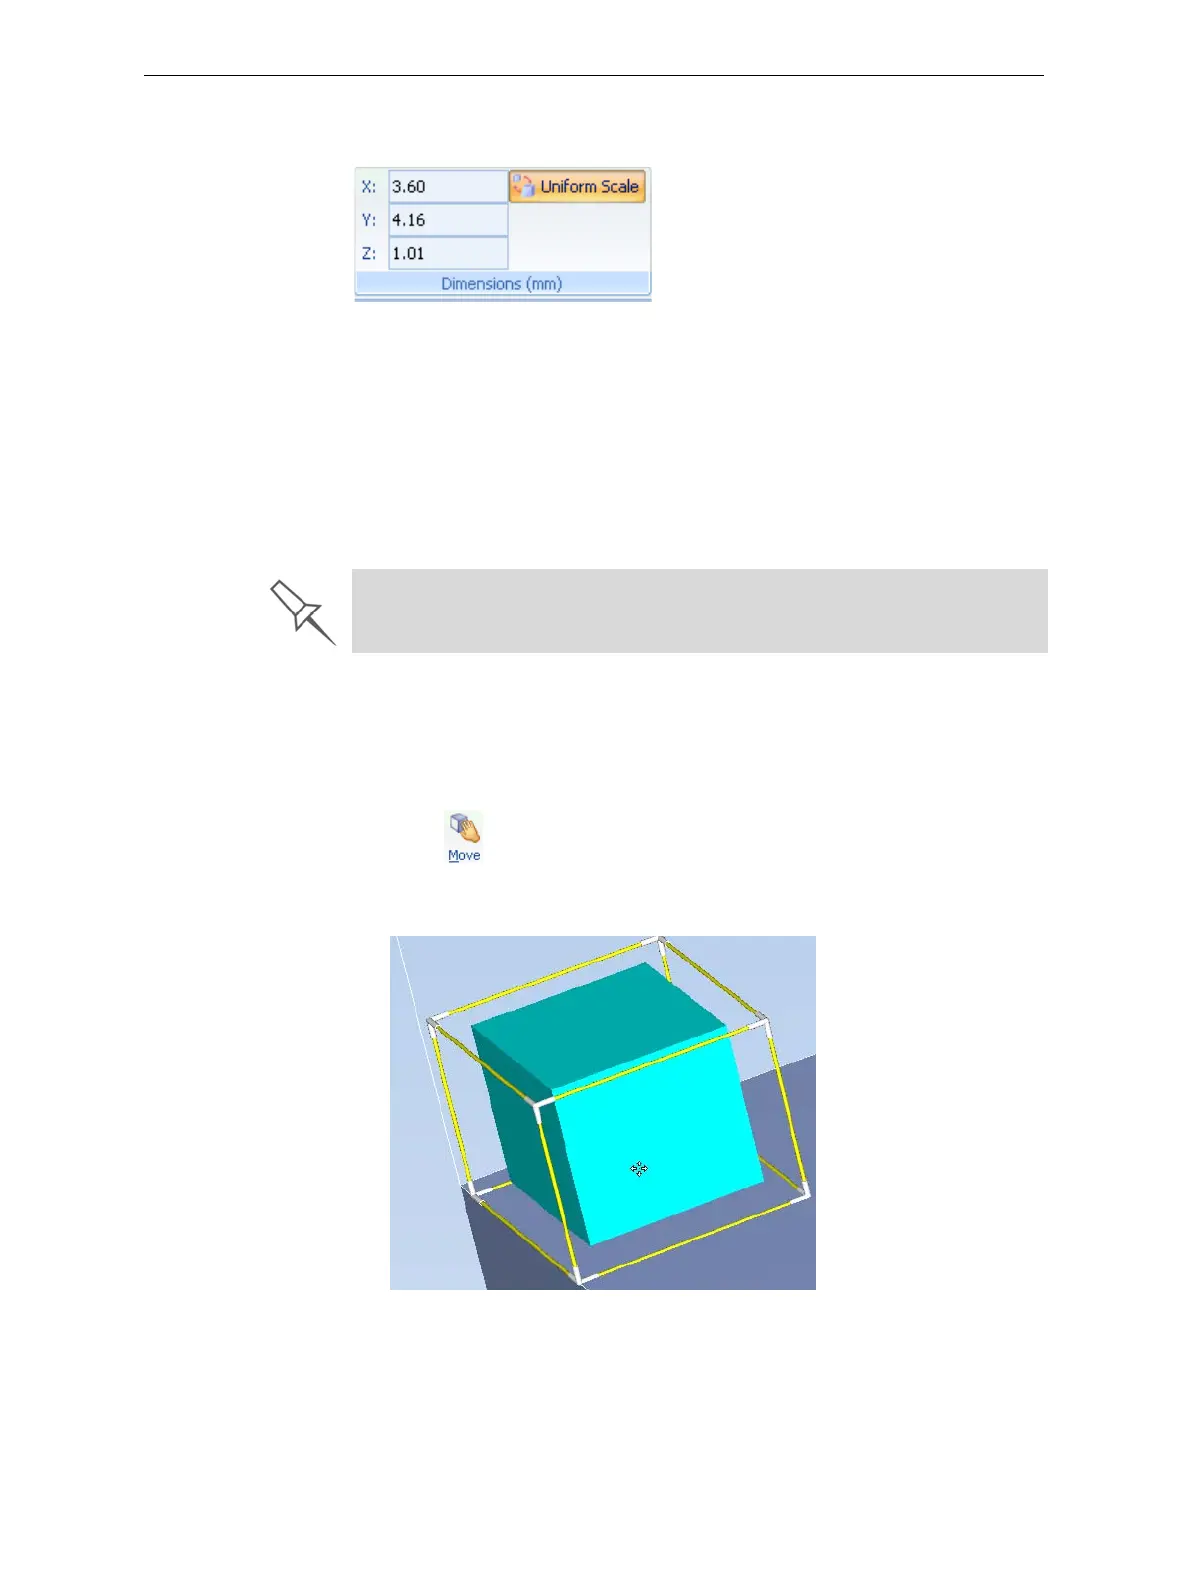
Youcanchangeanobject’sdimensionsbychangingitssizeontheX‐,Y‐,
andZ‐axes,fromtheDimensionsgroupontheModelSettingsribbon.
Figure 5-42: Dimensions on the Model Settings ribbon
• IfUniformScaleisenabled,changingtheobject’sdimensionononeaxis
affectstheotherdimensions,proportionately.
• Afterchangingameasurement,pressEnterorclickinanotherfieldin
theDimensionsgroup.
Note: You can change the height of the objects on the build tray only if this
is allowed by the Objet Studio settings (see “Positioning Objects on
the Z-Axis” on page 29).
Repositioning
Objects
Youcanmanuallymoveandrotateanobjectonthebuildtraywiththe
arrowkeys,orbydraggingitwiththemouse.
To manually manipulate an object:
1. Selectanobjectbyclickingitonthebuildtray,orinthemodeltree
pane.
2. ClickontheModelToolbar,orontheModelSettingsribbon.
Aframeappearsaroundtheobject,andthecursorchangestoindicate
thattheobjectcanbemoved.
Figure 5-43: Manually moving an object
The recommended minimum size for each object on the build tray is 800 mm
(on the X-axis) and 130 mm (on the Y-axis). Although smaller objects can be
printed, these minimum dimensions ensure good print quality.