(1) If the checkboxes are checked, the tab "Device CAN Settings" and/or "Device
Ethernet Settings" are opened.
(2) In these tabs it is possible to edit the CAN/Ethernet settings for the device.
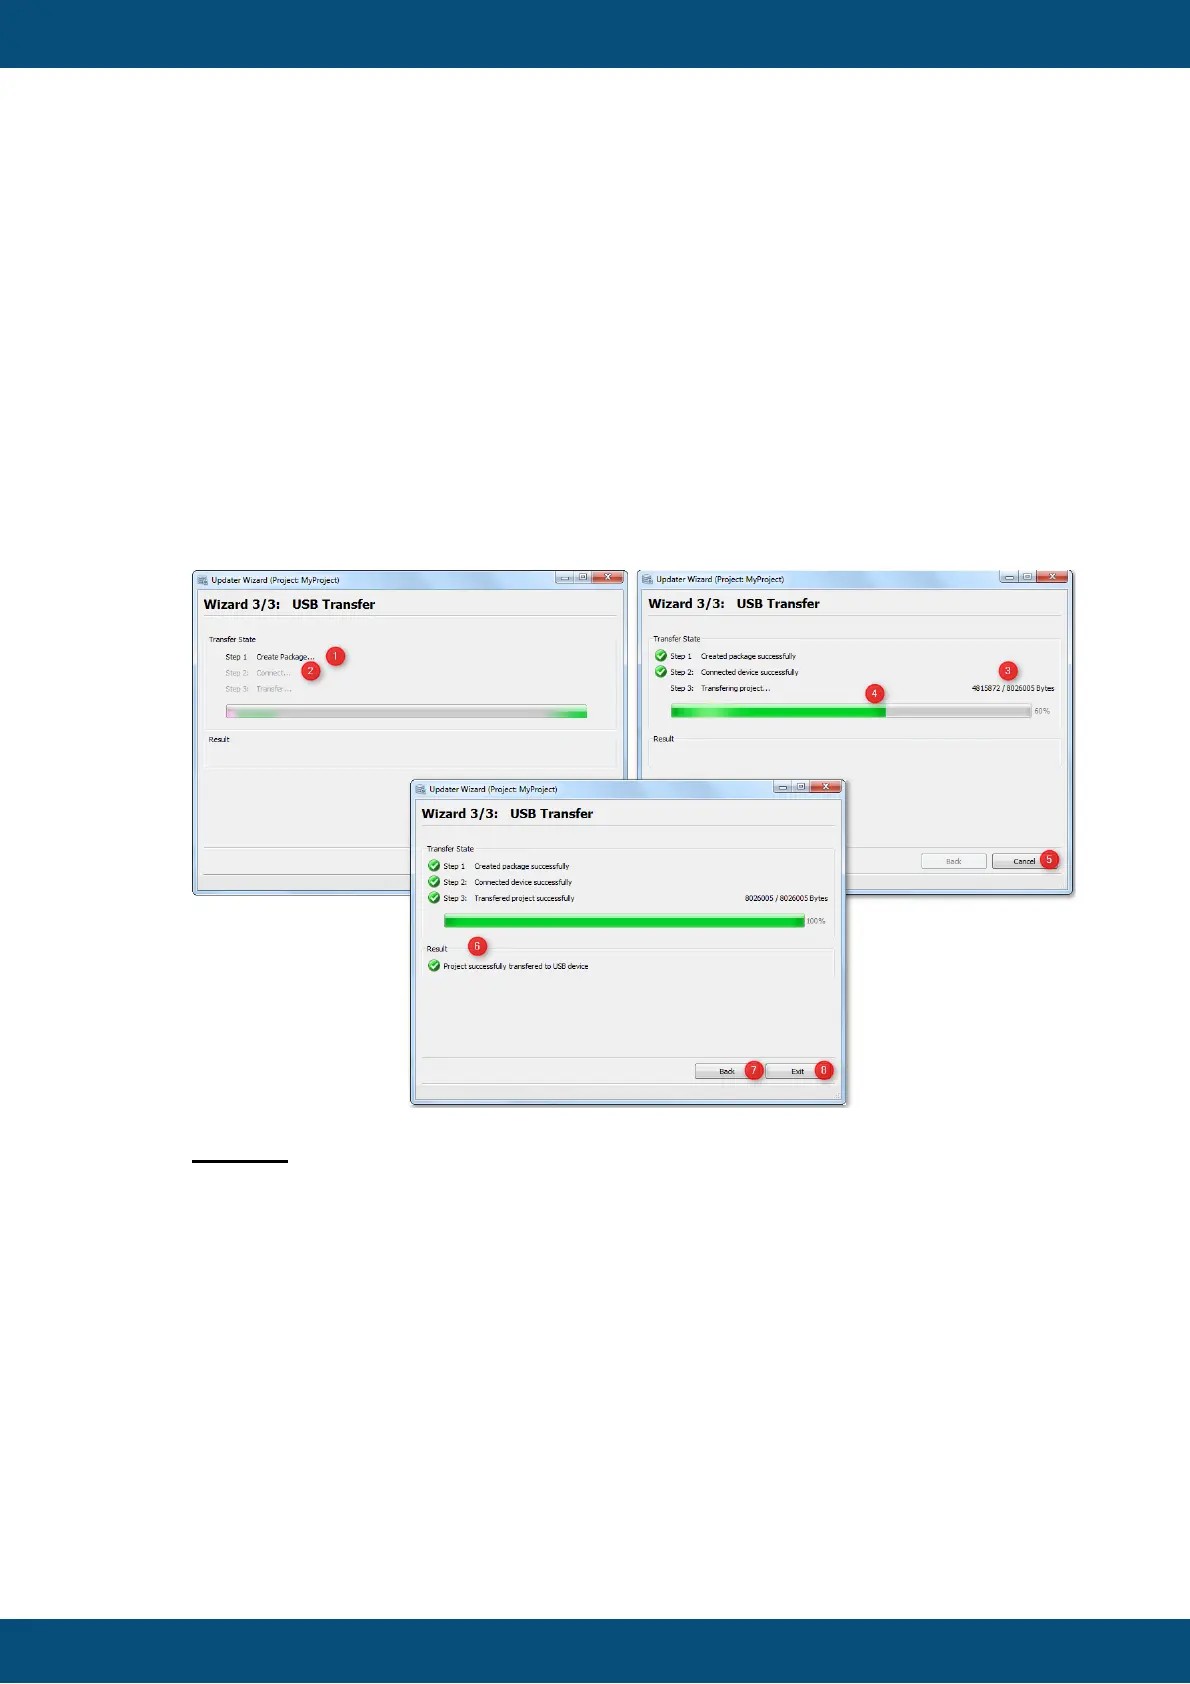
When the Transfer button is pressed, this page appears and shows the current USB
transfer progress and its result.
The USB Transfer is divided in 3 steps.
1. Creating Project Package,
2. Connecting to the USB drive and
3. Transferring the project.
Legend:
(1) Shows status of create package.
(2) Shows if USB drive is successfully connected.
(3) (4) Shows current transfer progress in percentage and bytes.
(5) When Transfer is started, it can be aborted with the "Cancel" button.
(6) Shows if the project package has been successfully created on the USB drive.
(7) Button to go back to the USB Settings page. (During transfer, "Back" button is
disabeld)
(8) Exit application. (During transfer "Exit" button is renamed to "Cancel")
If the application is closed via "X" button during the active transfer, a dialog is
shown with a warning that current transfer will be aborted.