Chapter 6 Installation and connection 40058725 BTA Alpha HSM
Version: 12.19.17 Page 46 of 112 GB
End of roll warning connection (low label)
Through the end of roll pre-warning an upcoming label roll change can be indicated at an
early stage. Depending on the module version, the end of roll pre-warning function is
available in two versions.
External version
An optional reflection light scanner on the unwinder arm scans the label roll. Adjustment of
the sensor is not necessary if the option is factory installed. The reflection sensor is con-
nected via an M12 4-pin plug to the optional flange socket (see page 38).
As soon as the label roll falls below a certain diameter, the warning message "Low la-
bel reached" appears in the display and a signal is transmitted. In conjunction with the
3-colour signal lamp, the signal is indicated by the yellow light.
The labeler will remain operational until the pre-programmed remaining label length has
been used up. Then the labeler will go into malfunction mode and stop, and the error
message "Web end reached“ will appear in the display.
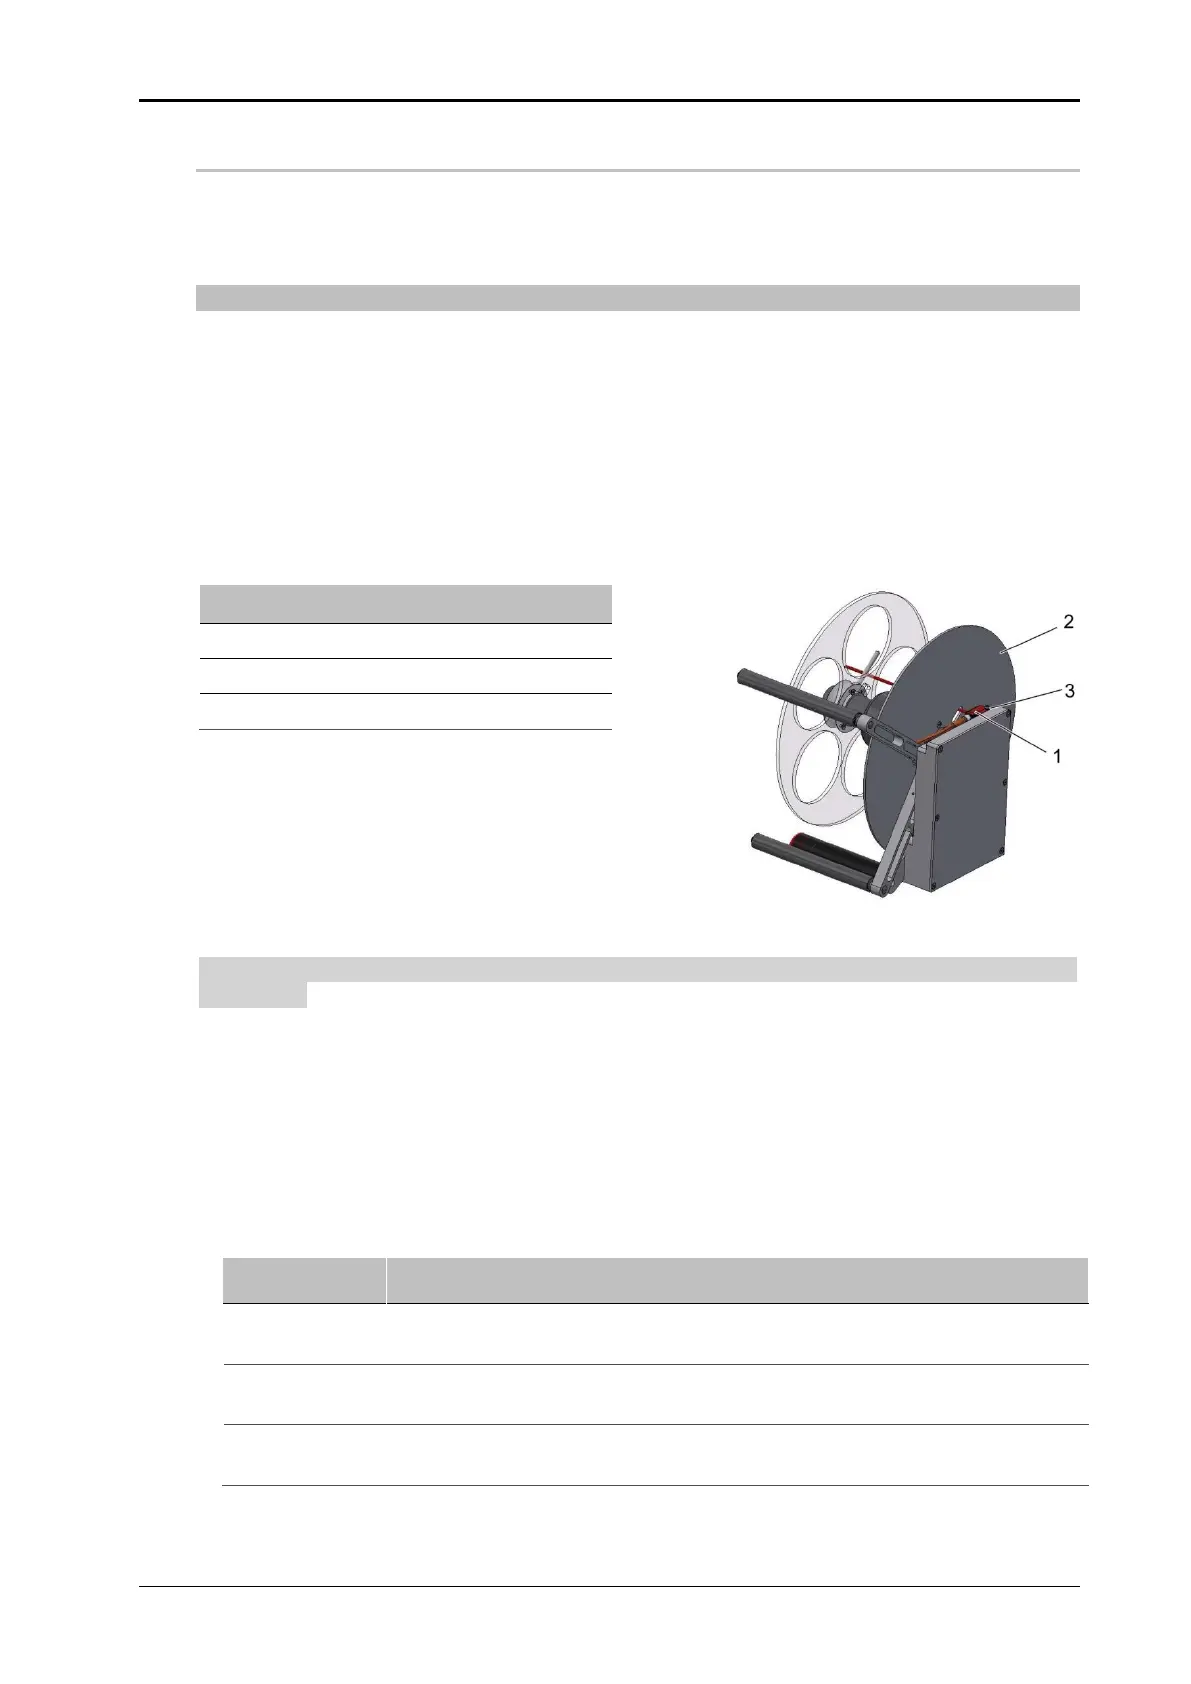
Fig. 6-12: End of roll warning external
Adjustment of the sensor is normally not required when the option has been installed by
the factory.
Prerequisites
Label web roll with the desired, residual amount that should trigger pre-warning.
No product supply.
Labeling machine is ready for operation.
Instruction
How to adjust the low label warning.
Place the remaining label roll, for which a warning message is to be dis-
played, on the unwinder reel.
Turn the disc (pos. 2, Fig. 6-12) with the groove on the sensor (pos. 1, Fig.
6-12).
Turn the small adjusting screw (pos. 3, Fig. 6-12) at the front side of the
sensor in the clockwise direction until the status LED lights up.