Cleaning and Adjustment: Valve Cleaning
Issue 2
157
Part No. 306-0430-102
C
LEANING AND
A
DJUSTMENT
Valve Cleaning
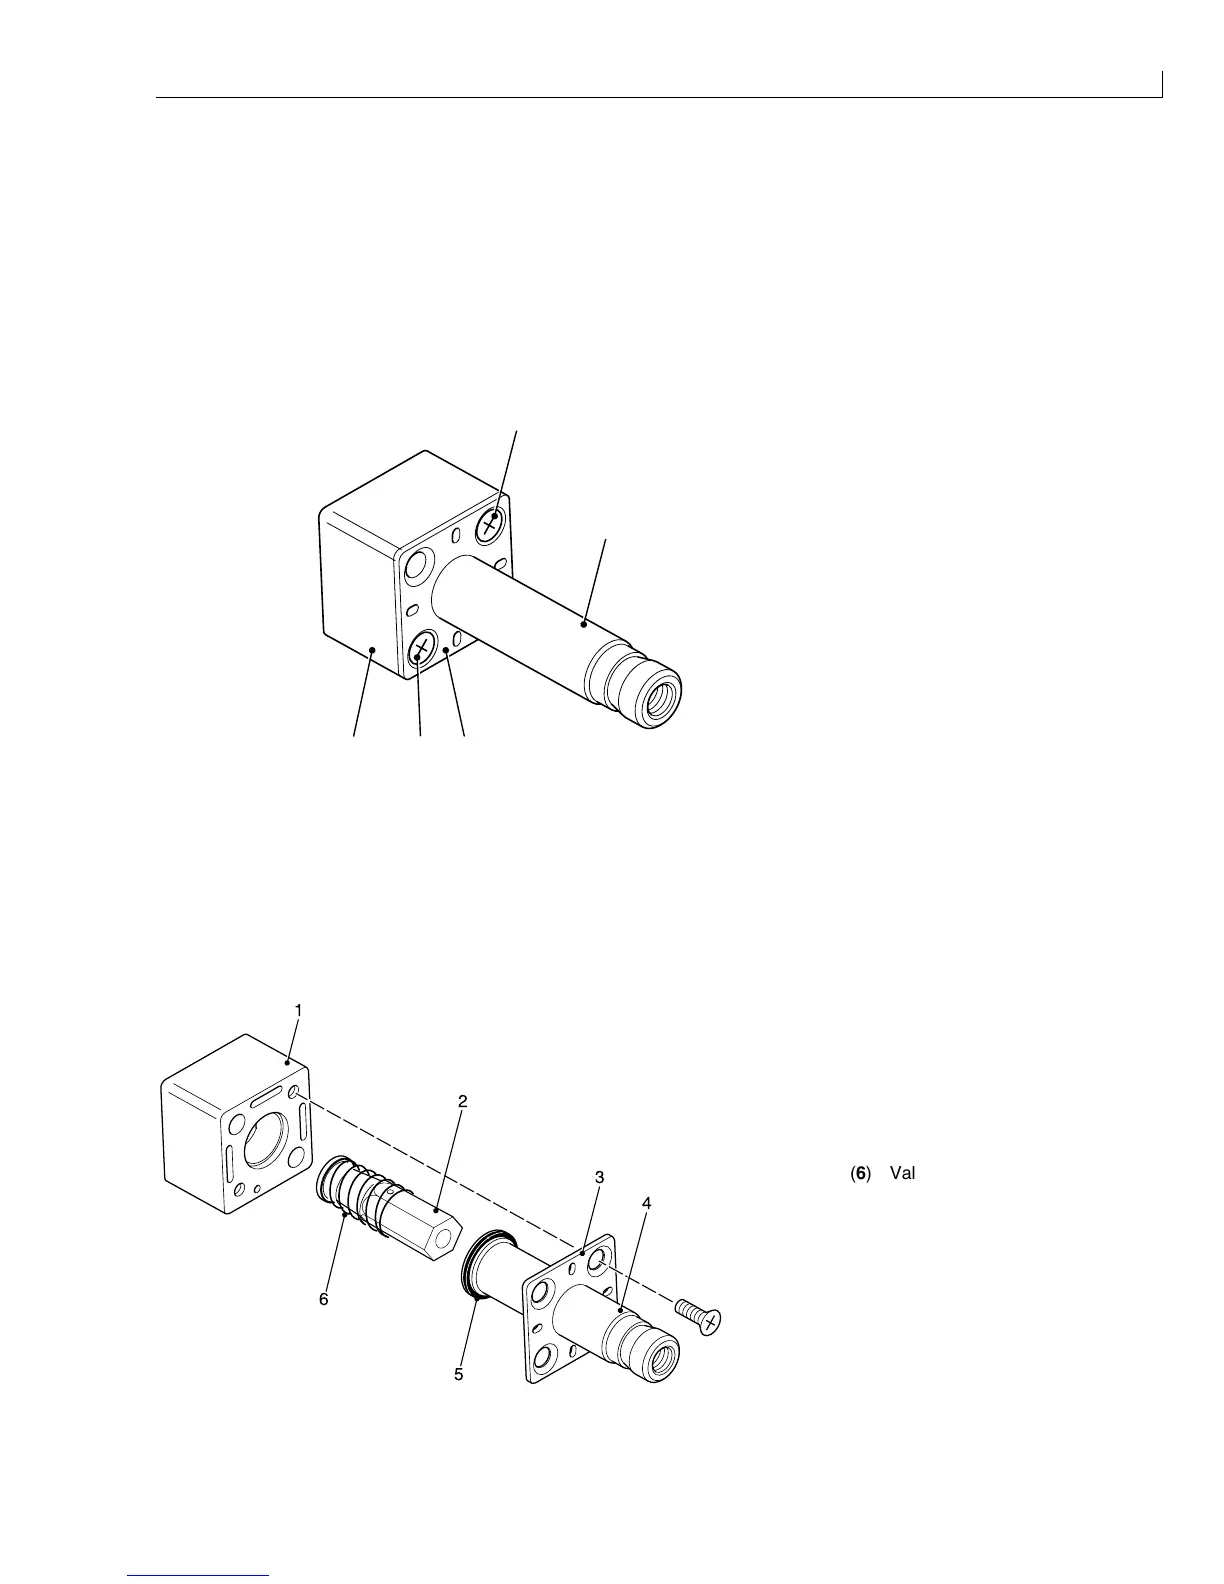
1
Remove the valve (see
Solenoid Valves
, page 127).
2
Remove the valve plate retaining screws (Figure 75 (
1
)). Retain the screws and note the orientation of the
plate.
3
Pull the valve stem (
2
) and the valve plate (
3
) away from the valve block (
4
).
(
1
) Valve plate retaining screws
(
2
) Valve stem
(
3
) Valve plate
1
2
314
(
4
) Valve block
Figure 75 Valve Components
4
Disassemble the internal valve components (Figure 76) noting the orientation of each.
5
Clean all the components in a suitable Willett solvent washdown.
6
Reassemble the internal valve components.
7
Fit the valve plate to the valve block and secure it using the two screws removed at step
2
.
8
Refit the valve in the printer.
(
1
) Valve block
(
2
) Valve plunger
(
3
) Valve plate
(
4
) Valve stem
(
5
) Valve stem O-ring
1
2
3
4
5
6
(
6
) Valve plunger spring
Figure 76 Valve Internal Components