Cleaning and Adjustment: Printhead Alignment
Issue 2
161
Part No. 306-0430-102
9
Disconnect the feed and return pipes and reconnect them to the nozzle feed and return pipes.
10
Slide the rear cover back into position on the printhead and secure it using the two screws (
4
) removed at
step
3
.
11
Refit the front over (
8
) and secure it with the knurled screw (
3
).
Printhead Alignment
1
Slacken the knurled nut and remove the front cover from the printhead.
2
Secure the printhead vertically in a suitable stand with the nozzle pointing downwards. Place a suitable
container beneath the printhead to catch the ink.
3
Disable the
Gutter Detect
and
Charge Check
from the System menu.
(
1
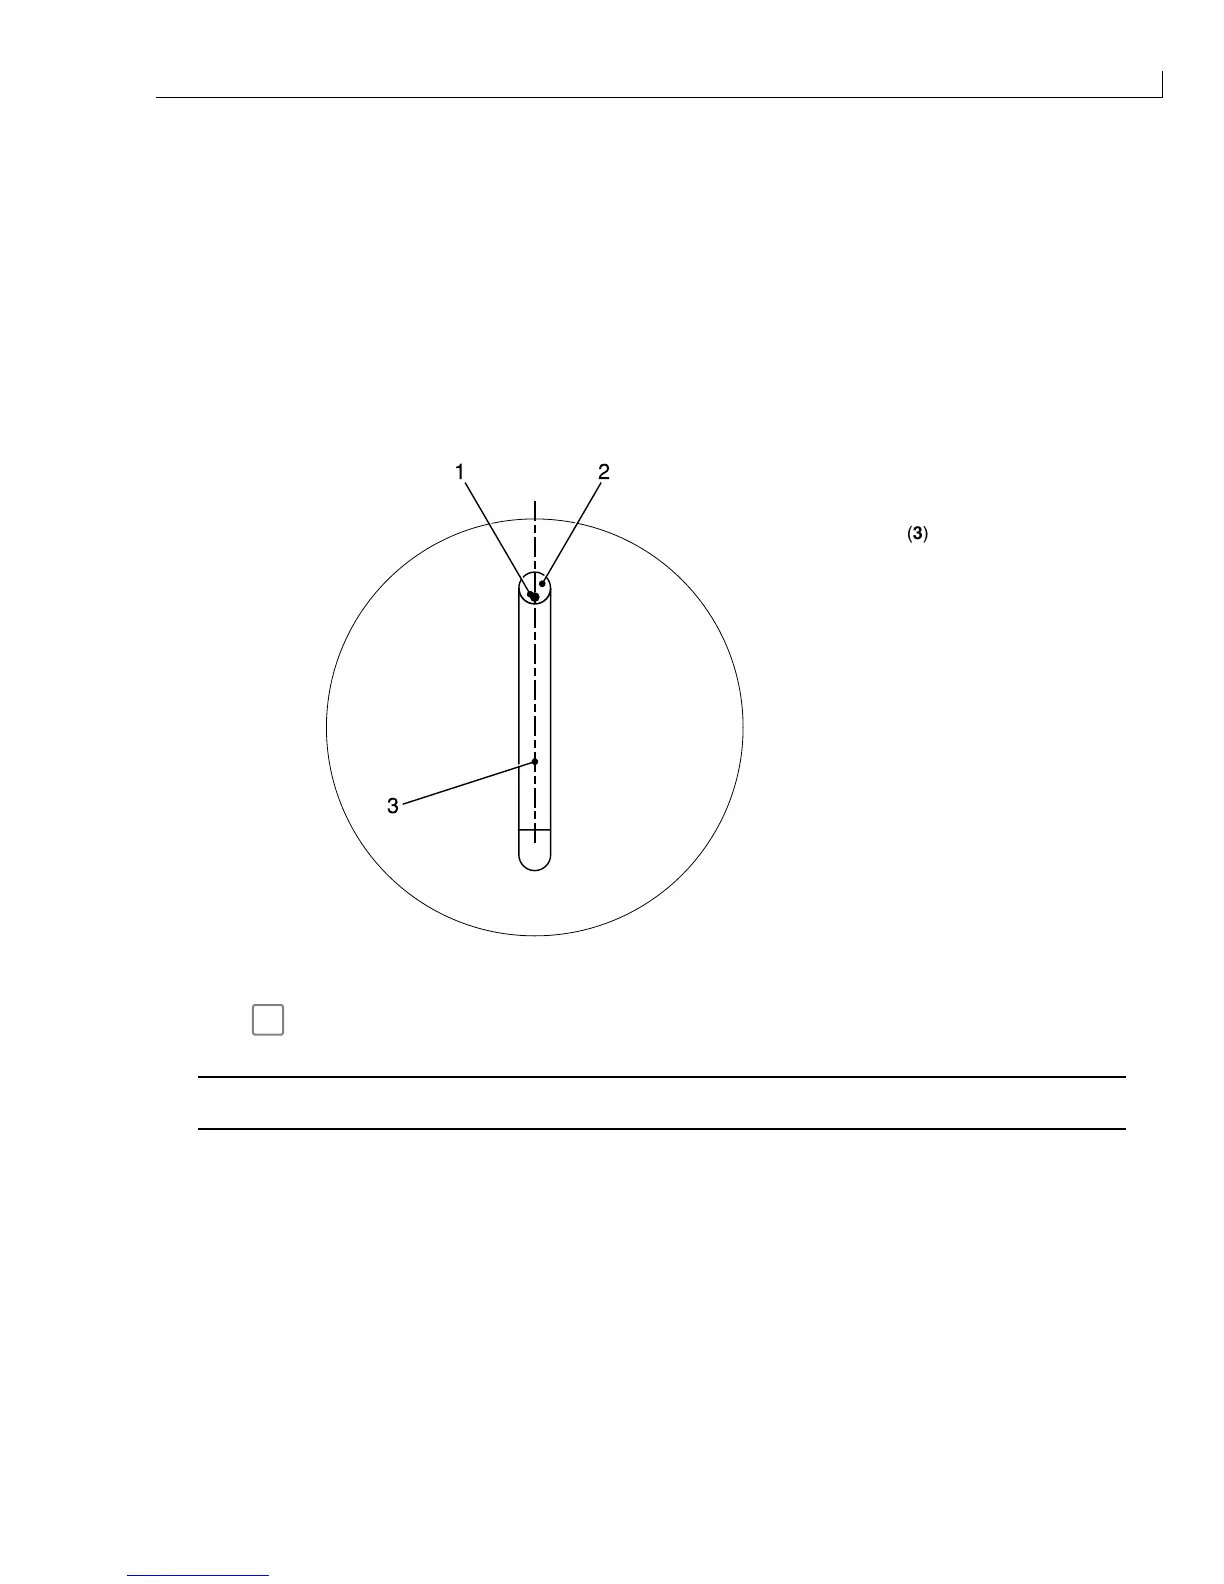
) Ink jet position
(
2
) Gutter
12
3
(
3
) Centre line
Figure 80 Ink Jet to Gutter Position
4
Press
f1
to start the jet. When the ink jet has started, check that the ink jet is in the correct position in the
gutter (Figure 80).
Caution - Equipment Damage
Never attempt to bend the gutter. Its position is fixed.
5
Adjust the ink jet position if necessary using the lateral adjustment screws (Figure 81 (
3
)) and height
adjustment screw (
4
). When the adjustment has been made ensure that the lateral adjustment screws are
tight and the ink jet position is correct.