April 2010
4-51
Phaser 3635MFP/WorkCentre 3550
ADJ 8.1, ADJ 8.2
Repairs and Adjustments
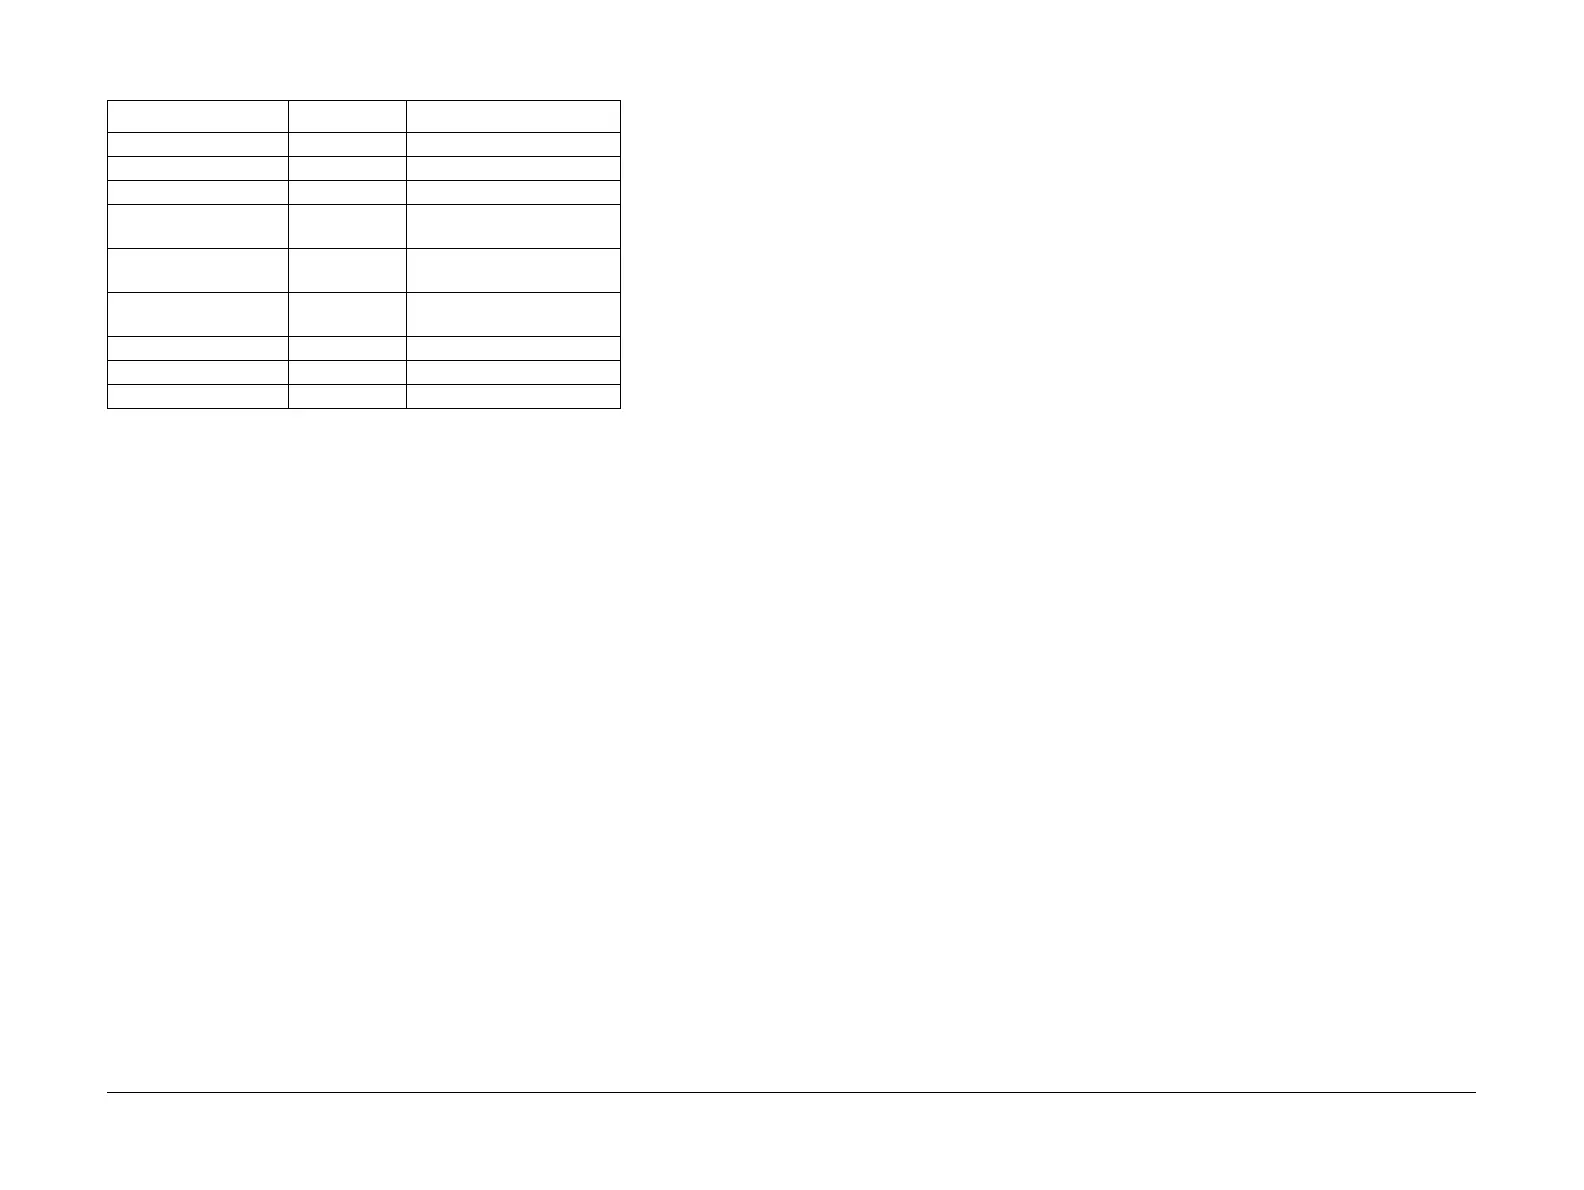
6. Refer to Table 2. Select the relevant NVM setting.
7. Select Read/Write. Enter a new value via the numeric key pad as follows:
• To increase the lead edge registration (move the ABC line away from the paper
edg)e, enter a value larger than the current value.
• To decrease the lead edge registration (move the ABC line toward the paper edg)e,
enter a value smaller than the current value.
NOTE: A change of 12 will change the registration by approximately 6mm (0.24
inch)
8. Press the O.K button to save the adjustment.
9. Exit diagnostics GP 1 Diagnostics Entry.
10. Perform again the 3550 Checkout.
ADJ 8.2 Side Edge Registration Adjustment
Purpose
To measure and adjust side edge image to paper registration.
Go to the relevant procedure:
• 3635 Checkout
• 3550 Checkout
3635 Checkout
NOTE: Both the Check and the Adjustment use an internal test pattern. Both are performed in
diagnostics.
Check the side edge registration (left side edge of portrait A4 or 8.5x11 inch). Perform the fol-
lowing:
1. Enter dC606 Internal Print Test Patterns (3635 Only).
2. Select test pattern 7.
3. Select Features. For simplex side edge check, select 1 Sided. For duplex side edge
check select, 2 Sided.
4. Select the tray. Select Start Test.
NOTE: Simplex copies exit face down. Duplex copies exit side 1 face down (side 2 face
up).
Table 2 NVM location
Mode Tray Location
Simplex 1 07-100
Simplex 2 07-200
Simplex Bypass 07-500
Duplex Side 1(Long and
short)
1 07-140
Duplex Side 1 (Long
and short)
2 07-240
Duplex Side 1 (Long
and short)
Bypass 07-540
Duplex Side 2 (Long) 1 07-120
Duplex Side 2 (Long) 2 07-220
Duplex Side 2 (Long) Bypass 07-520

 Loading...


