The SDH Access Tester application
Acterna ANT-5 Page 85
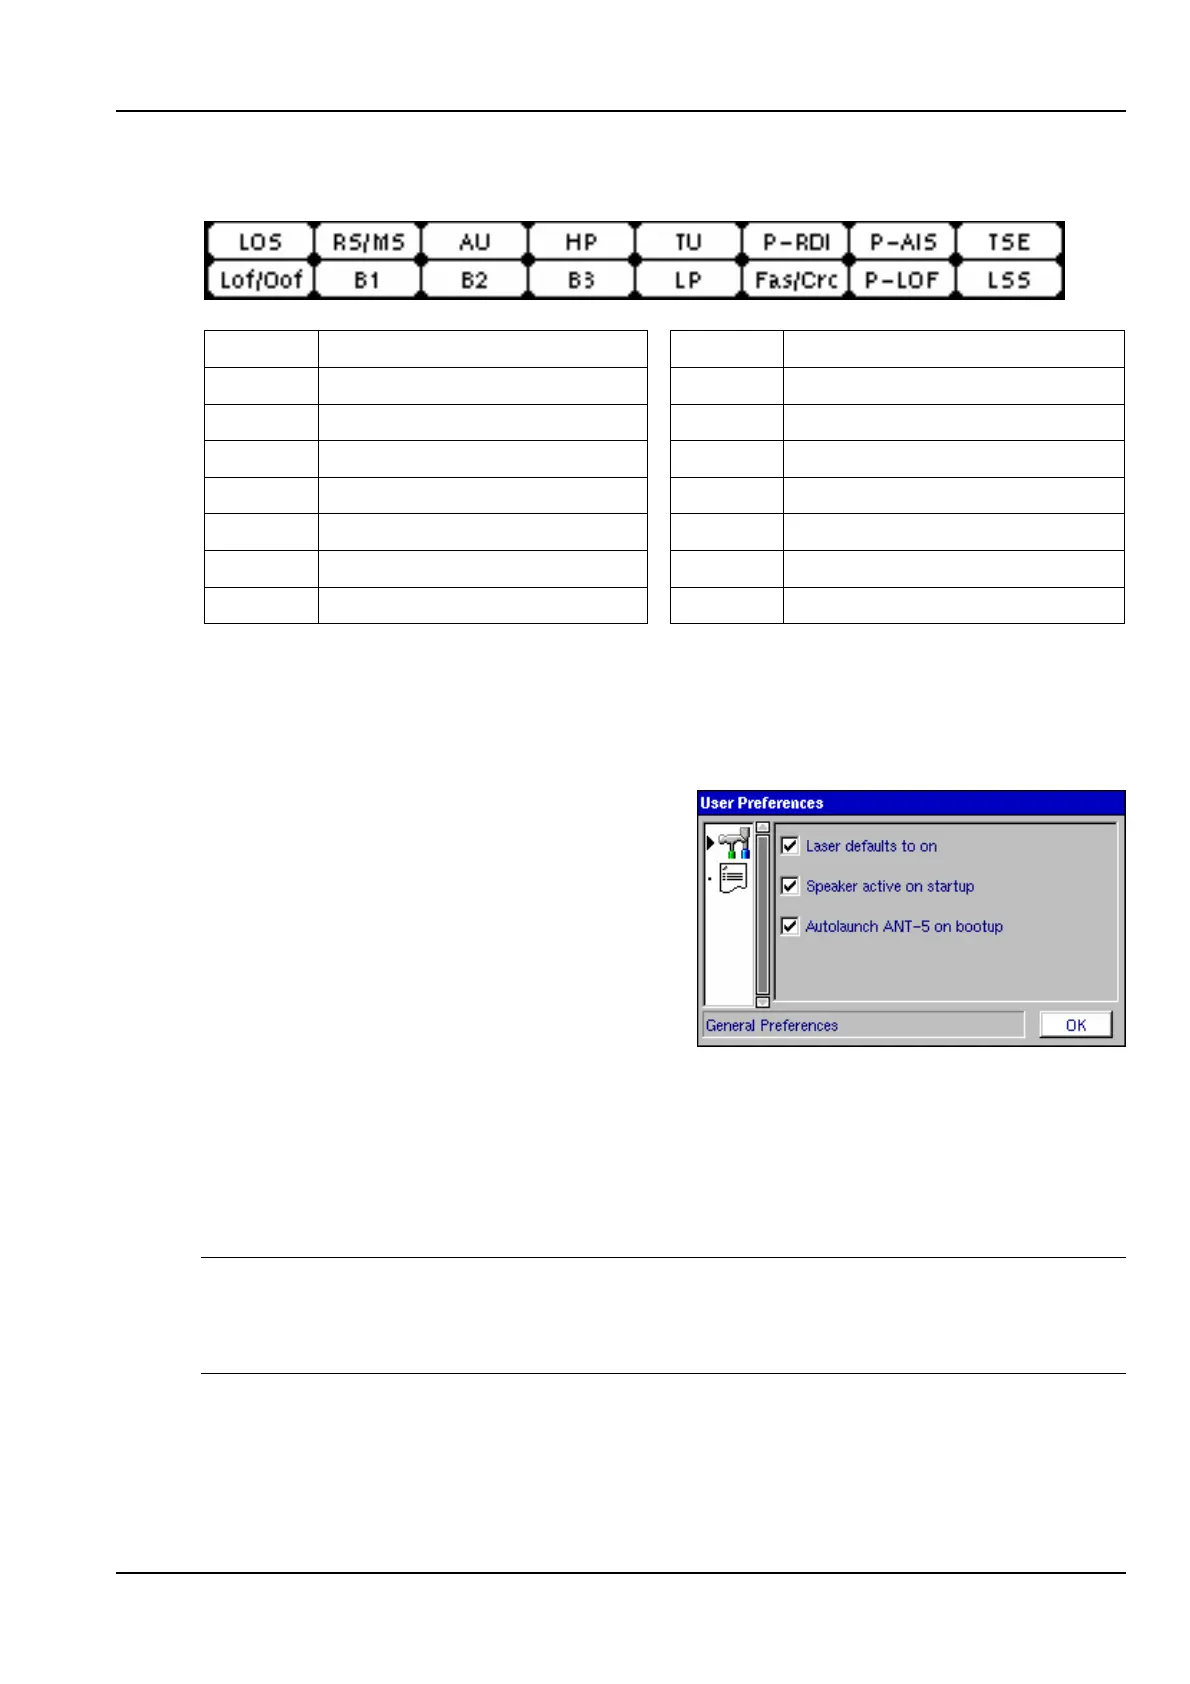
The sixteen on-screen LEDs are arranged as shown below:
LOS Loss of Signal Lof/Oof Loss of Frame
RS/MS Regen / Multiplex Sections B1 Regen. Section error monitor
AU Administrative Unit B2 Mux section error monitor
HP High Order Path B3 HO path error monitor
TU Tributary Unit LP Low Order Path
P-RDI PDH Remote Defect Ind. Fas/Crc FAS / CRC Error
P-AIS PDH AIS P-LOF PDH Loss of Frame
TSE Test Sequence Err. (Bit Err.) LSS Loss of Sequence Sync.
4.25 User Preferences
User preferences enable the user to ‘customise’ parts of the ANT-5 setup to suit their
typical requirements.
User preferences can be set from within the
ANT-5 application by pressing Menu and
selecting Preferences from the Tools
menu.
1. Use the directional keys to highlight the
icons.
2. Press the Enter key to activate this
area.
3. Use the directional keys to select either the General Preferences or the Printer
Header Defaults screen. The graphic above shows the General Preferences
screen which indicates that the laser, speaker and the ANT-5 application will
launch automatically. The name of the operator and user information can be
inserted from the Printer Default screen.
Note: Another icon will be present only when the GUI is used with the Remote
Operation option. Select the cable icon to change the IP Address of the ANT-5. If the
IP address is edited whilst running the application, close and restart to enable the
change.