Optional software for the ANT-5
Page 90 Acterna ANT-5
Container Setup panel to VC4-4c.
5.4 Remote Operation
Before starting it is advisable to note the communication settings of the ANT-5. Press
Alt+Menu and select Comms… from the System menu, then select PPP and/or
Ethernet as required.
Note 1: Only 3COM 589 chip-set PC cards are supported, model numbers
3CCE589EC and 3CCE589ET. These cards are used only when an Ethernet
connection is made via the PC Card slot. An Ethernet port is fitted from BN 4565/02
onwards, care should be taken not to confuse the E1 120Ω (RJ48) and the Ethernet
port -> (RJ45).
Note 2: Remote operation currently supports the SDH Access Tester Application and
is available only in English.
Note 3: The V.24/PPP connection is available only for the BN4565/01. The V.24/PPP
connection is currently not available on the BN4565/02 or BN4565/03.
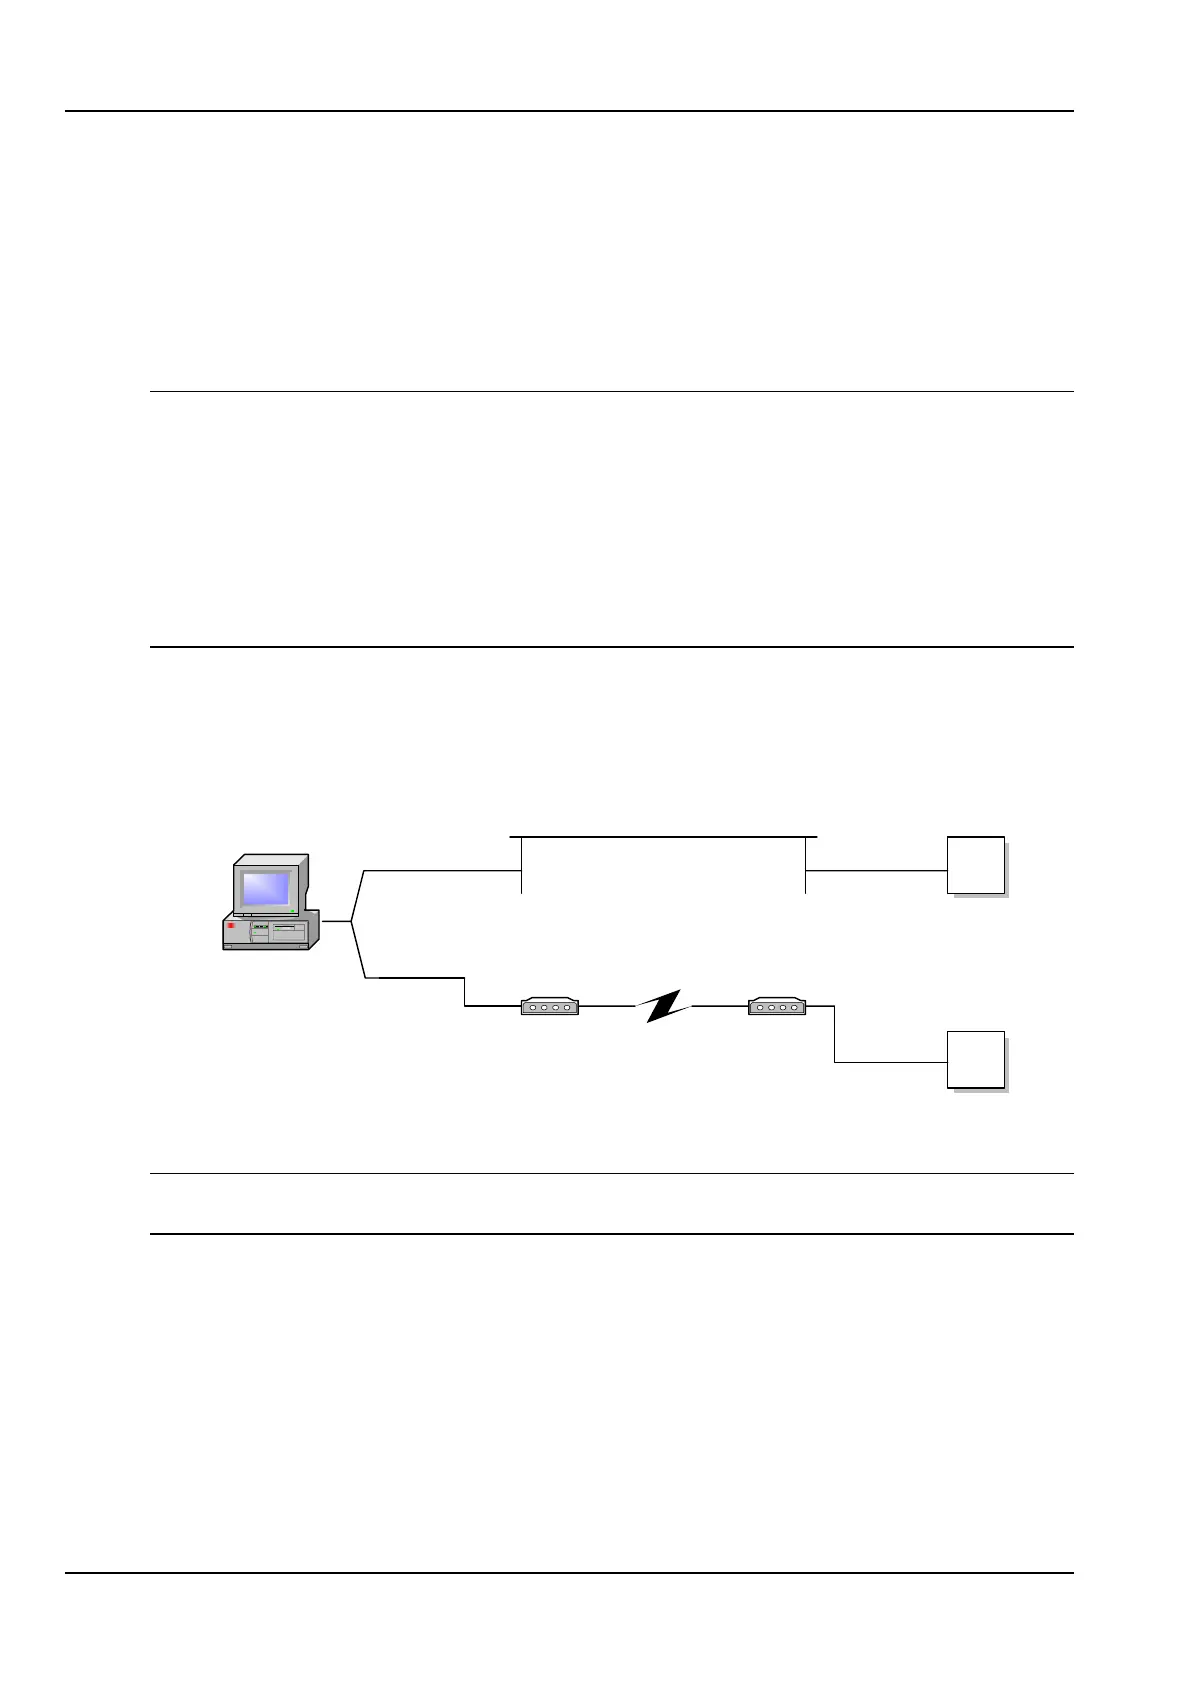
Remote Operation is achieved by establishing a suitable communications link, e.g.
dial-up link via modems or over an Ethernet LAN. Once the link has been successfully
set up, the PC/Laptop can communicate with the ANT-5 using the supplied version of
the ANT-5 GUI faceplate. See Appendix F - Remote Access for worked examples of
the configuration.
ANT-5
Ethernet Ethernet
Modem Modem
ANT-5
Host computer
V24/PPP
V24/PPP
5.4.1 Software Installation and operation
Note: Ensure that the ANT-5 unit has been fully upgraded and that the corresponding
version of the client software has been installed and is used.
Follow steps 1-3 below if the remote operation client needs to be installed.
1. Insert the ANT-5 Upgrade CD-ROM into the CD drive of the PC.
2. From Windows click on Start > Run and type in:
D:\ANT-5 Remote Operation Client\setup.exe (replace D with the drive
letter for your CD-ROM drive if necessary).
3. Follow the on-line instructions to complete the installation.