B13 BETTER (B13 BEST APPEARANCE) WASHING MACHINE SERVICE HANDBOOK
137
Picture 15.8 Upper table detachment - 3
Picture 15.9 Upper table detachment - 4
15.2. Panel Attachment / Detachment
15.2.1 Attachment
Prior to mounting of the panel assembly, front wall attachment has to be completed. (Screws
connecting upper skirt of front wall to the body are in the back side of panel assembly.)
Picture 15.10 Panel attachment -1
Picture 15.11 Panel attachment -2
Panel assembly is pushed
downwards from the top of the
front wall as shown in Picture
15.10, tabs on the bottom part
of the panel assembly are
pushed into the front wall. Prior
to this, bolts have to be
mounted in the front wall holes.
After the panel assembly is
placed on the body, screws
shown in Picture 15.11 are
attached
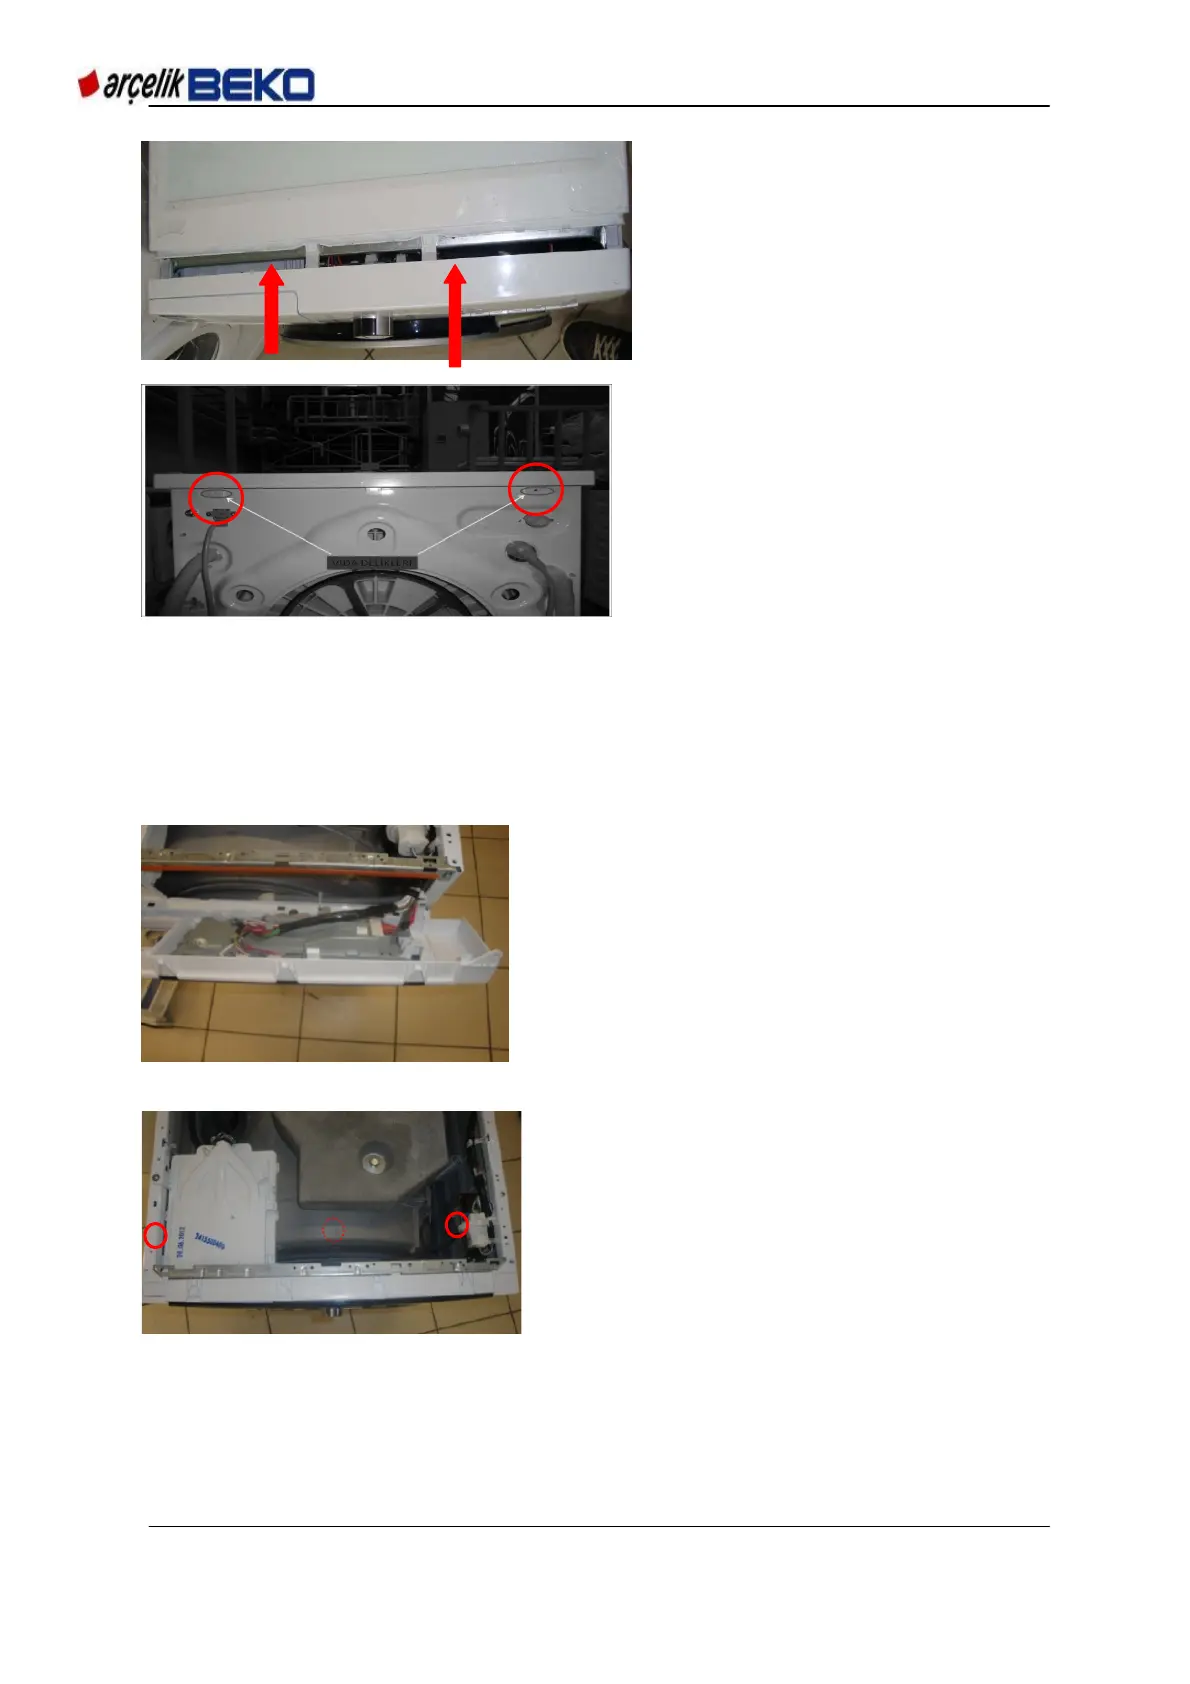
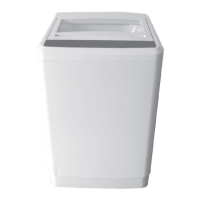
Upper table is drawn
backwards as shown in Picture
15.8, 2 screws on the back
side of the front side of upper
table are attached as shown in
Picture 15.9.