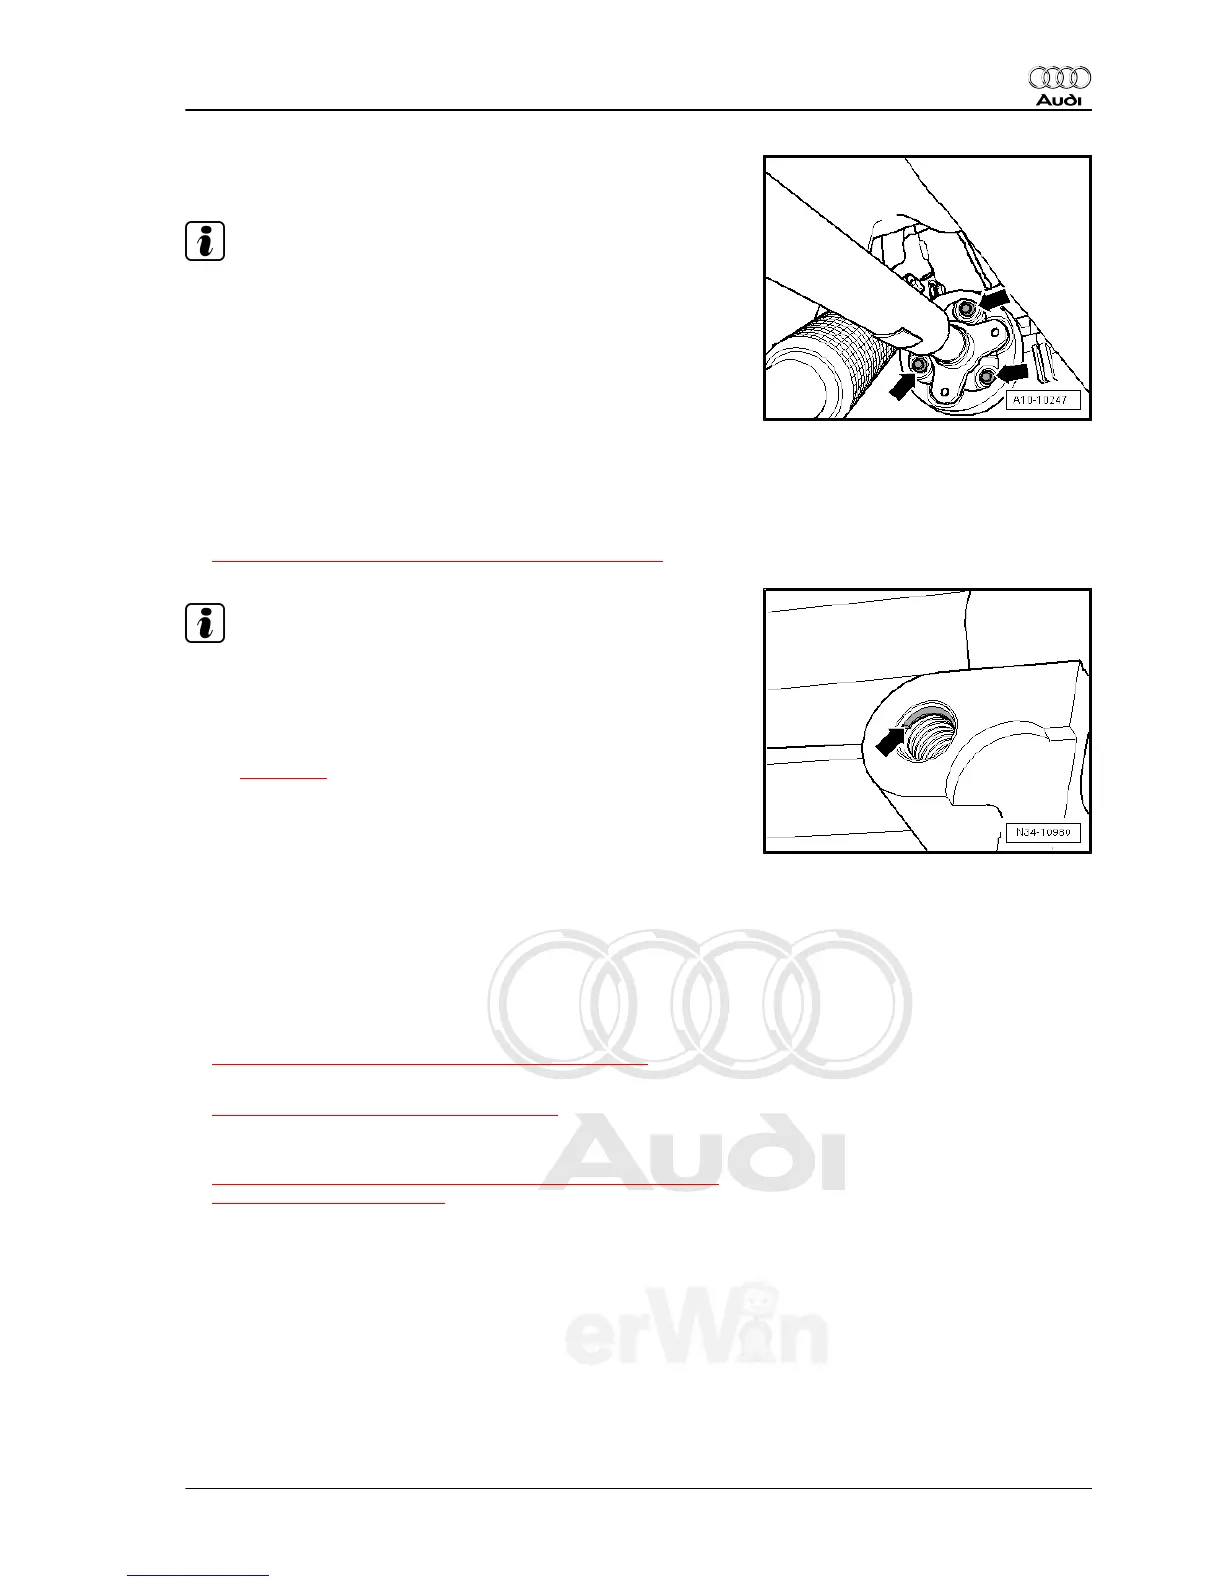
– Press the engine/transmission assembly to the bulkhead while
carefully guiding the bevel box pin into the flange/driveshaft.
Note
♦
Seal in driveshaft flange must not be damaged when removing
and installing transmission. Replace driveshaft if damaged.
♦
Slip the driveshaft horizontally onto the centering pin.
– Secure the driveshaft with the flexible disk on the bevel box
flange -arrows-. Refer to ⇒ Rear Final Drive 02D, 0AV, 0BR
and 0BY; Rep. Gr. 39 ; Removal and Installation .
:
– Installing the subframe. Refer to ⇒ Suspension, Wheels,
Steering; Rep. Gr. 40 ; Removal and Installation .
– Install pendulum support. Refer to
⇒ “2.9 Subframe Mount Assembly Overview”, page 72 .
Note
♦
The holes for the pendulum support on transmissions from
05.28.07 have threaded inserts (for example HeliCoil).
♦
How to recognize: collar on the first thread -arrow-.
♦
Note the correct mounting bolts and tightening specifications
-2- ⇒ page 72 .
– Installing the steering gear on the subframe. Refer to ⇒ Sus‐
pension, Wheels, Steering; Rep. Gr. 48 ; Removal and In‐
stallation .
– Install the exhaust system and cross member. Refer to ⇒ En‐
gine Mechanical; Rep. Gr. 26 ; Removal and Installation .
– Install the fan shroud. Refer to ⇒ Engine Mechanical; Rep.
Gr. 19 ; Removal and Installation .
– Install starter. Refer to ⇒ Electrical Equipment; Rep. Gr. 27 ;
Removal and Installation .
– Install the hose/line assembly or plastic line. Refer to
⇒ “4.1 Hose/Line Assembly or Plastic Line”, page 29 .
– Bleed the clutch system. Refer to
⇒ “1.2 Clutch System, Bleeding”, page 12 .
– Install the control cable mounting bracket on the transmission.
Refer to
⇒ “2.5 Shift Cable and Selector Cable to Model Year 2007 As‐
sembly Overview ”, page 61 .
Audi TT 2007 ➤
Manual Transmission - Edition 10.2009
4. Removal and Installation 111


 To Next Page