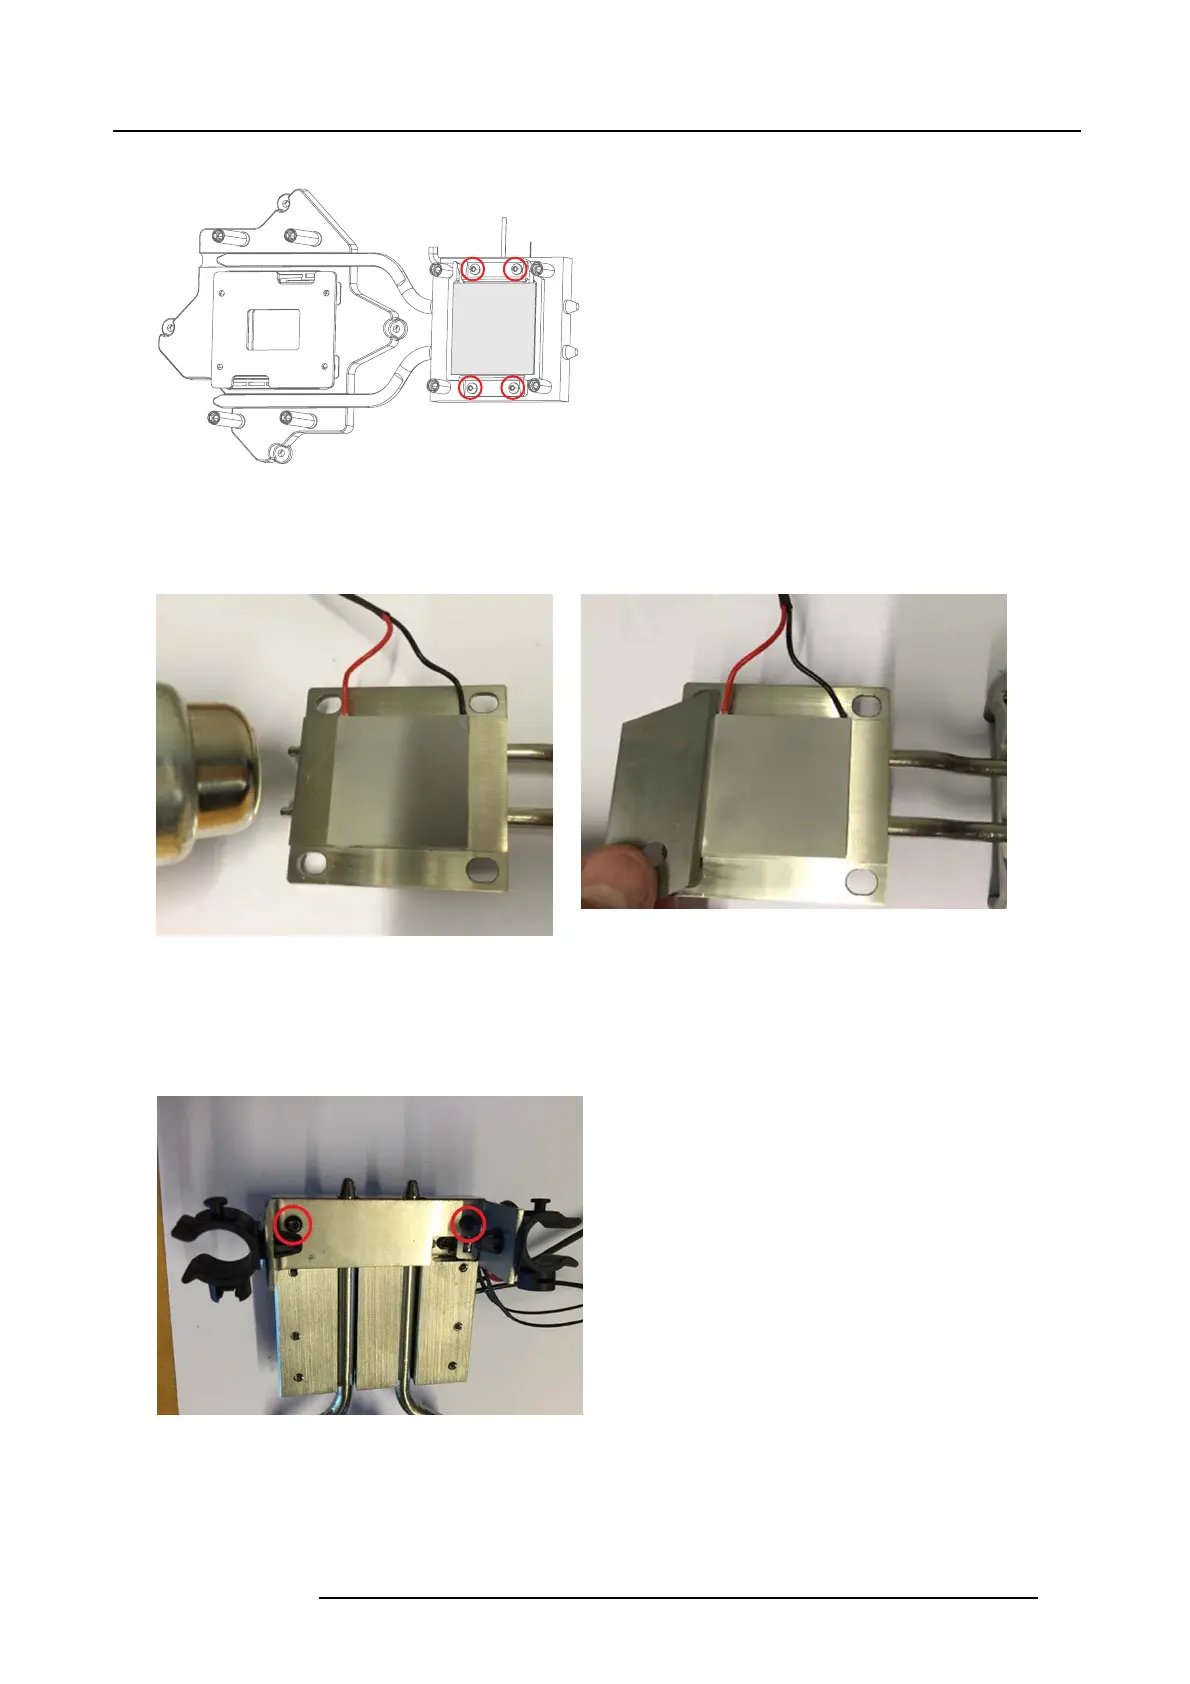
21. DMD, DMD Board, CLGA & DMD heatsink elements
1. Release the four screws M2 ,5x6, TX8.
Peltier
Image 21-10
2. In order to loosen the P eltier element from the Rear Assy, the heatsink & P eltier element m ust be pre-heated w ith an adjustable
heat gun set to 80°C for minimum 1 minute.
3. Useawideflat object to release the Peltier e lem ent from the pre-heated he atsink.
Image 21-11
Image 21-12
4. Clean the Stud and Peltier surfaces with Isopropanol or Clutch & Brake cleaner.
5. Add phase change material (390 Gasket TIM Peltier) on Peltier. Rem ove thin plas tic film.
6. Add a thin layer of Thermal Paste (Shin Etzu from Barco).
7. Remove 2 screws (Tx08 M2.5x6) and move ov er bracket heat pipe to the new Heatsink DMD front Assy
Image 21-13
Note: If Heatsink DMD Rear Assy must be replaced, the Peltier elem ent m ay be moved from old to new assembly following
instructions provided above.
723–0016 F90 01/12/2017
107