19. Disassembly / Assembly instructions
19. D ISASSEMBLY / ASSEMBLY INSTRUC TIONS
19.1 Safety Precautions
WARNING: W hen chan ging lens, always close the shutter to avoid accidentally staring in to the len s opening.
This light can b e h armful t o the eyes.
Close the shutter b y pressing t he shutter b utton on t he keypad panel. The key will illuminate red when the
shutter is c losed.
Always disconnect mains power before attempting assembly/de-assembly steps. Failure to disconnect mains,
may lead to short-circuits, voltage shocks or otherwise damage to vital componen ts in the system.
Always disconnect mains power before attempting assembly/de-assembly steps. Failure to disconnect mains,
may lead to short-circuits, voltage shocks or otherwise damage to vital componen ts in the system.
While mains power is connected but device is switched off, the following items may retain a charge
• DC Power supply
• Las er Driver
Take care w hen removing the cluster m odule. In the unlikely event that the bulb ruptures, small glass frag-
ments may be g enerated. The clu ster module is designed to contain these fragments, but use caution when
removing the cluster module.
Do not dispos e of the real time clock b attery as unsorted m un icipal waste, but ensure correct d isposal at
municipal drop-off stations where batteries can be collected separately
19.2 Remove the projector covers
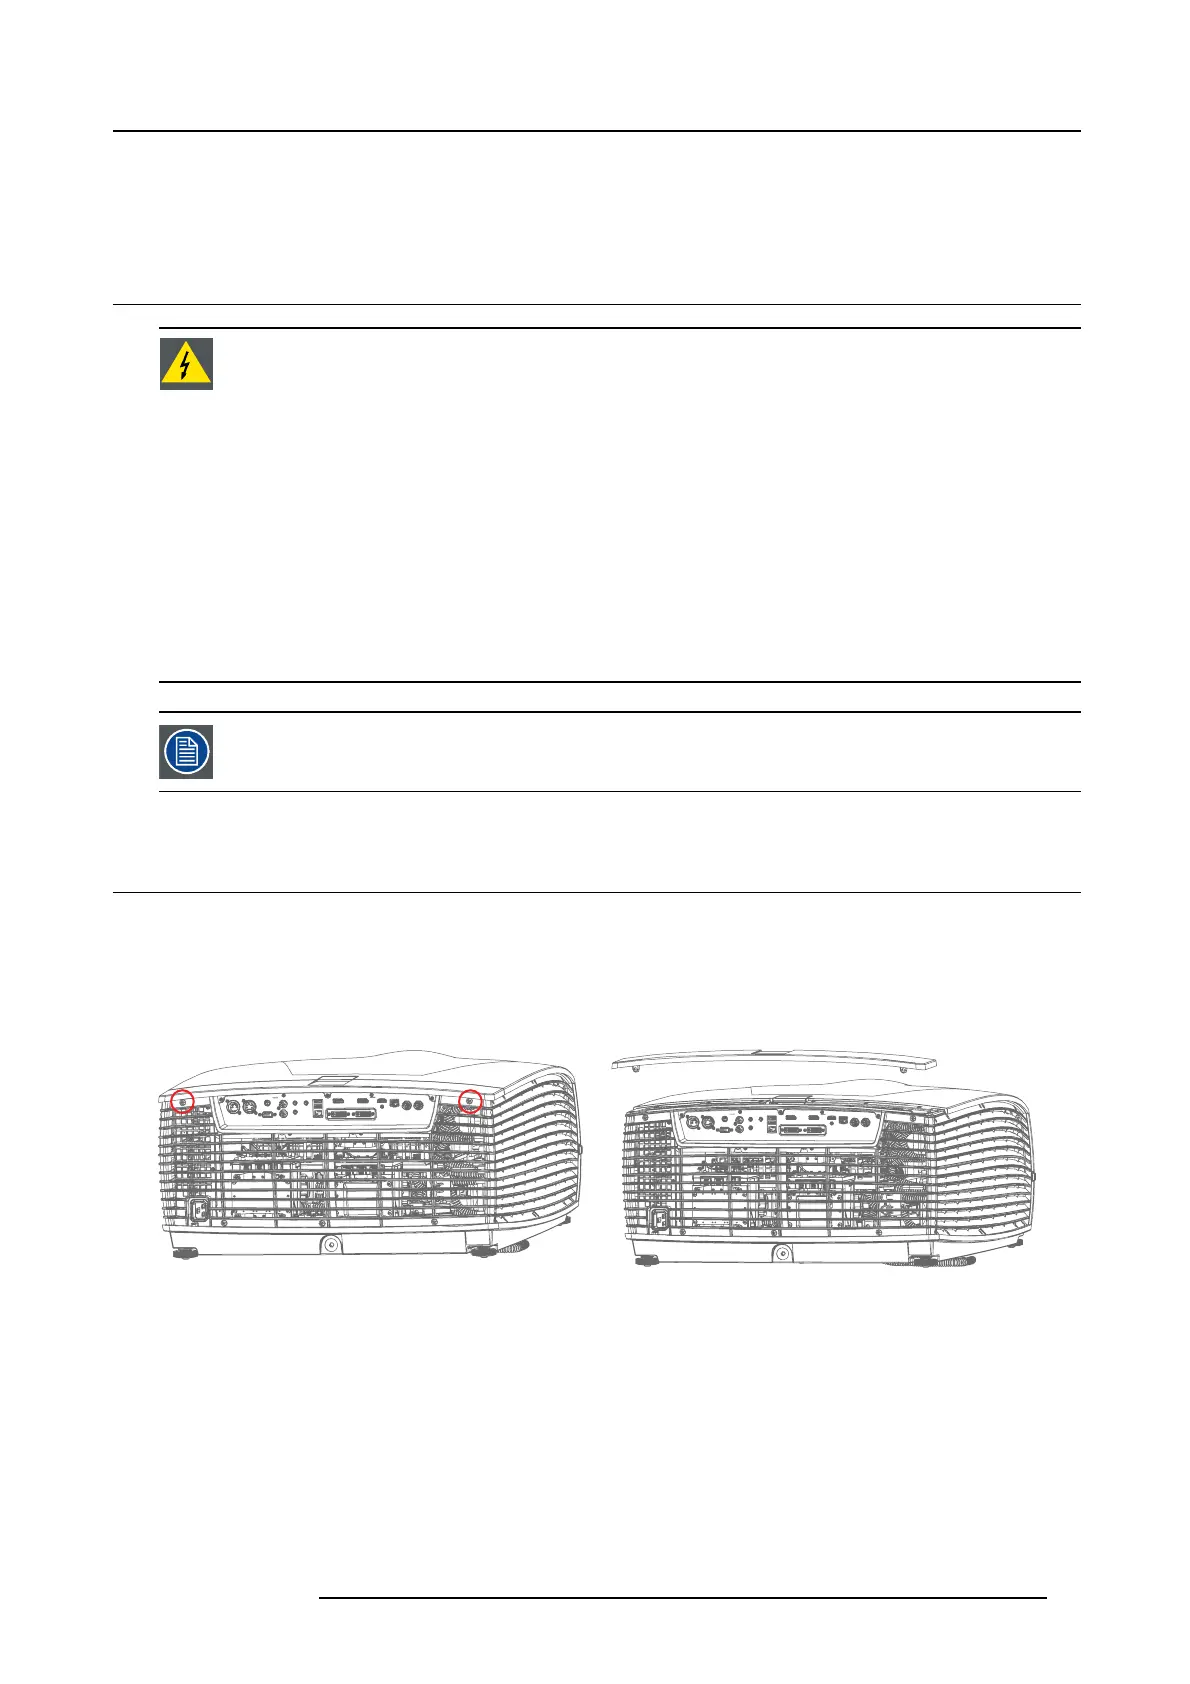
19.2.1 Remove the rear top cover
1. Remove 2 screws TX20 M 4x10, securing the R ear Top C over.
2. 2. Lift the cover in the rear end, and pull backwards .
Image 19-1
Image 19-2
19.2.2 Remove the rear cover
1. Remove 3 screws Tx10 M3x8 indicated by the blue circles.
2. Remove 9 screws T20 M4x10 indicated by red circles.
3. Remove 2 screws T10 M3x8 indicated by green circles.
Note: Total num ber of s crews to be removed: 1 4 pcs.
4. Gently remove the back cover from its position by pulling it slightly back, and upwards.
723–0016 F90 01/12/2017
81