Cleaning and
Inspection
& WARNING &
To
avoid personal injury,
wear
eye
protec-
tion
and
set
compressed
air
pressure
to
less than 25 psi (172 kPa).
• Clean all parts with cleaning solvent and dry
with compressed
air.
• All nut and screw threads that are coated with
Nut Lock or
Screw Lock must be thoroughly
cleaned before assembly. When using a thread
locking product, prime the threads with Locquic
Primer.
• Discard all oil seals, a-rings, and gaskets. Use
new components during
assembly.
•
Check all bushings for wear and proper fit.
Replace if necessary.
• Inspect the rubber motor mounts. Replace if
deteriorated or damaged.
• Inspect the water tube for obstructions or kinks
which may restrict water flow.
Replace the
grommet if worn or damaged.
• Inspect the stern brackets, swivel bracket, and
steering arm for cracks and other damage.
• Inspect the shift components for wear. Replace
if deteriorated or damaged.
Before checking the driveshaft or
oil pan housings
for distortion,
thoroughly clean the top and bottom
mating surfaces and remove
all sealer and corro-
sion.
MIDSECTION
DRIVESHAFT HOUSING
AND OIL PAN
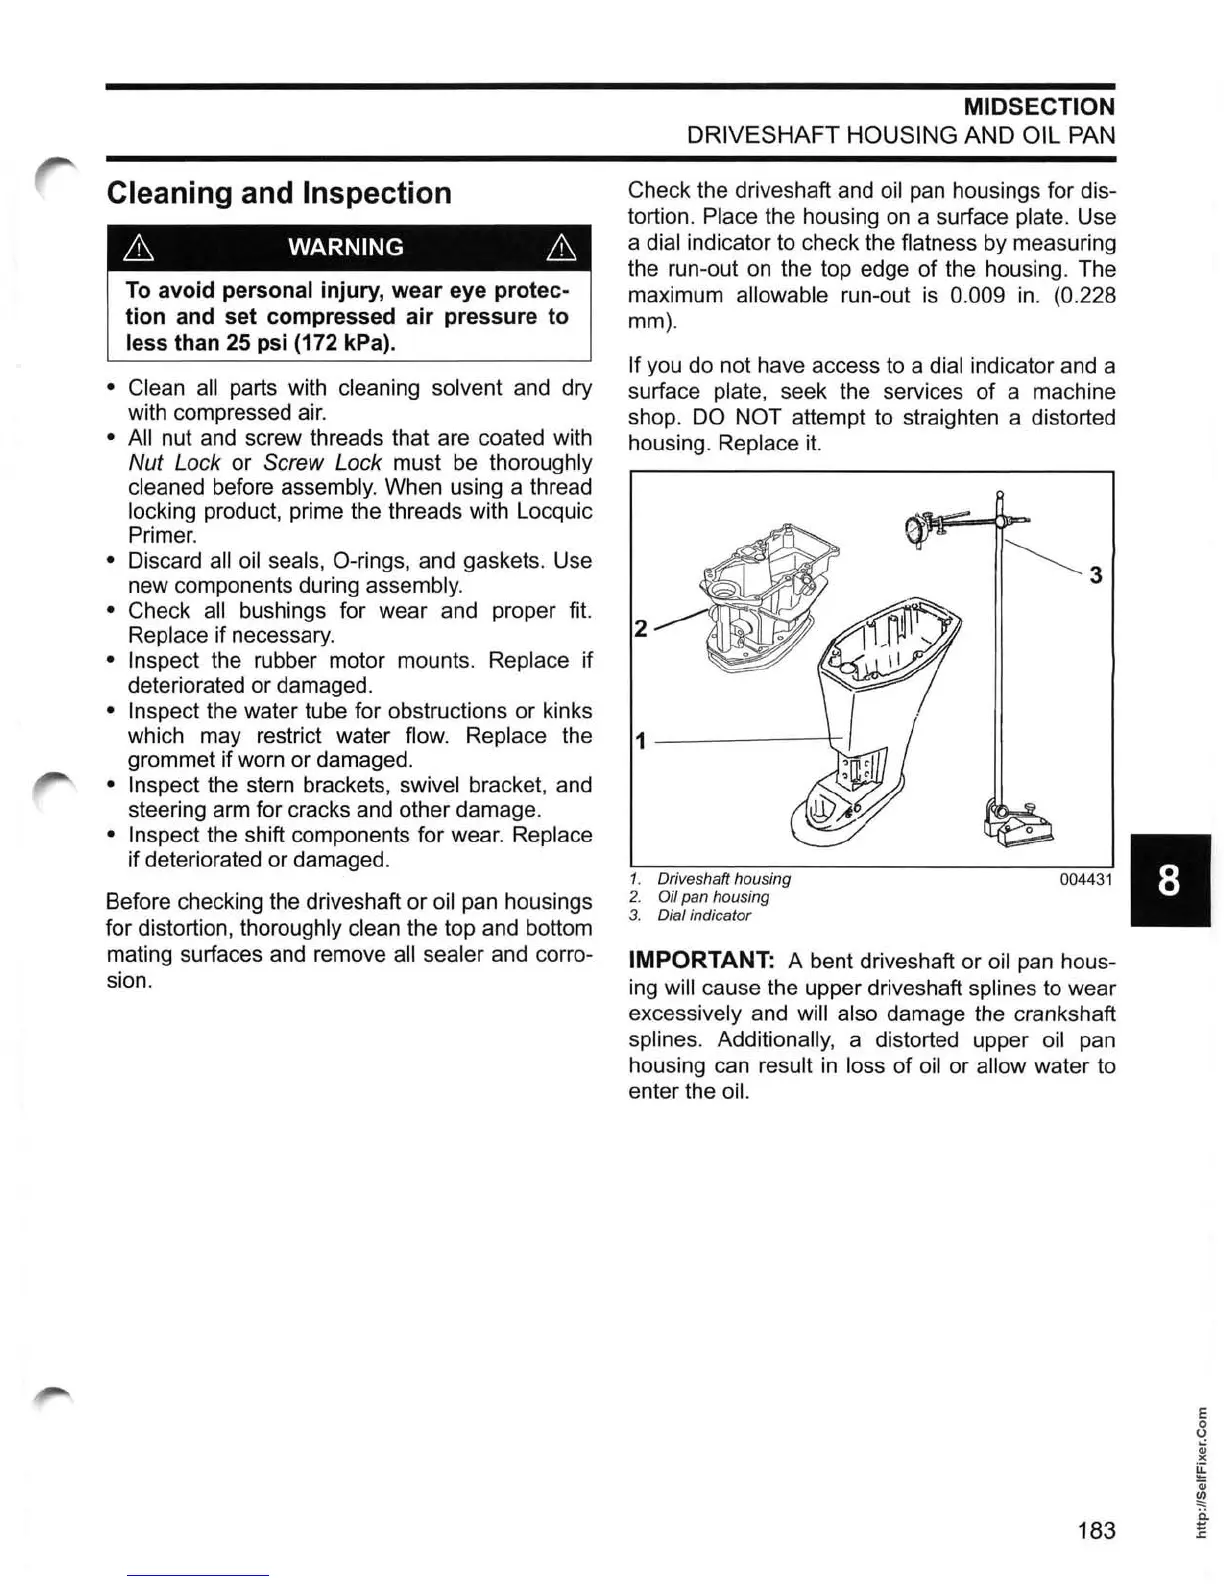
Check the driveshaft and oil pan housings for dis-
tortion.
Place the housing
on
a surface plate. Use
a
dial indicator
to
check the flatness by measuring
the run-out
on
the top edge of the housing. The
maximum
allowable run-out
is
0.009
in
. (0.228
mm).
If you do not have access to a dial indicator and a
surface
plate, seek the services
of
a machine
shop.
DO NOT attempt to straighten a distorted
housing.
Replace
it.
2
1
--------t-
~431
•
1. Driveshaft housing
2.
Oil pan housing
3.
Di
al indicator
IMPORTANT: A bent driveshaft or oil pan hous-
ing
will cause the upper driveshaft splines to wear
excessively and will also damage the crankshaft
splines. Additionally, a distorted upper oil pan
housing can
result
in
loss of oil or allow water to
enter the
oil.
E
o
o
~
><
~
OJ
~
i:i
183 E